
Apple’s ProRAW camera feature is a powerful tool to have in your back pocket. An image taken in ProRAW mode combines the same great post-processing flexibility of a traditional RAW file with the benefits of multi-frame computational photography. Kind of the best of both worlds! But once you’ve gone through the steps to enable it on your iPhone and have taken your photo, that’s when the real work starts: processing and converting it to a shareable format like JPEG, PNG, or HEIF.
Related
ProRAW files are saved in Adobe’s ubiquitous DNG format, which is compatible with virtually every RAW photo editing app under the sun. That means you have a lot of options, including just sending the file to a computer and using desktop software. But you don’t need access to a computer — you can process your image right on your phone, either using a third-party app or Apple’s own editing tools. Here’s how to go about it. (I followed these steps on an iPhone 14 Pro running iOS 16.3.1.)
Editing and sharing a ProRAW photo with Apple Photos
You don’t need to download a separate app to edit ProRAW DNG files — Apple’s own Photos app will do the job. A third-party app will give you a lot more control, but for quick and basic functions like boosting exposure, Apple’s app is just fine.
- Open your RAW photo and tap edit in the top right of the screen
- If you’re viewing your image in the camera app gallery, the edit options will appear at the bottom of the screen
- Scroll through the adjustment options below your image and use the tools you would like
- You can tap the three-ring filter icon at the bottom of the screen to apply a filter. This is not to be confused with Apple’s Photographic Styles, which are “baked in” to the capture process
- If you need to rotate the photo, use the crop tool, the icon on the bottom right of the editing pane
- Tap Done at the bottom right of your screen to save your changes. There’s no option to save it as a separate image, but you can always revert your changes to the original by opening it again in the Photos app, tapping the three-dot menu icon in the upper right, and choosing Revert to Original.
Once you’ve made edits to your RAW file, you can use the Photos app’s sharing functions to export a JPEG version of your image. You can email it, post it to Instagram, or put it on your digital picture frame — it’s your choice.
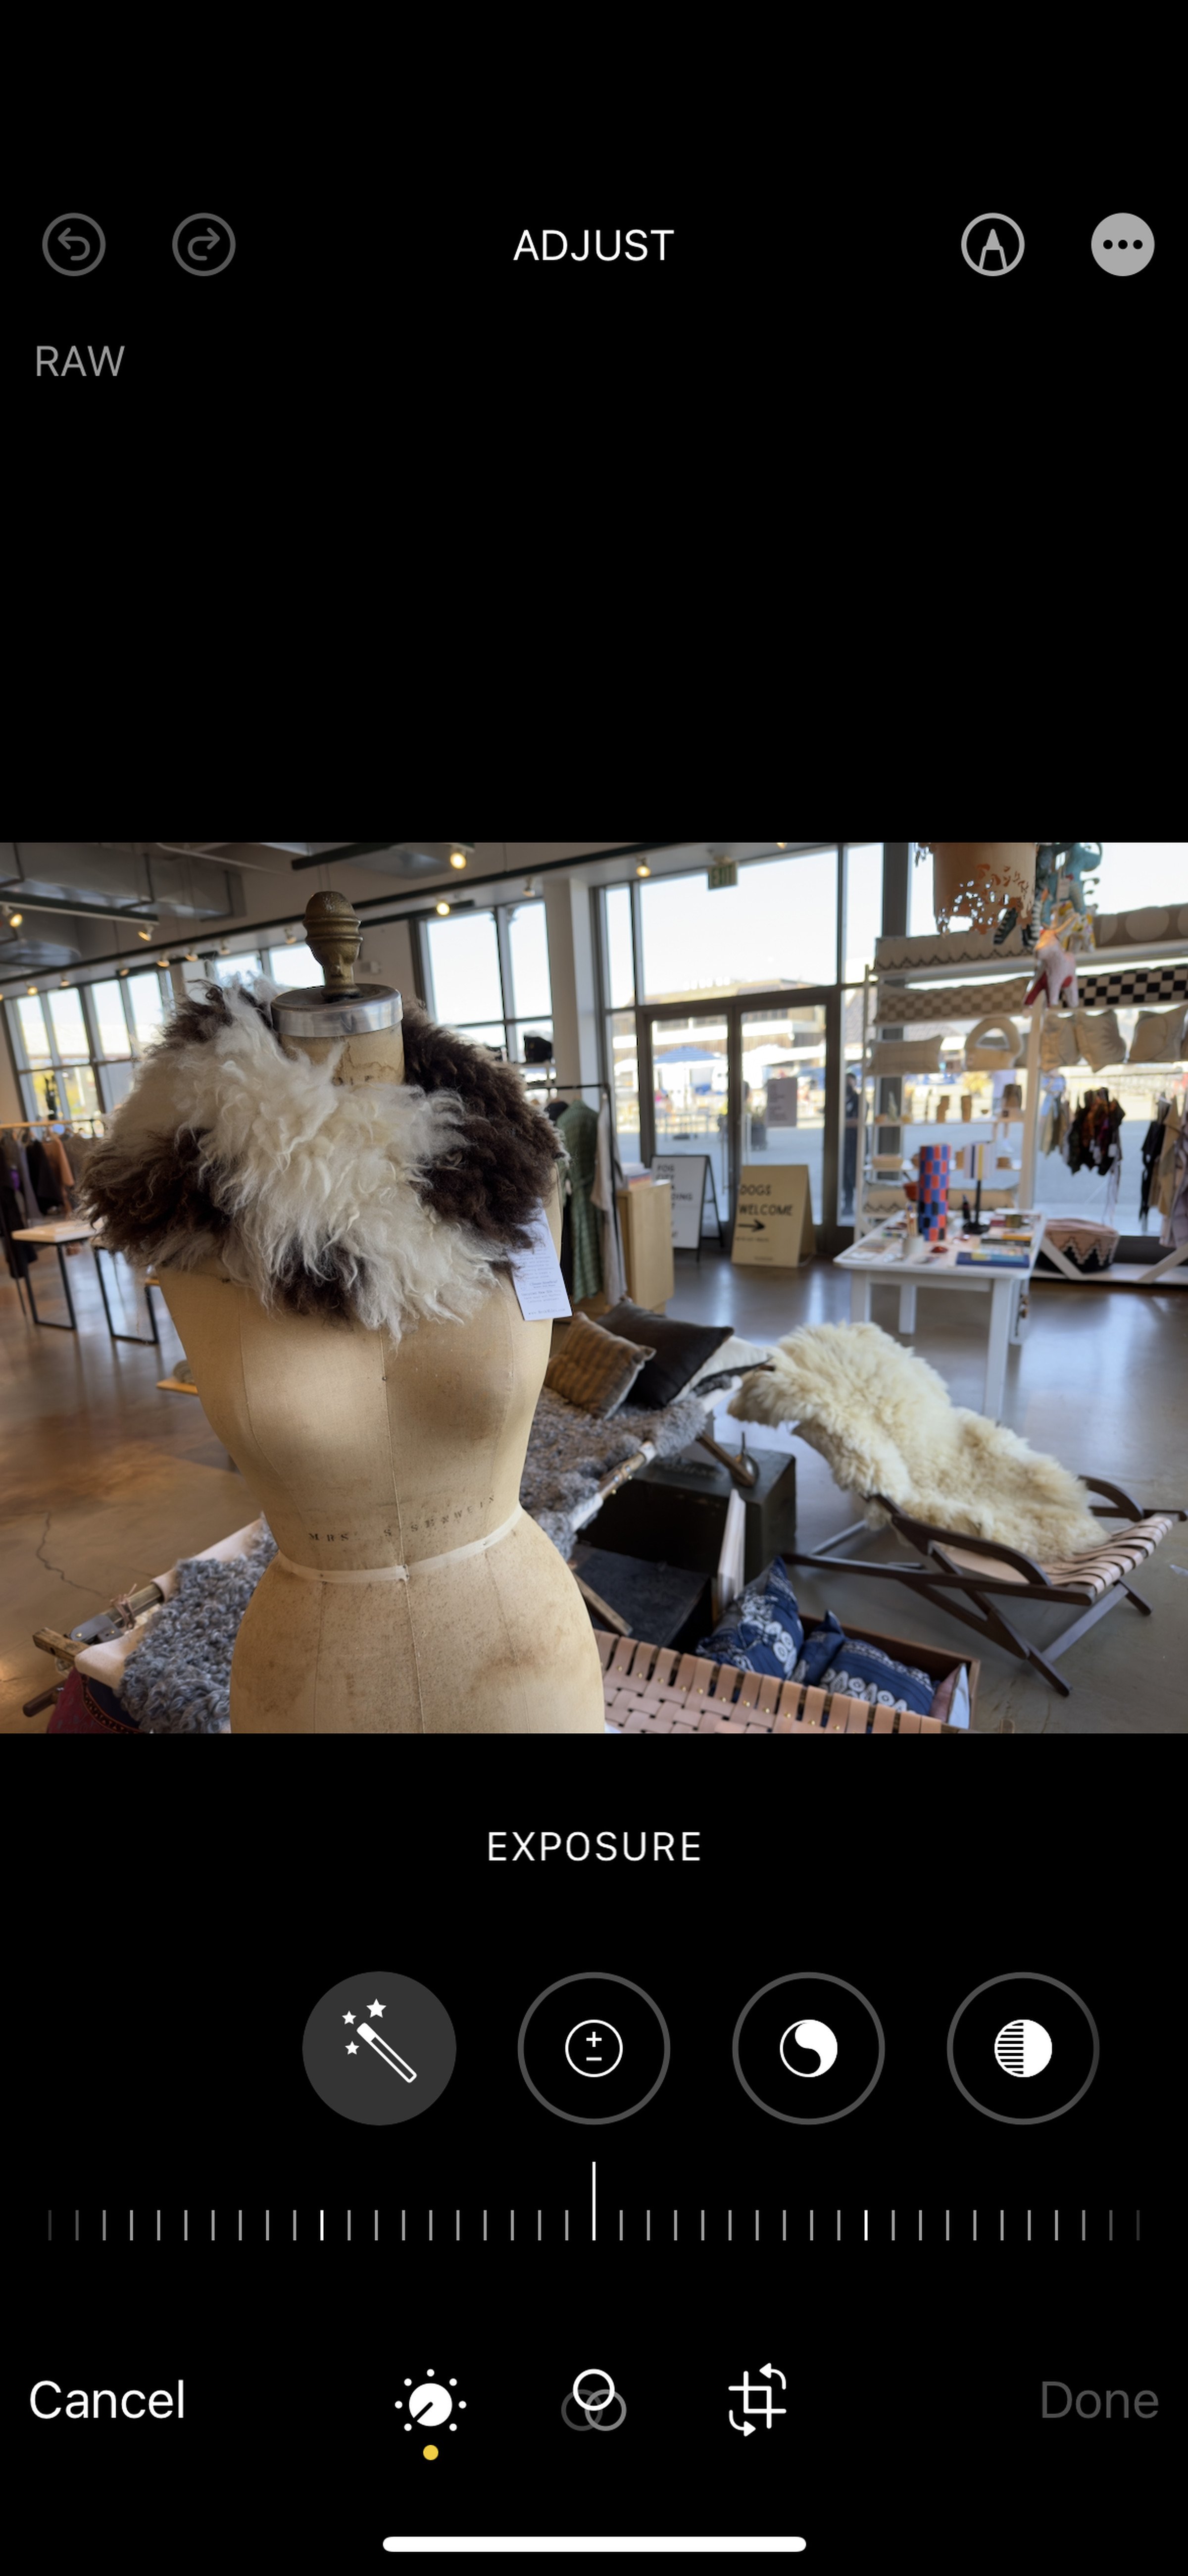
Apple’s Photos app provides basic editing functions.
Once you’re happy with your edits, you can use any of the sharing functions, and the app will automatically share a JPEG.
How to export a ProRAW file from your iPhone
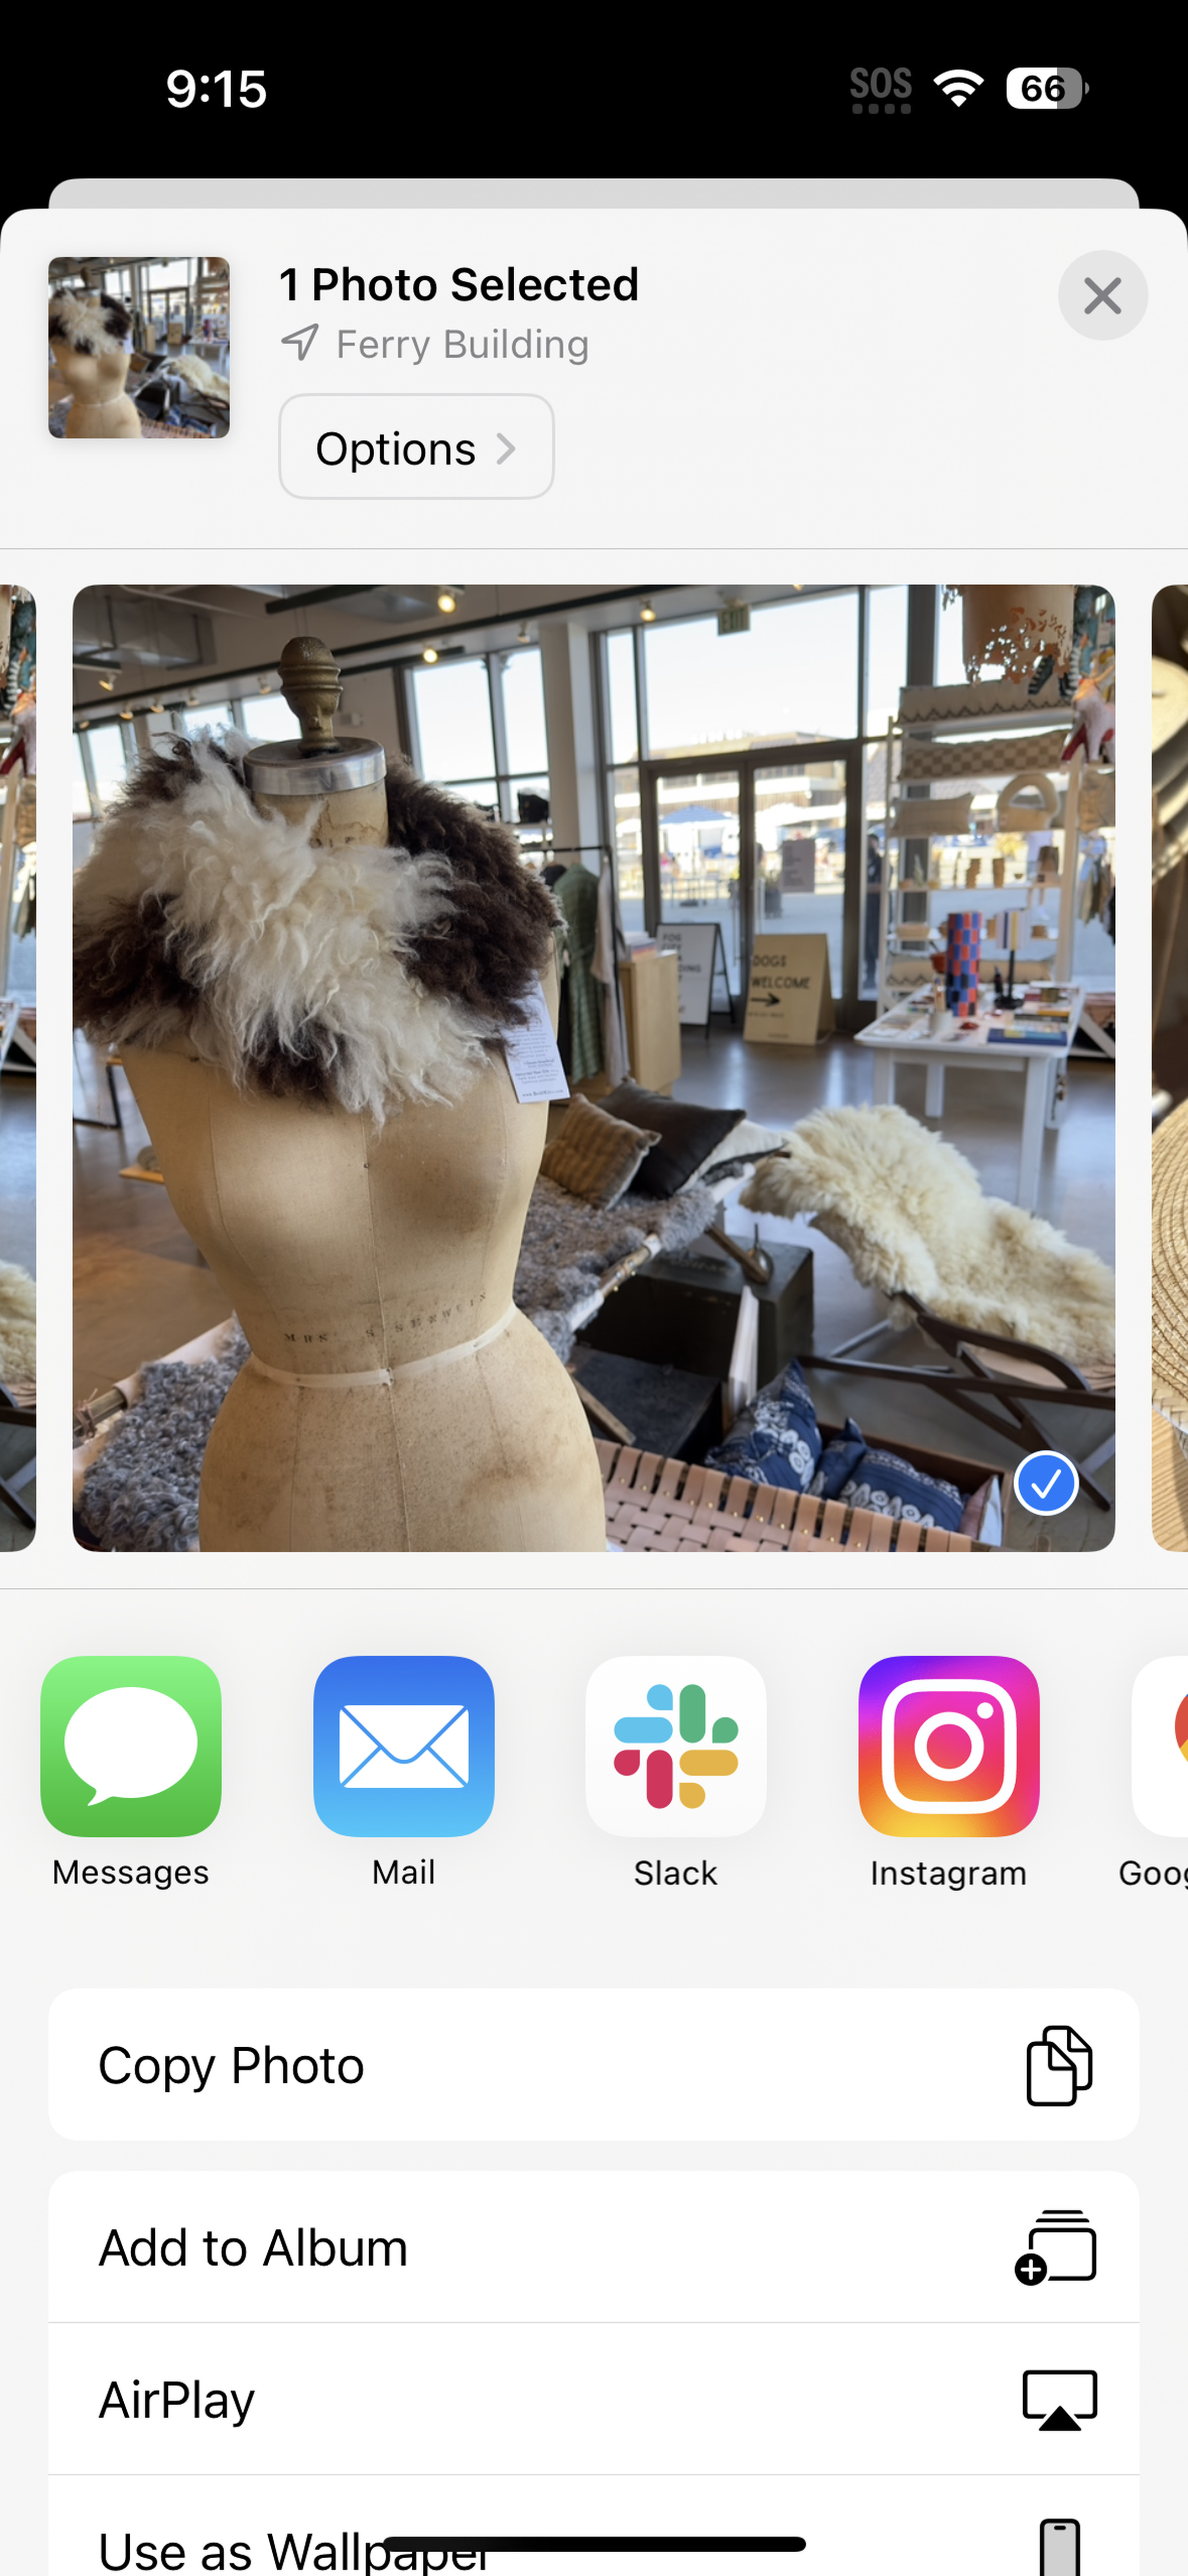
So what if you want to export the original RAW image? That’s a little tricky. Once you’ve made edits in the Photos app, you can’t easily share the original DNG file. The only exception is if you’re AirDropping your image to a Mac. If that’s the case, there’s a way to send both the original file and a JPEG with your edits. Here’s how:
- Scroll to your photo in the Photos app and tap the share / export icon in the lower left
- Tap Options at the top of the screen
- Toggle All Photos Data on and press Done
- Tap the Airdrop icon below the image and choose your destination
- On the Mac, tap Accept and Save to Downloads when prompted. This creates a folder in Downloads with both the DNG file and your edited JPEG.
If you aren’t AirDropping to a Mac and you want to save your DNG file somewhere else, you’ll have to make a copy of your edited RAW and revert changes.
- In the Photos app, scroll to your image and tap the three-dot menu icon in the upper right
- Tap Duplicate, then tap the three-dot menu and select Revert to Original
- Tap the export icon in the lower left and choose how you’d like to send your file
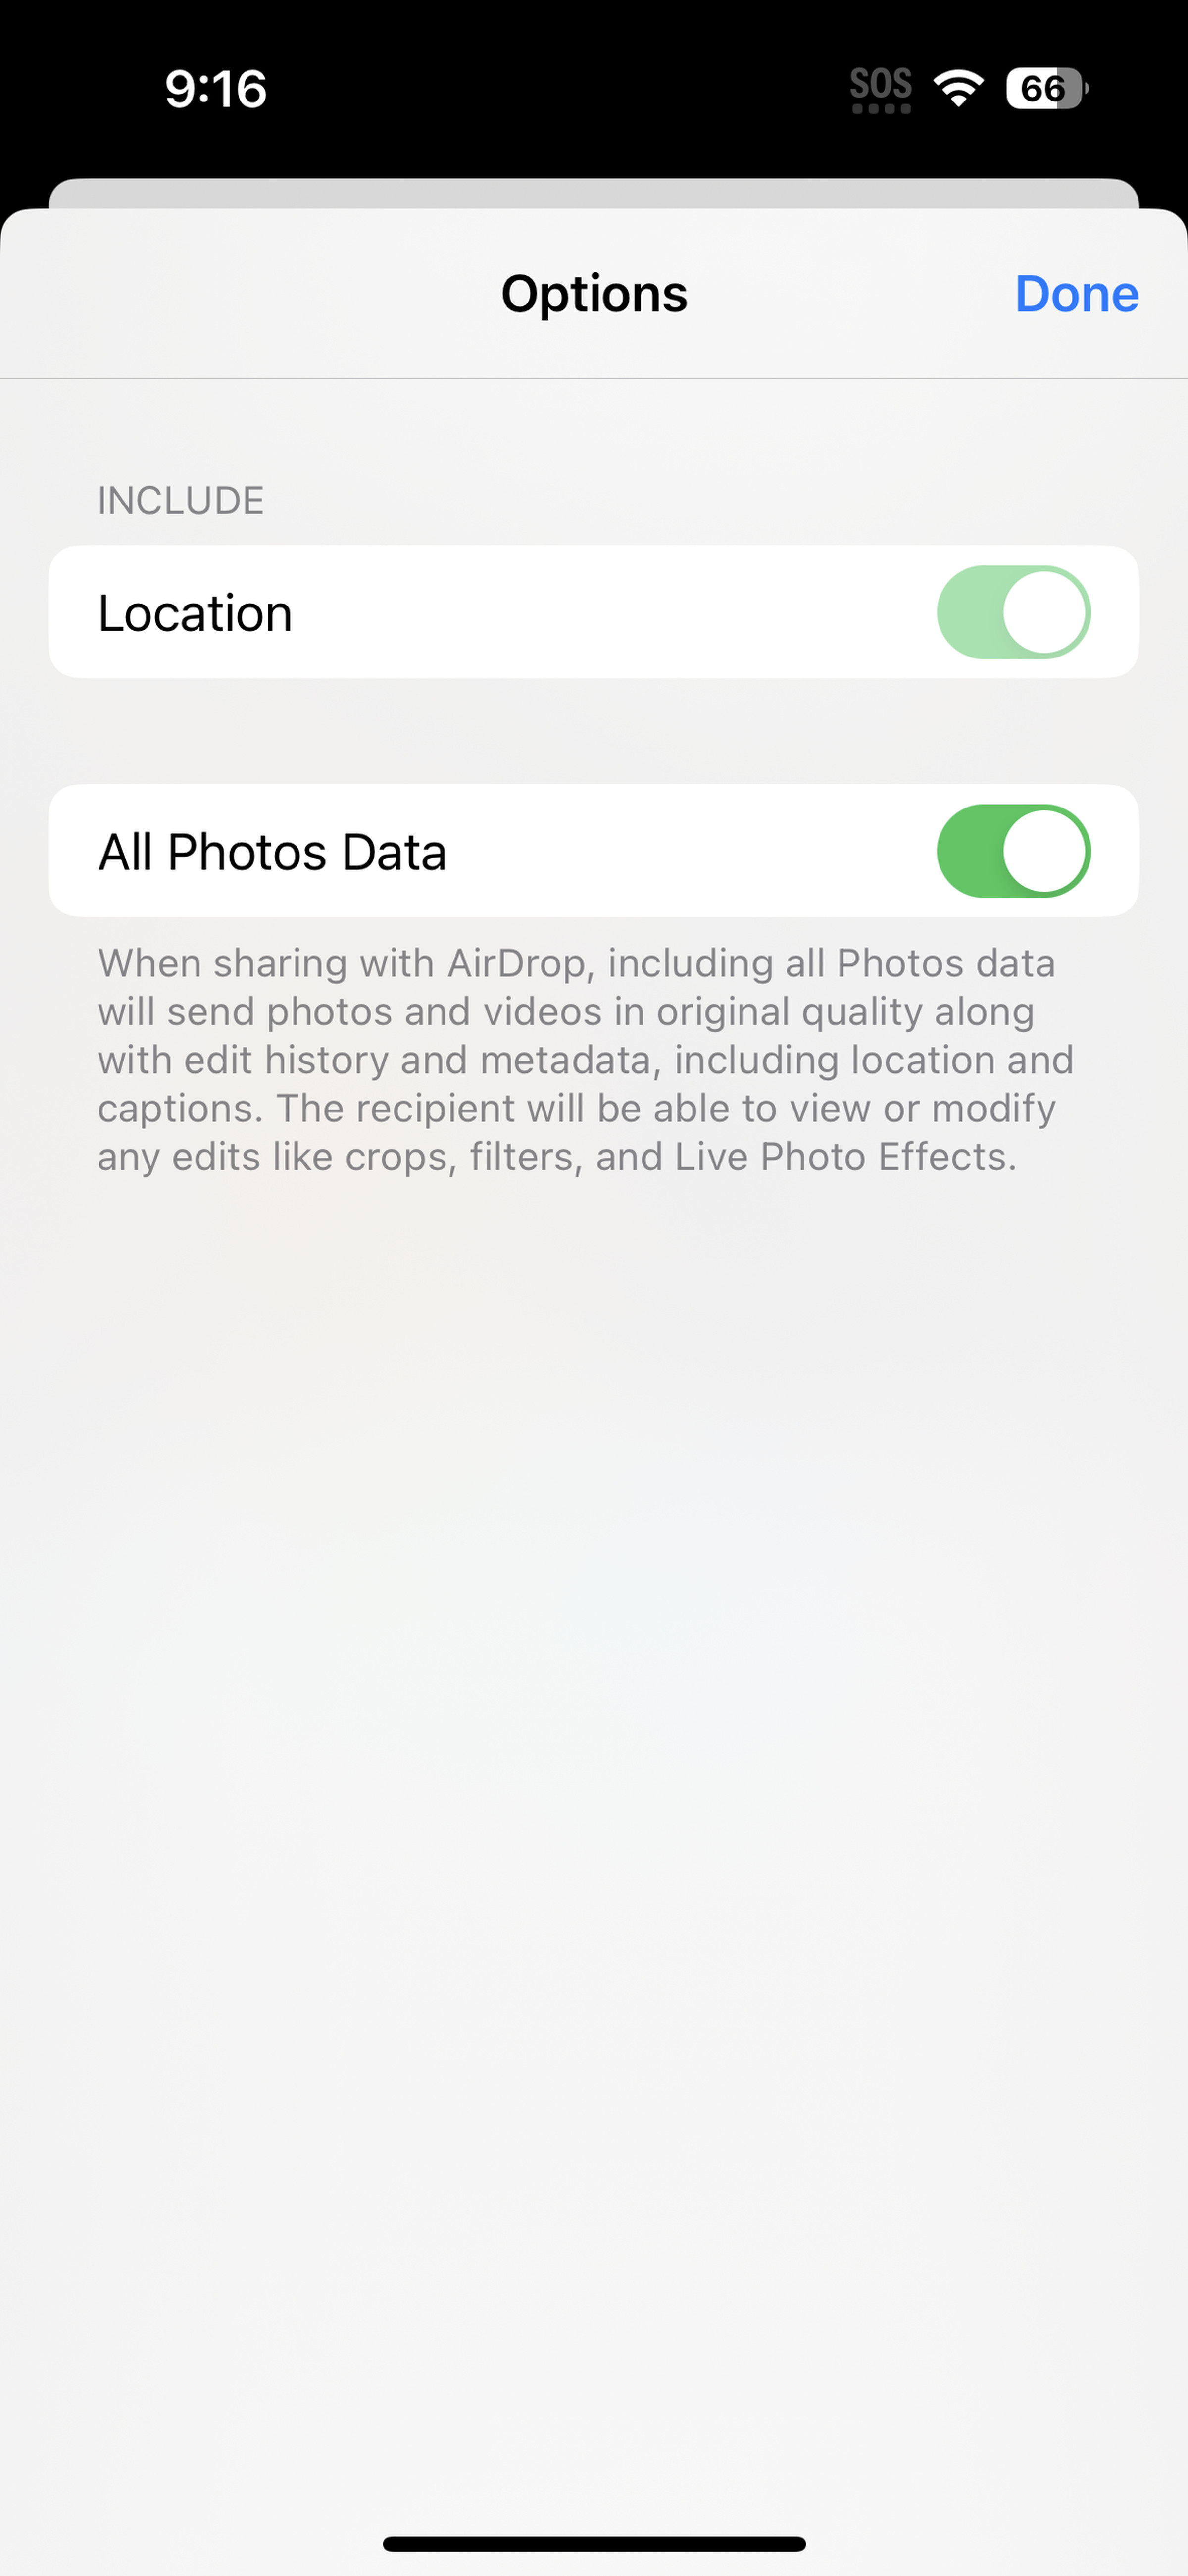
You can AirDrop your edited JPEG and original DNG file to a Mac by toggling All Photos Data on in sharing options.
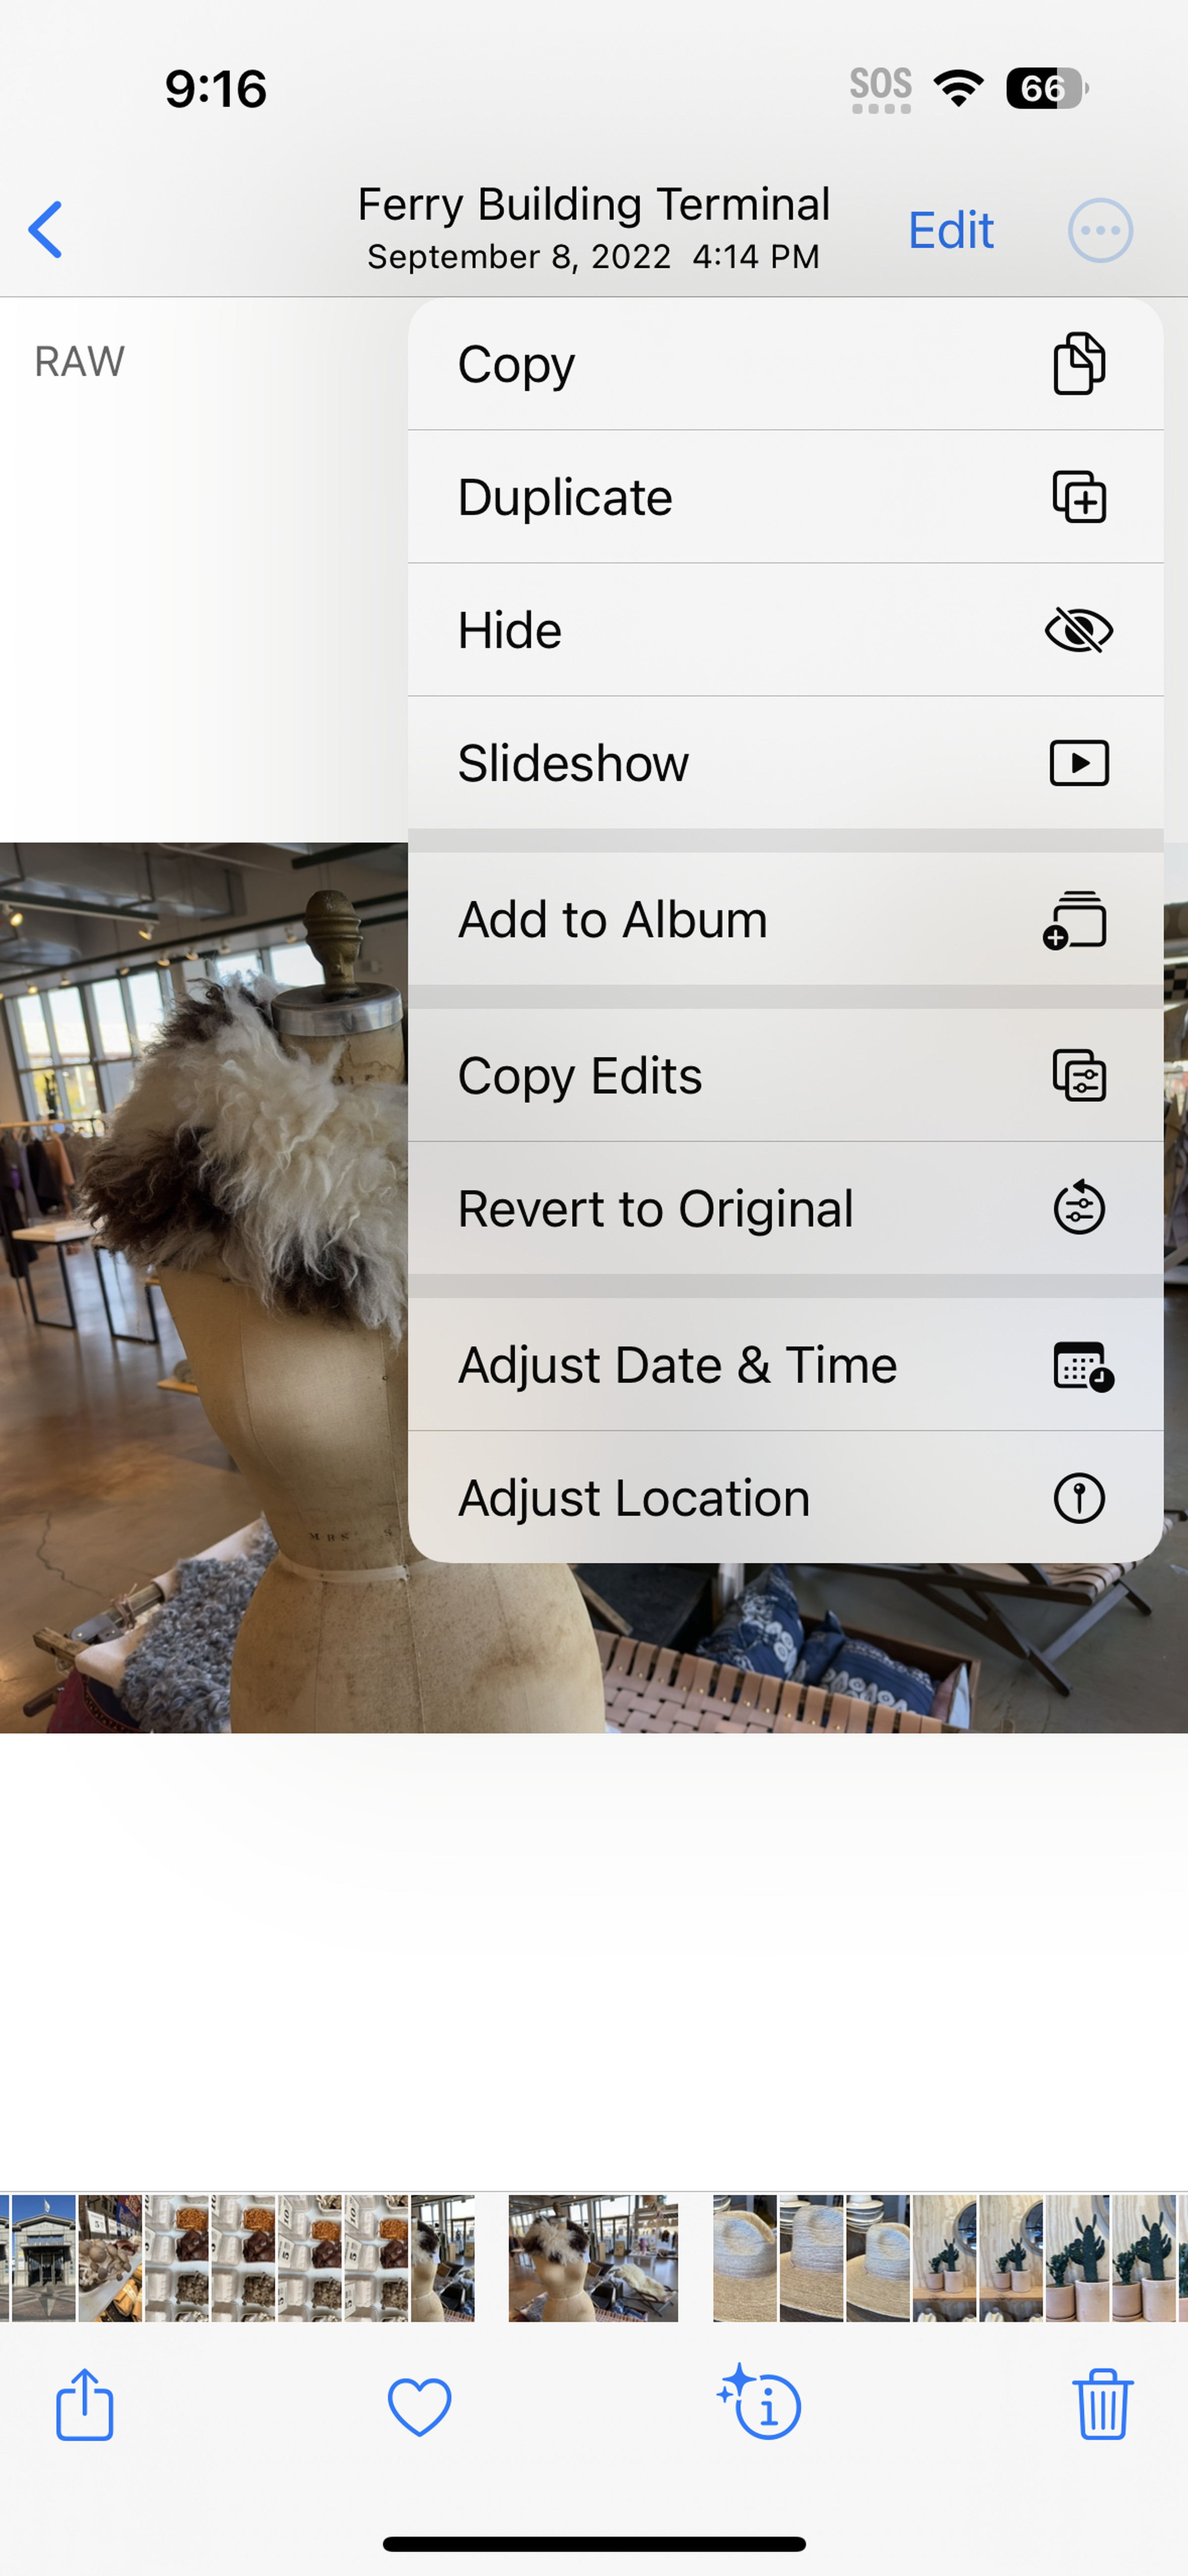
If you want to share your original DNG file without AirDrop, you’ll need to duplicate your image, revert changes, and share that version.
If you want a PNG or HEIF of your image rather than a JPEG, you need to follow a couple of extra steps. You can either directly convert an unedited DNG or make your edits in Apple Photos first and then convert the resulting JPEG to a PNG or HEIF — not ideal if you want to minimize compression, but it works. Here’s what to do:
- Scroll to the image in Apple Photos and tap the share / export icon
- Scroll down and tap Save to Files
- Pick the folder you want to save to and tap Save
- Open the Files app and locate your image
- Long press the image thumbnail and tap Quick Actions
- Select Convert image
- Choose your format (JPEG, PNG, or HEIF) as well as image size (Small, Medium, Large, or Original)
- Your converted image will be saved to the same folder
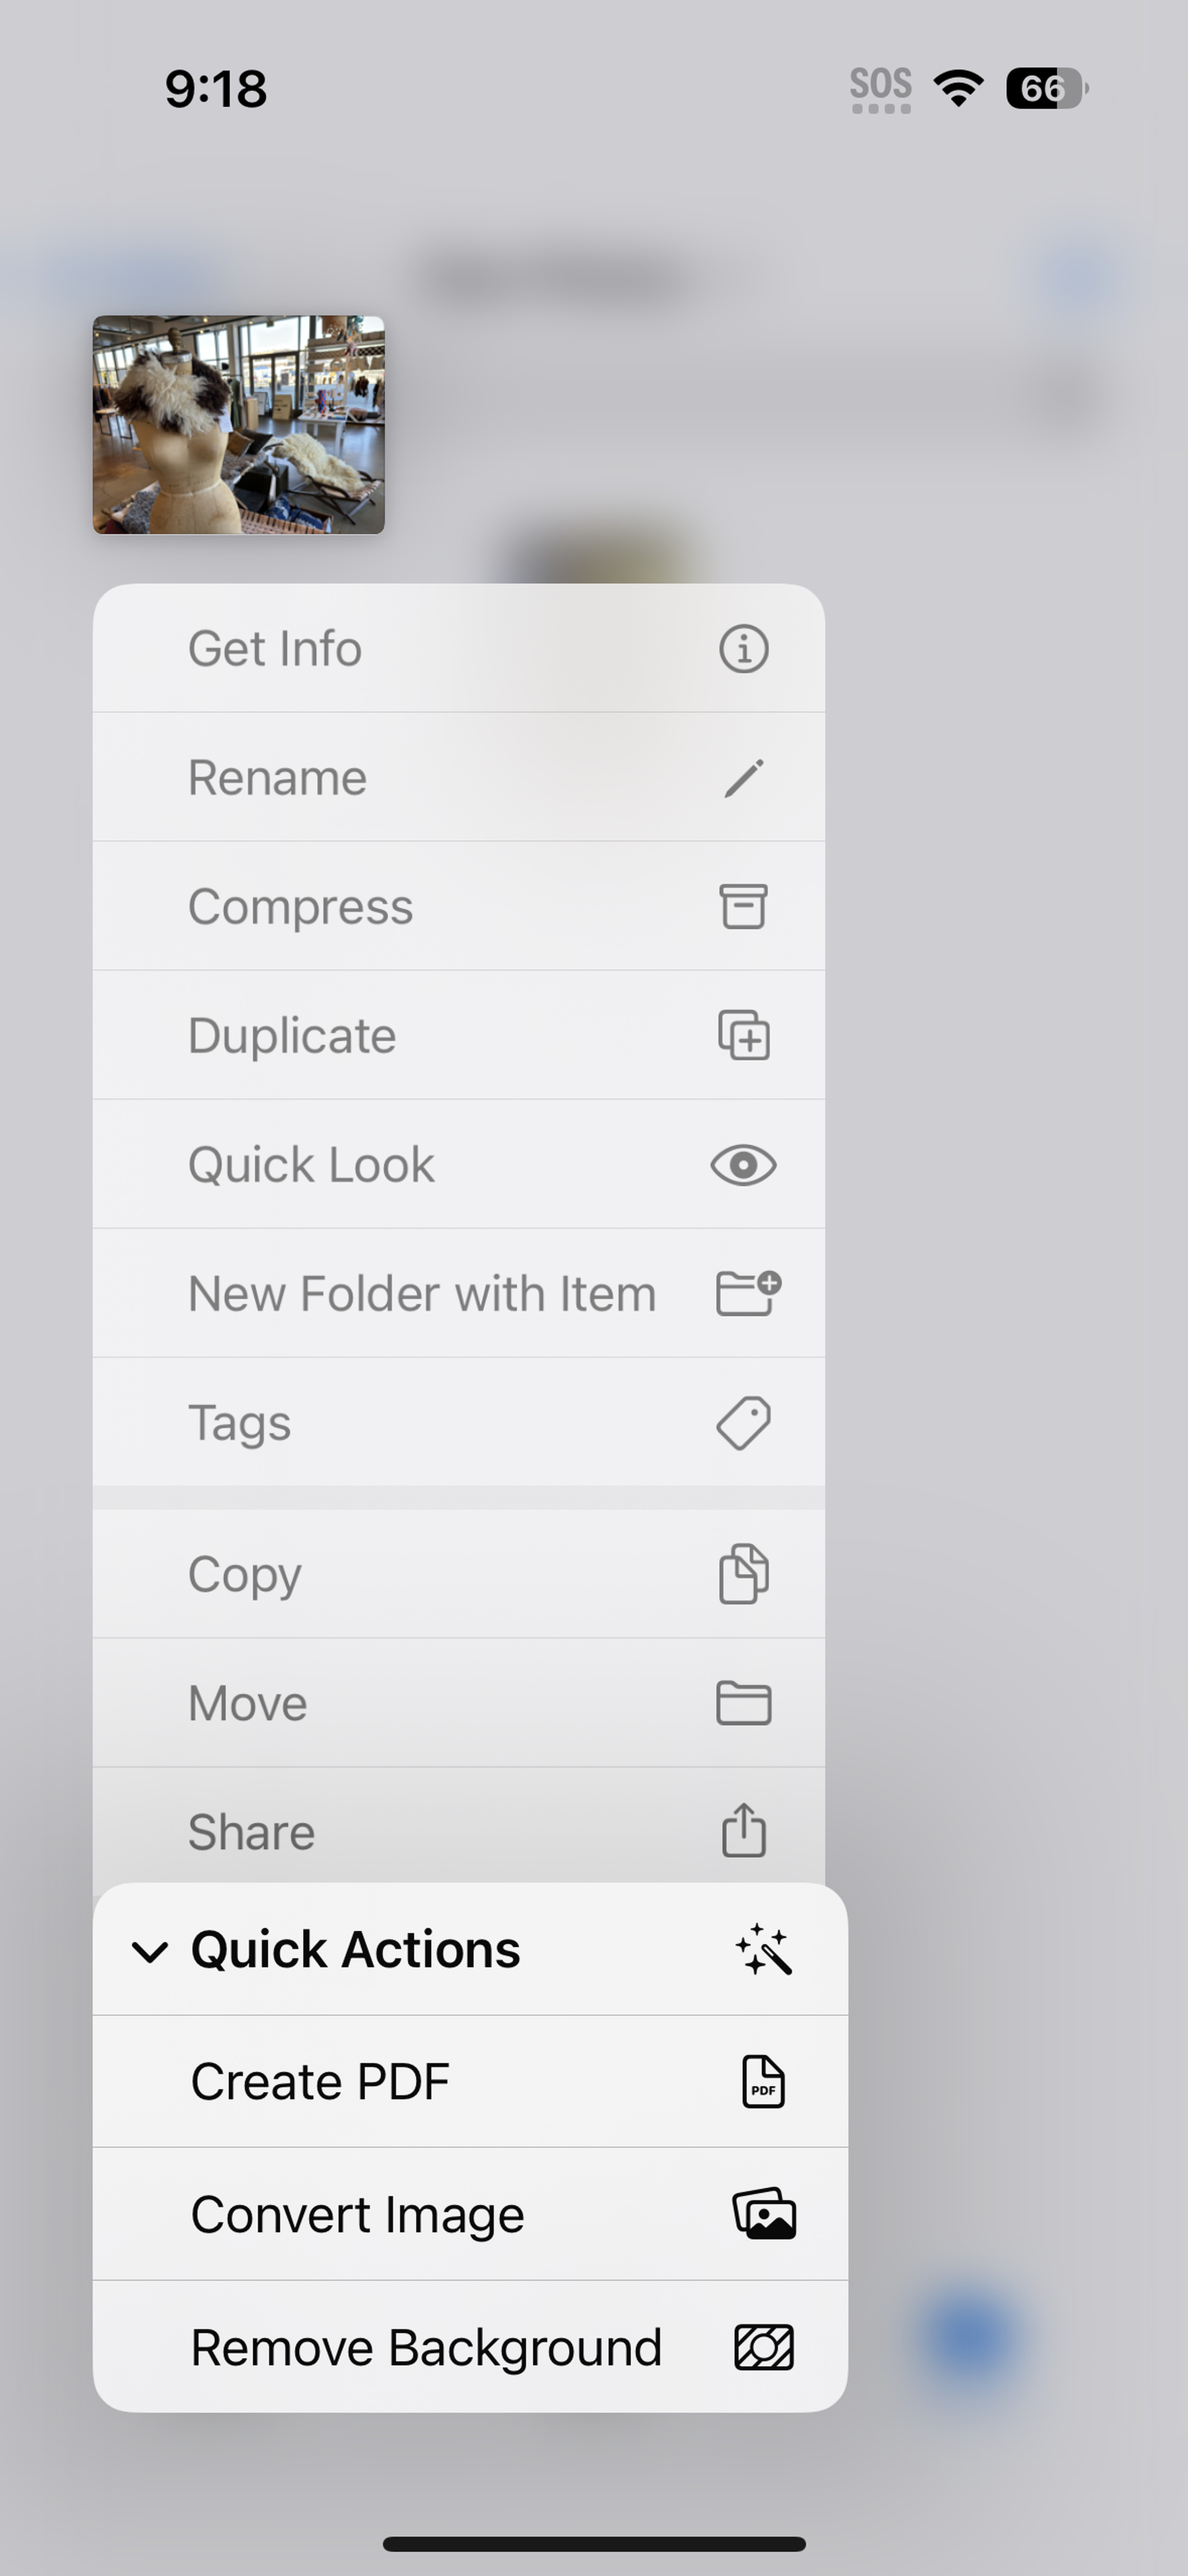
To save your photo in another format, save it to Files and find the Convert Image option under Quick Actions.
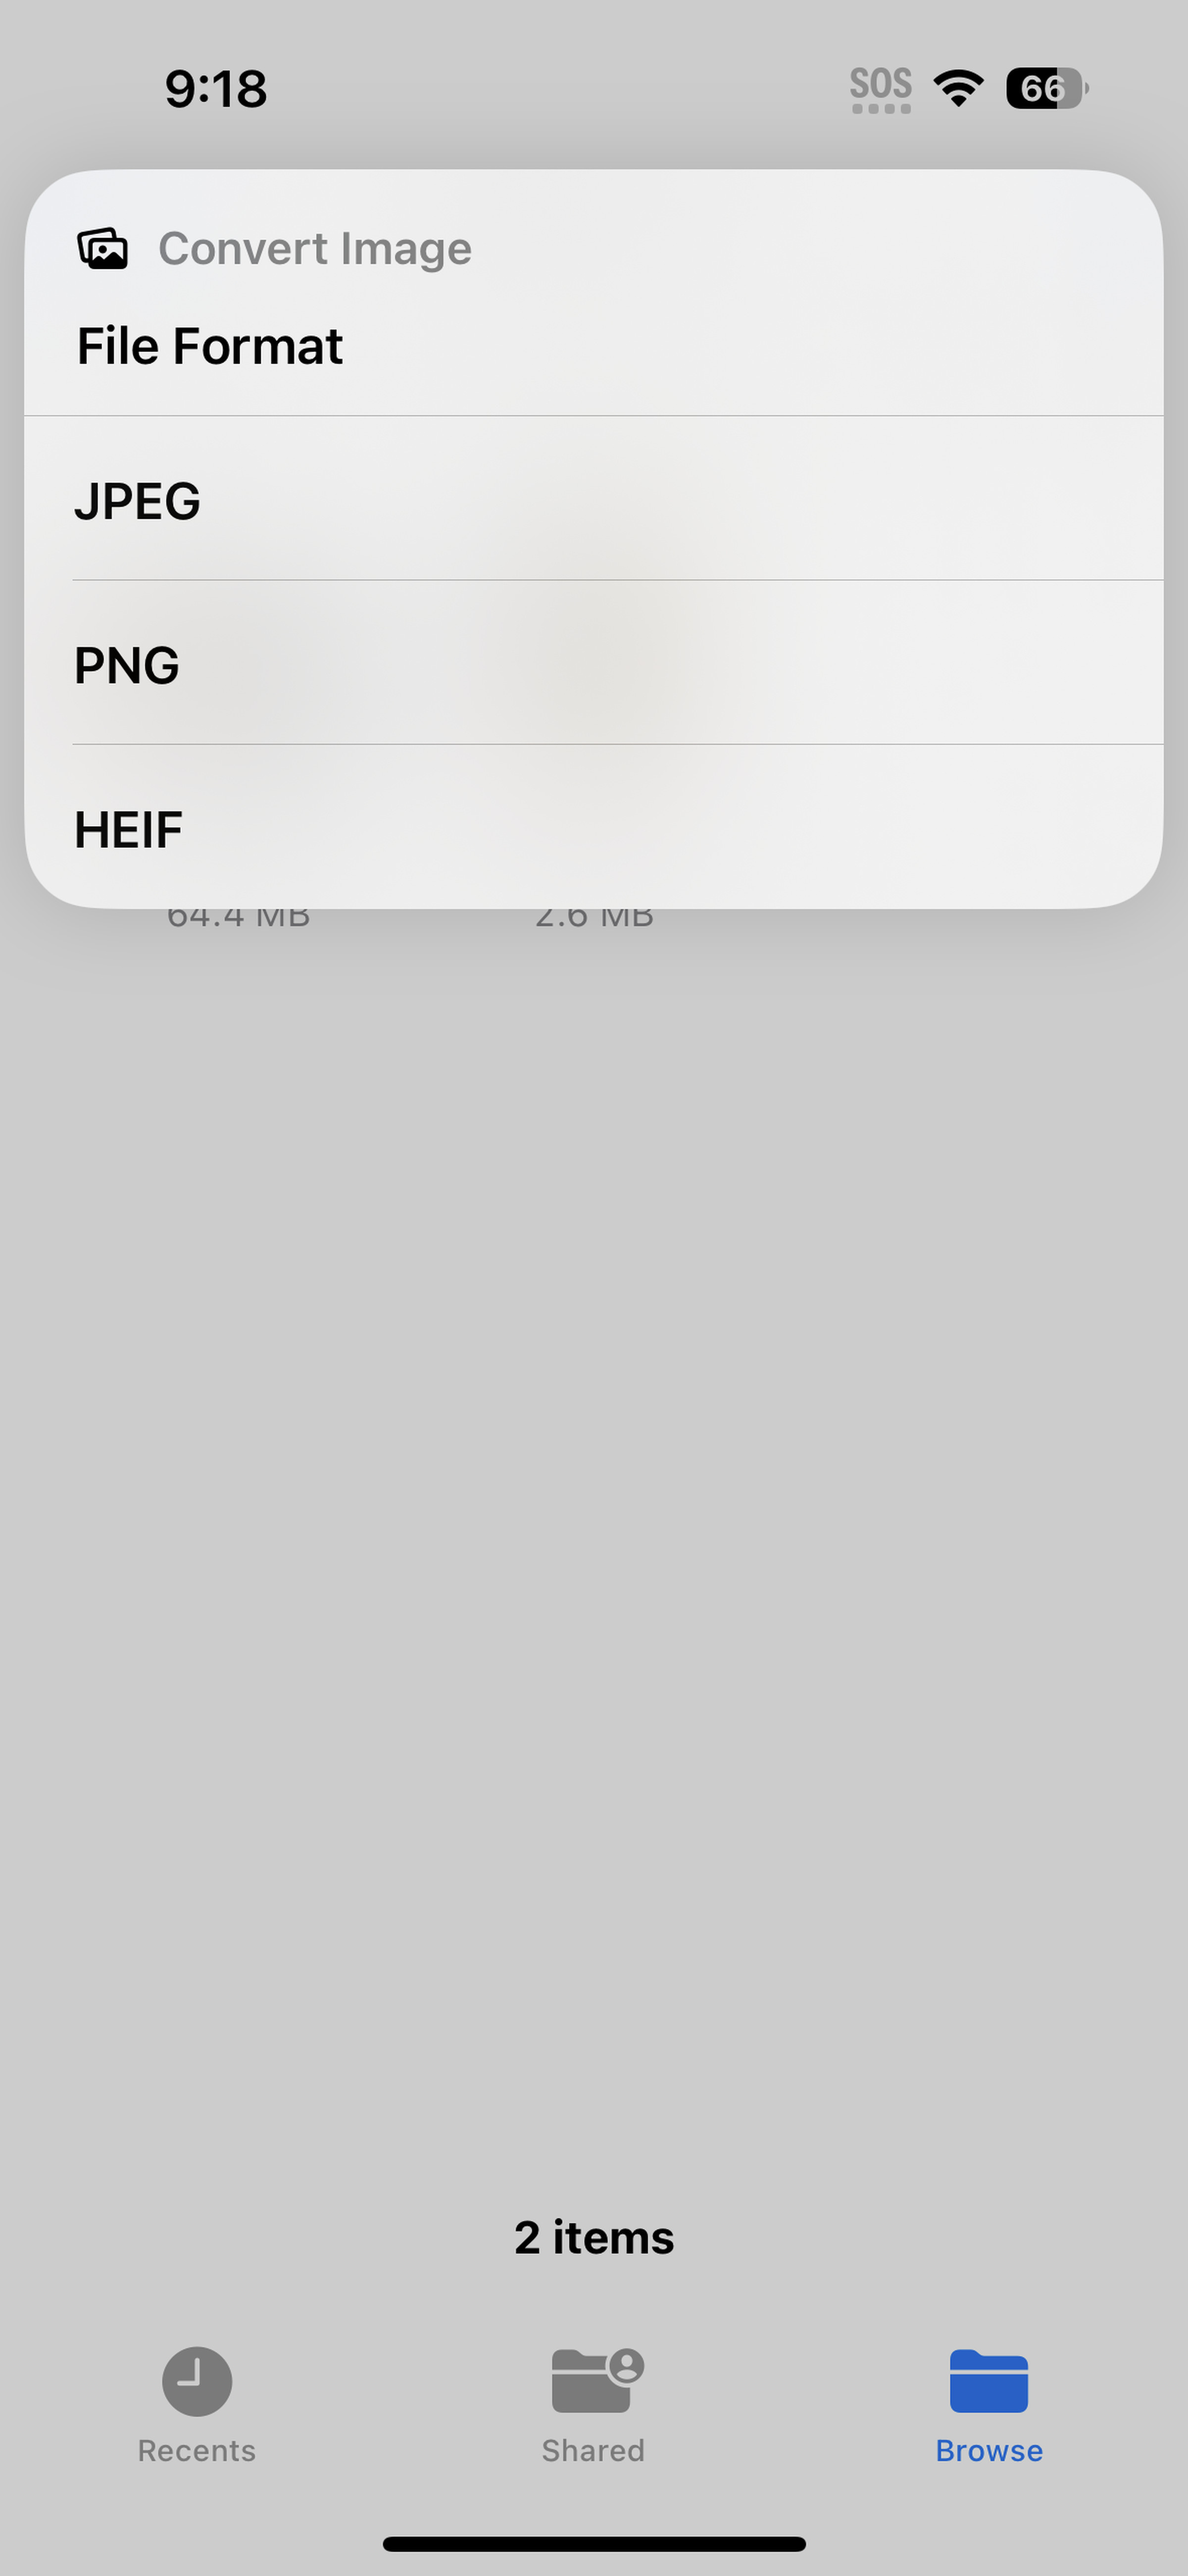
You can convert a DNG to a JPEG, PNG, or HEIF file.
Editing a ProRAW photo with a third-party app
If you have a photo-editing app that you’d prefer to use instead of Photos, that’s not a problem. You can start by either opening the Apple Photos app or by opening the photo editing app you want to use.
If you start in Photos, do the following:
- Find the image you want to edit and tap the export / share icon at the bottom left of the screen
- Scroll through the suggested app icons just below the image. If your editor is there, tap the icon to open your file in the app
- If you don’t see the app icon you’re looking for, tap the three-dot More icon for additional options
- Exporting your RAW file this way will only work if you haven’t made any edits to the photo in the Photos app. If you edited it there first, it will export as a JPEG.
If you prefer to start in your photo editing app of choice, just follow that app’s procedure for importing a new image. For example, in Snapseed — my favorite free editor — that’s just a matter of opening the app, tapping the plus icon and choosing Open from Device.