Here’s how to get your hands on Microsoft’s brand new AI assistant in Windows 10 without waiting

Originally introduced as a Windows 11-only feature, Microsoft eventually decided to backport its generative AI assistant Copilot to Windows 10. Built on top of OpenAI’s GPT-4 foundational large language model, Copilot is fine-tuned for interacting with core Windows apps and components — including Microsoft Office, Windows Settings, and more — albeit there exist a few minor shortcomings in the Windows 10 version.
That’s all well and good, but getting the shiny new Copilot icon in the taskbar on your great laptop isn’t a straightforward process at this stage, all thanks to the controlled feature rollout model. The good news is that bypassing the waiting queue is a relatively easy affair.
What is the status of Copilot on Windows 10?

Microsoft has already started shipping bits and pieces of Copilot via Windows 10’s monthly cumulative updates, so turning the AI companion on isn’t difficult. In fact, doing so requires you to tinker with just a couple of internal system variables. You’ll probably master how to do it before you finish going through this tutorial.
For example, Microsoft announced build 19045.3757 for the Release Preview Channel as KB5032278. For Insiders who are on the Windows 10 22H2 branch, it’s the first pre-stable build closest to the general availability with Copilot. Be that as it may, the feature isn’t enabled for everyone out of the box.
According to Microsoft, “The initial markets for the Copilot in Windows (in preview) include North America, United Kingdom and parts of Asia and South America. It is our intention to add additional markets over time including the EEA.”
Additionally, the company has confirmed Copilot will only appear on PCs with 4GB RAM and more than 720p screen resolution. In our test cases, the feature rollout seemed completely random, as even identical models with the exact same OS configurations didn’t get similar treatment from Microsoft’s end.
How to enroll in the Release Preview channel (recommended)
If you don’t want to fiddle with the OS on your own, this is the recommended way to enable Copilot.
The Copilot feature is currently available in Windows 10 Home and Pro only. Devices that are managed by organizations aren’t eligible for now. Windows 10 Enterprise and Education SKUs are not officially supported yet.
- Make sure you’re logged into your Microsoft account.
- Don’t try unofficial workarounds that bypass the Microsoft account requirement while Insider Channel enrollment, as it might create issues later on.
- Enroll the Windows 10 instance of the target PC to the Release Preview channel. By design, it’s one of the more stable Windows Insider channels, with little risk of bugs impacting your PC.
- Go to Settings> Update & Security> Windows Update and turn on the toggle named Get the latest updates as soon as they’re available.
- Check for updates and install 19045.3757 (KB5032278).
- Reboot to apply the update.

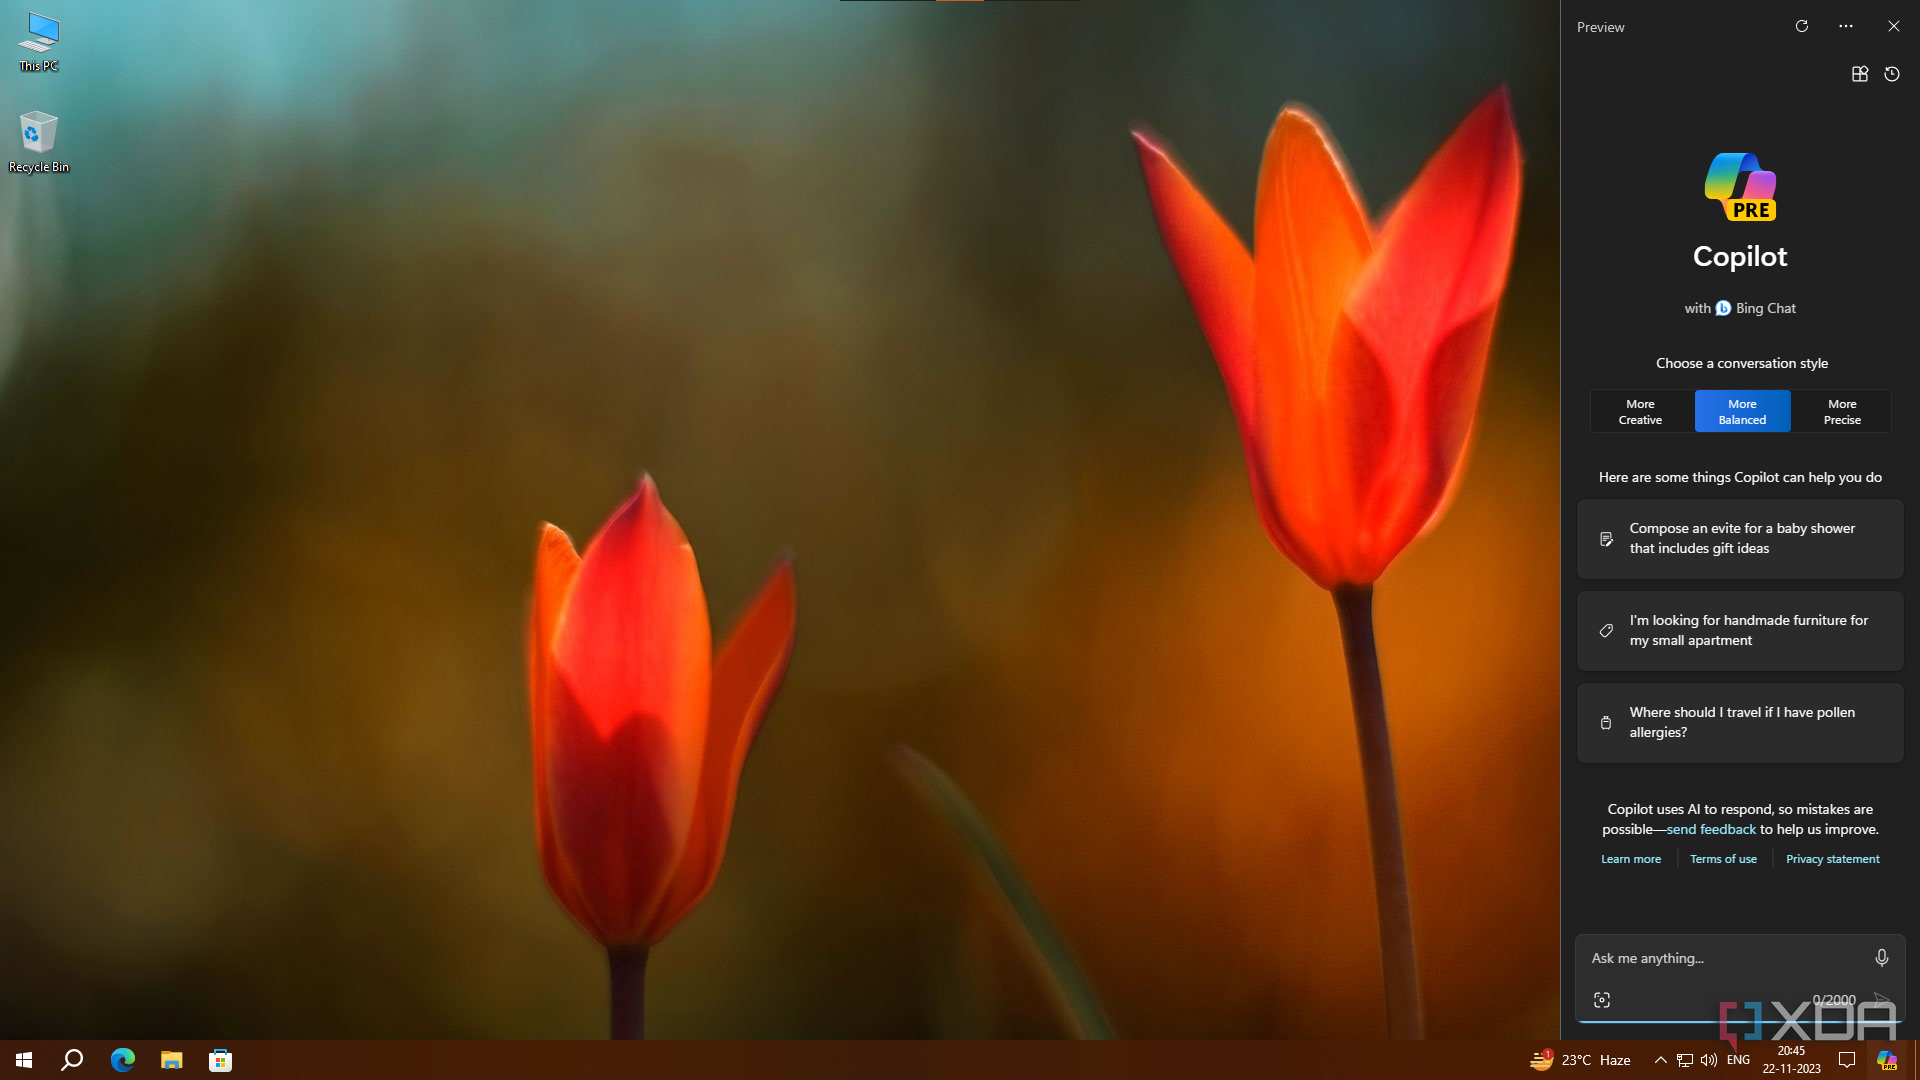
If everything goes right, you should be able to get to Copilot by clicking on the Copilot icon in the taskbar to open a chat window as soon as you reach the desktop.
How to manually enable Copilot in Windows 10
Copilot is still a hidden feature inside the preview channel of Windows 10, so enabling it can break the OS as there are plenty of experimental work-in-progress modules there. Still, if you wish to see the functionality for yourself, you should create a backup first and then attempt the steps below.
Microsoft actually publicly published two editions of KB5032278. Apart from 19045.3757, it originally came out as 19045.3754 through a slightly older Release Preview update. Since both of them contain Copilot components, you can technically force-enable the feature even on the legacy build, although we don’t recommend doing so.
You can find the build information in Settings> System> About, or in the winver app. As such, before you start, make sure the target device is running build 19045.3754 or up.

- (Optional) Open Microsoft Edge and install its latest update.
- Since we need to dive into the Windows Feature Store and alter some values, we need to get our hands on a compatible app like the ViVeTool utility. So download the latest version of ViVeTool from the release section of the project’s GitHub repository.
- Extract the archive to any convenient location on your PC.
- For example, you can create a ViVeTool folder on your Desktop and place the extracted files there.
- Press the Windows + X on your keyboard and select Terminal (Admin) to launch an elevated shell window. You may also use PowerShell or Command Prompt with elevated privileges if you prefer.
- Change the directory to the extracted ViVeTool directory. For example, if you have extracted the ViveTool archive to C:UsersxxxDesktopViveTool in the previous step, type
cd /d C:UsersxxxDesktopViveTool.
- Using ViveTool, turn on the following feature IDs: 44755019, 46686174, and 47530616 (h/t @thebookisclosed on X):
vivetool /enable /id:44755019,46686174,47530616
- You will see Successfully set feature configuration after proper execution.
- Reboot your PC.
- At this point, Copilot should be enabled after you log in. If not, then open Registry Editor (Run> regedit), and move to the following location:
HKEY_CURRENT_USERSoftwareMicrosoftWindowsShellCopilotBingChat. - Make sure that the value of the IsUserEligible 32-DWORD is set to 1 in the right pane. If not, then do it yourself.

- Once again, restart your computer to apply the changes.
- Right-click the taskbar and select the Show Copilot (preview) button option. The Copilot icon will then appear to the right of the notification center button.
- The icon won’t be visible if you have the taskbar on the right or left side of the screen.

Now, the Copilot button will automatically appear on the right side of the taskbar in Windows 10. When you click on it, the Copilot screen appears at the right of your screen.
How to disable Copilot in Windows 10
You can follow the steps above if you need to turn off Copilot in Windows 10, only use “disable” in place of “enable” in the ViVeTool command:
vivetool /disable /id:44755019,46686174,47530616

Currently, the value of the IsUserEligible variable takes less priority, so you can leave it as it is.
Final thoughts
Copilot is one of Microsoft’s current huge new features, and since it announced it’ll be bringing it to Windows 10, we expect it to be easier to enable in the future. For right now, we recommend enrolling in the Release Review channel for the easiest way to get access.