This tutorial explains step by step to format a USB Flash Drive on Ubuntu. We will use built-in tool in Ubuntu called Disk Utility. If you want to do it from Ubuntu file manager instead, feel free to go to Alternative section at the end. May you always have safe disk formatting!
 |
| Disk Utility on Ubuntu 19.04 |
Index
1. Insert Disk
2. Run Disk Utility
3. Select Drive
4. Format Drive
5. Create New Partition
6. Finish
7. Alternative
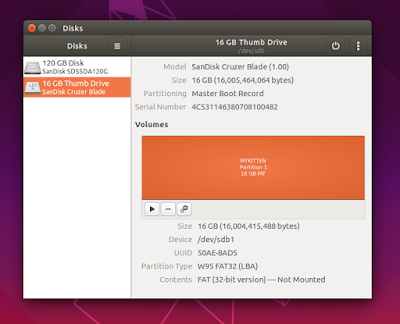
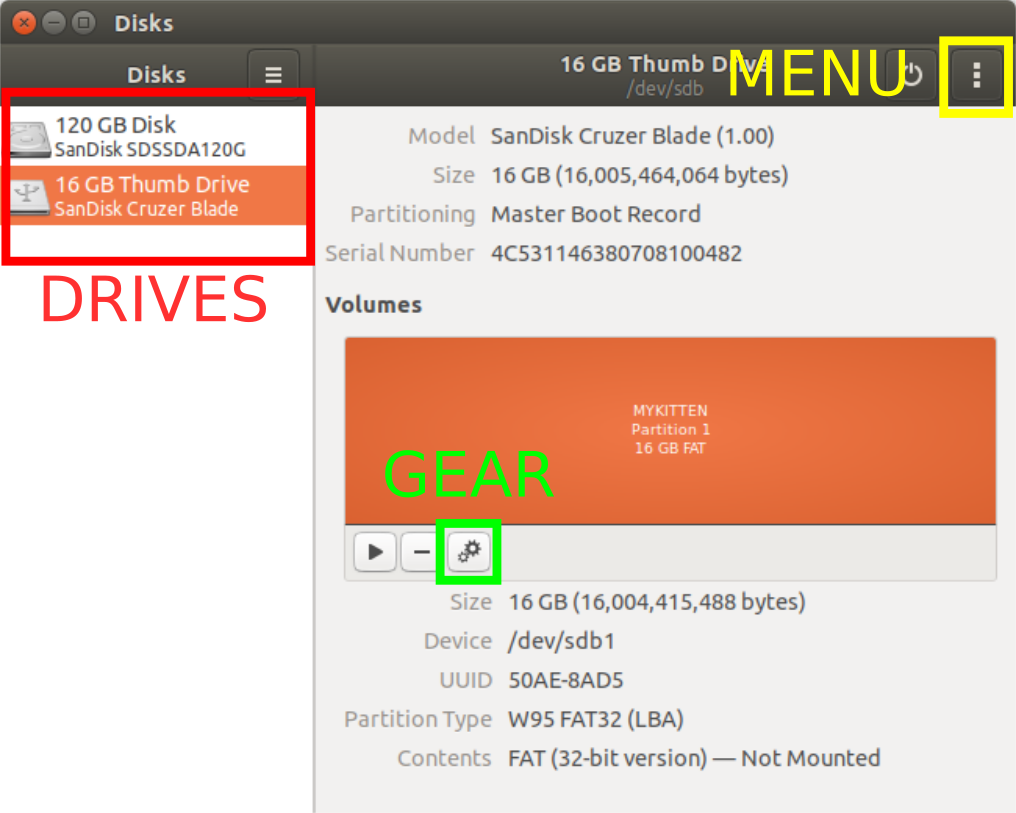
This is Disk Utility
On Disk Utility, you will see 3 points, the Drives section, the Menu button, and the Gear button like illustrated below. You ought to know as you will use these later.
1. Insert
Plug your flash drive in to your computer’s USB port. You should see notification on your screen that a drive is inserted.
2. Run Disk Utility
Open start menu and find GNOME Disk Utility program. It is symbolized by hard disk logo. If you don’t find it, perhaps it’s named with other name such as “disks” ” or “disk utility”. If you still cannot run it, use you Terminal and invoke command line $ gnome-disks .
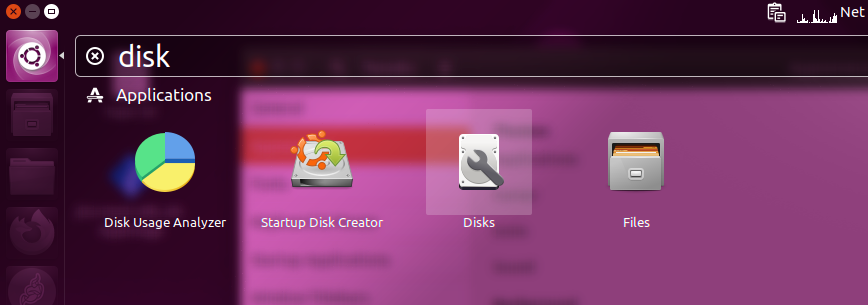 |
| GNOME Disk Utility is called simply Disks on Ubuntu 19.04 (released 2019) |
3. Select Drive
You should correctly select drive you want to format. Easiest way is to look at its capacity. A USB Flash Drive should be smaller in capacity compared to your hard disk, for example, common flash drive today are between 8GB and 32GB, where hard disks today are 128GB up to 1TB. To make sure, see the label (“name”) and brand, for example mine here is labeled Zorin OS and it’s branded SanDisk Cruzer Blade with 16GB capacity. When you selected a drive, you should see these information.
4. Format Drive
- Make sure correct drive selected.
- Click Menu button.
- Select Format Disk… .
- Appears a small dialog with two options, Erase and Partitioning.
- Select Erase=Quick.
- Select Partitioning=MBR / DOS.
- Click Format… .
- Appears a dialog asking “Are You Sure?” displaying detailed info about the disk drive.
- Read carefully once again so you are sure it is the correct disk.
- Click Format button below “Are You Sure?”.
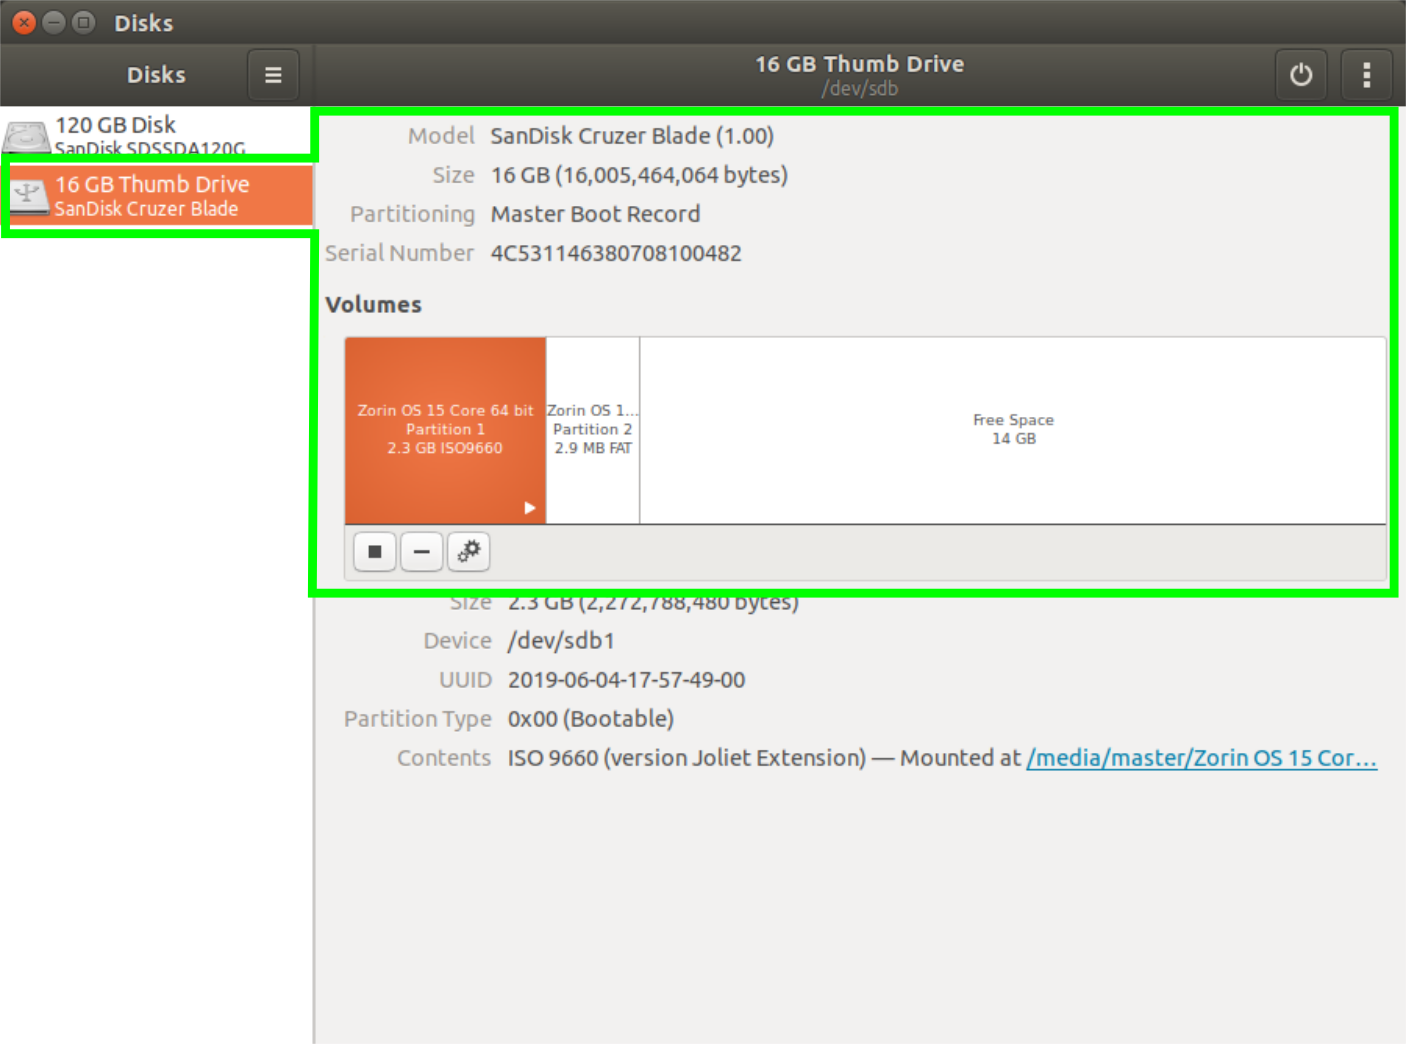
- Successful formatting will display “Free Space” and “Unallocated Space” under Volumes and Contents fields on Disk Utility.
- This is still incomplete as you need to continue in order to make the drive usable.

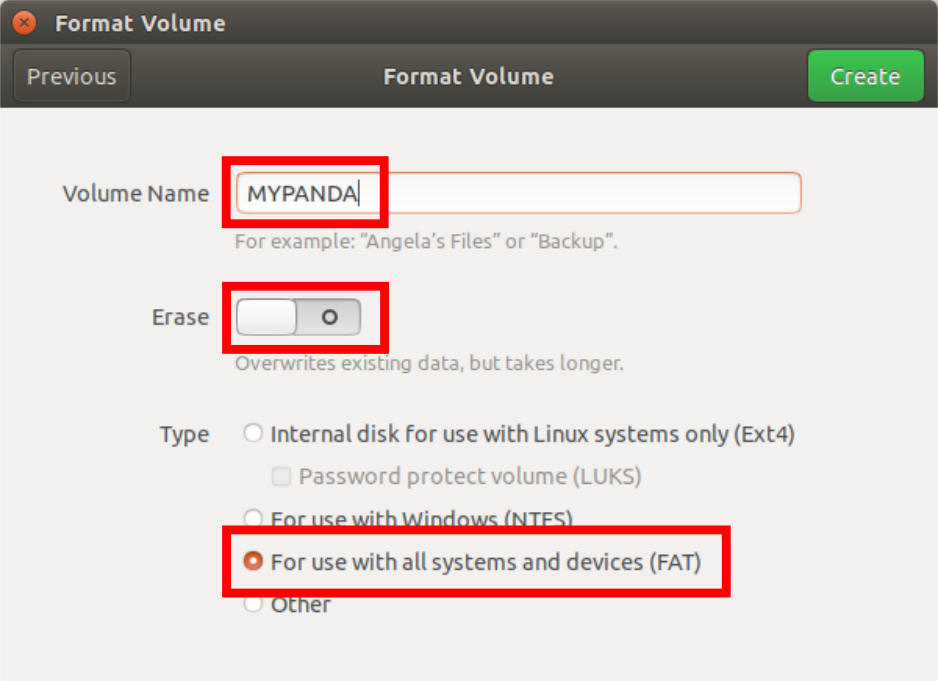
5. Create New Volume
- Make sure correct drive selected.
- See if Disk Utility displays plus button under Volumes section.
- Click plus button.
- Appears a small dialog with maximum capacity size selected.
- Click Next button.
- Appear Volume Name, Erase, and Type options.
- Enter Volume Name=MYPANDA.
- Let Erase unchanged.
- Choose Type=FAT.
- Click Create button.
- Successful formatting will display your flash drive with “MYPANDA” name, capacity size, and FAT filesystem.
- Now your flash drive is ready to use.
6. Finish
- Open file manager.
- New disk named MYPANDA should appear on left panel.
- Click it to open flash disk drive.
Alternative
This is more quicker way to format a flash disk drive as you can do it via right-click at file manager similar to popular operating systems.
- Plug your flash disk drive in.
- Open file manager.
- You see drive name appears on left panel.
- Right-click your drive.
- Select Format… .
- Continue with Step Number 5 before this Alternative section.
- Finished.