
To install Windows on a Steam Deck, follow these steps:
- Create a Windows ISO file.
- Use the ISO to install Windows To Go on a microSD card.
- Download the Steam Deck Windows drivers and copy them into your Windows installation.
- Start your Steam Deck, selecting the microSD card as your boot device.
- Follow the prompts to install Windows, then install the Steam Deck drivers.
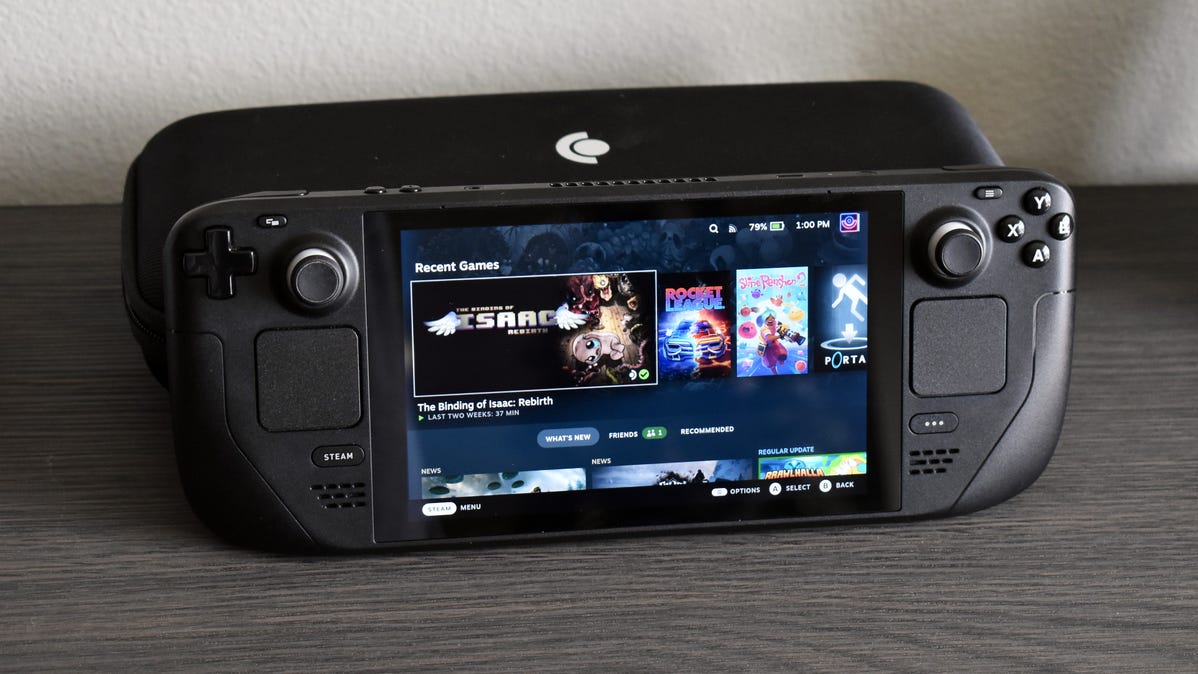
The Steam Deck is a brilliant machine, but you may decide you want to run Windows on it instead of SteamOS. If that’s you, we’ll explain how to run Windows on Steam Deck from an SD card and how to install Windows on your Steam Deck’s internal SSD.
Windows on Steam Deck: What Are Your Options?
You aren’t limited to only one way of running Windows on your Steam Deck. The most straightforward option that doesn’t involve wiping any data is to create a bootable microSD card with the Windows To Go version of the operating system, allowing you to use both Windows and SteamOS on your Deck.
You can also install Windows directly on your Steam Deck’s internal SSD, wiping SteamOS off your device in the process. We don’t recommend doing this if all you want is to experiment with Windows on your Deck. Going back to SteamOS can be a chore since you’ll have to create a bootable drive and reinstall the OS. And if you don’t have a backup you’ll also have to go through the setup process again, which includes installing games and apps, setting up emulators, importing non-Steam games, etc.
There’s also the option of installing Windows on an external SSD, which would be a great option if it weren’t for the fact that the Deck features a single USB-C port, meaning you’ll have to disconnect the SSD every time your Deck needs a charge.
If you want to pursue that route anyway, one solution for the issue is to get a USB-C dock and only use Windows when you’re connected to the said dock, allowing you to use Windows even while your Deck is charging.
Finally, you could dual-boot Windows and SteamOS on the Deck’s internal drive. While SteamOS technically supports dual boot with Windows, the procedure for making that happen is rather complex and long-winded. Also, there’s always the chance for a new SteamOS update to break dual boot functionality, which has already happened before.
We recommend using the SD card method if you want to taste the flavor of Windows on Steam Deck. If you find the Windows experience usable or even better than the SteamOS one, you can install Windows on the internal SSD or an external one if you own a dock. We’ll guide you through both of those methods in this guide.
Run Windows on Steam Deck With an SD Card: What You Need
To install Windows on your Steam Deck using a microSD card, you’ll need a Windows ISO file along with a microSD card, a card reader (or a USB-C dock with one), and a copy of Rufus.
Regarding the microSD card, we recommend using at least a 64GB UHS-I card that supports A2/U3 speeds. Those are faster than the A1/U1 card we used and will make the whole Windows experience snappier and more fluid.
A solid pick is the 128GB SAMSUNG PRO Plus, a UHS-I microSD card that supports A2/U3 speeds. It sports a competitive price and is also available in 256GB and 512GB sizes. If you’re looking for a 64GB option check out the SanDisk 64GB Extreme microSDXC, another quality choice.
SAMSUNG PRO Plus 128GB microSDXC
We also recommend using a USB-C dock, a keyboard, and a mouse to make the Windows setup process as painless as possible. The good news is that you can use wireless keyboards and mice as long as they come with a 2.4GHz wireless dongle. Just place the dongle in one of the USB slots on the dock, and you’re good to go.
The dock should have at least a couple of USB-A ports and an HDMI port. If you can get one that has a microSD card slot, that will save you from having to buy a separate SD card reader.
Eventually, you’ll also need to download the Steam Deck Windows drivers, download links for which you can find below. An app to unzip Windows drivers is required as well; we recommend downloading 7-Zip.
How to Install Windows on a Steam Deck Using an SD Card
Step 1: Create a Windows ISO File
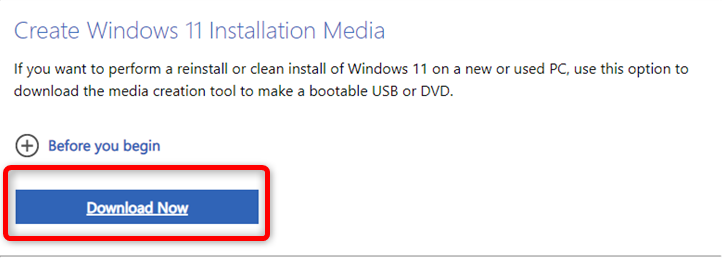
To begin, visit Microsoft’s Windows installation media downloads page, select Windows 11 — you can also choose Windows 10; the setup process is almost exactly the same, and you can follow the steps shown below— and click the “Download Now” button below the “Create Windows 11 Installation Media” option.
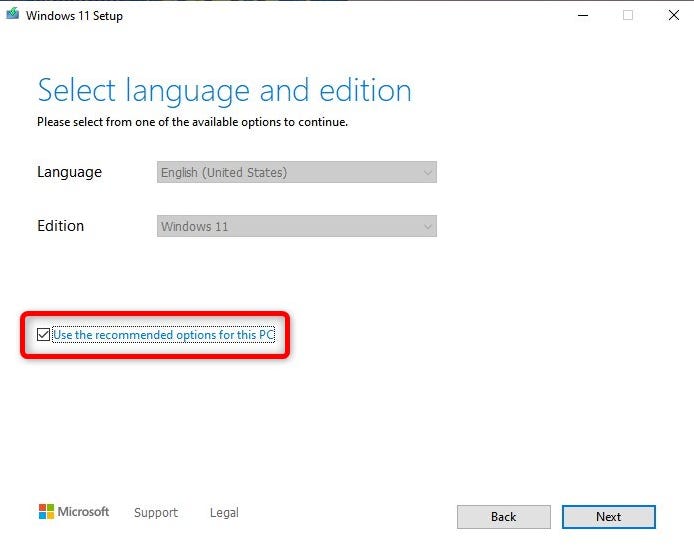
Once the media creation tool is downloaded, open it, wait for it to start, accept the Terms of License, and proceed with the recommended options.
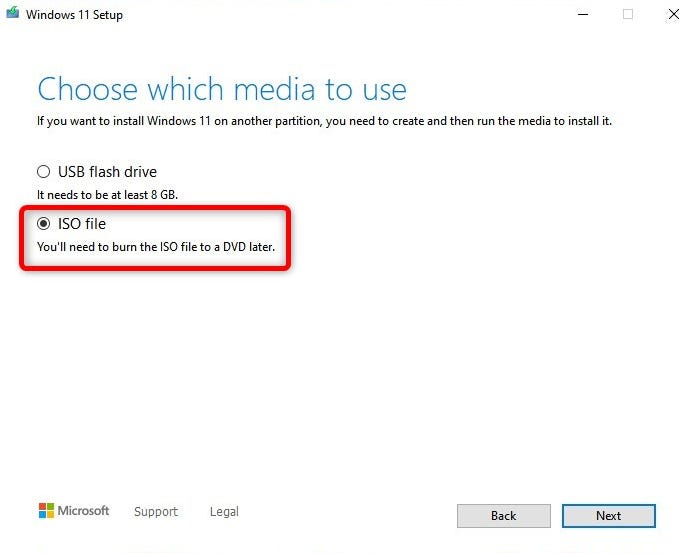
On the next dialog window, select the “ISO File” option, click the “Next” button, and decide where to save the Windows 11 ISO file.
Step 2: Install Windows on the SD Card
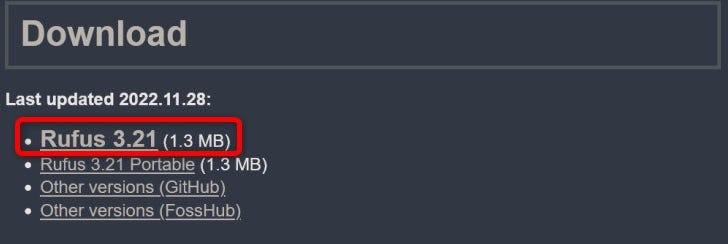
Once the Media Creation Tool finishes creating the ISO file, it’s time to download Rufus. This is a handy tool for creating bootable USB flash or SD card drives.
Save the Rufus executable and run it. Before opening Rufus, ensure you’ve slotted your microSD card into your card reader.
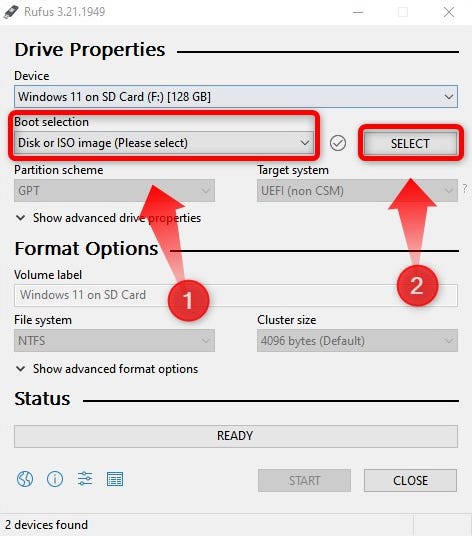
Once you open Rufus, select your microSD card in the “Device” tab, then select “Disk or ISO Image” under the “Boot Selection” button. Once you’ve done that, click the “Select” button, locate your Windows ISO file, and click “Open.”
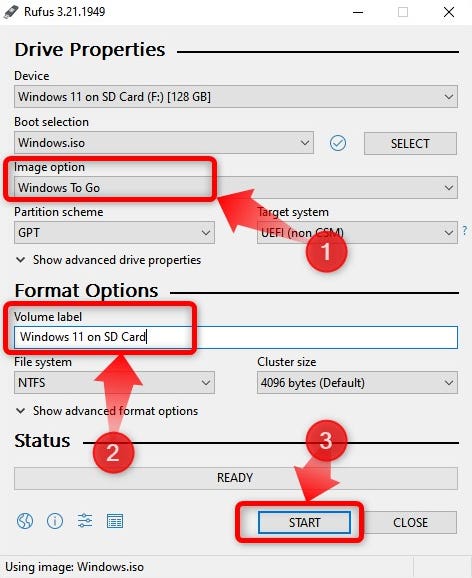
Next, select the “Windows To Go” option in the “Image Option” selection. You can name your SD card in the “Volume Label” box if you want and then click the “Start” button. Do not change other options.
After you click the “Start” button, a new dialog window will appear where you can select which version of Windows 11 you want to install. Pick whichever you want since you don’t need an activation key to use Windows 11, or Windows 10 for that matter, anyway.
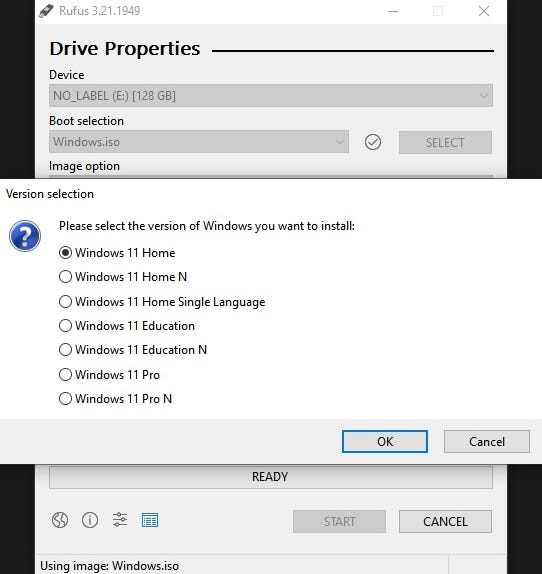
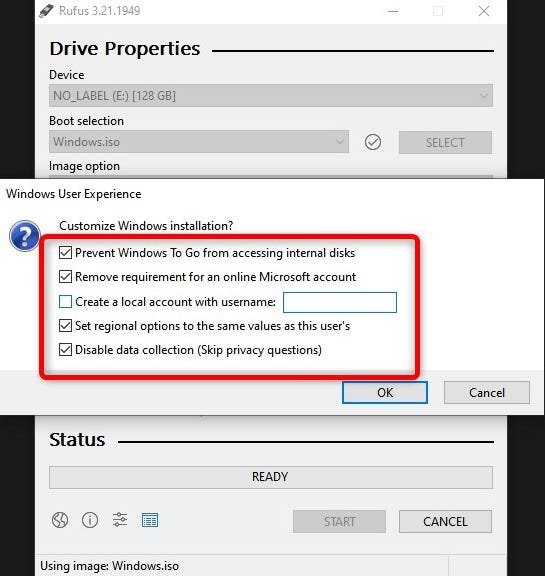
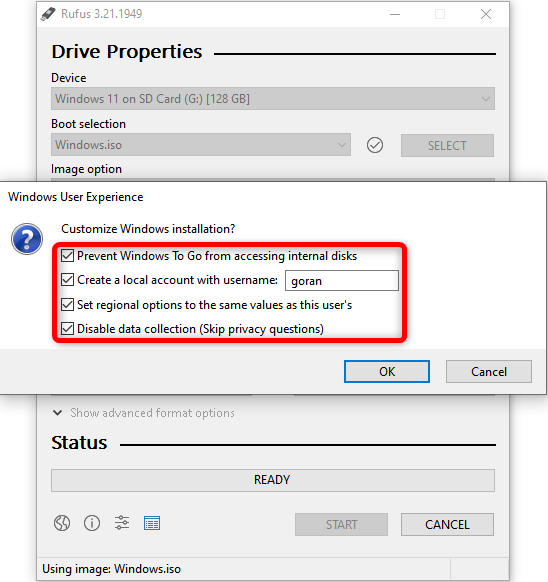
After you select the version of Windows 11 you want, another dialog window will open. There, we recommend enabling these four options:
- Prevent Windows To Go from accessing internal disks
- Remove requirement for an online Microsoft account
- Set regional options to the same values as this user’s
- Disable data collection (Skip privacy questions).
If you’re okay with having to enter your online Windows account and manually setting up regional options, you can leave the second and fourth box unchecked. However, we strongly recommend disabling data collection since that will help maintain your privacy and reduces the number of prompts you have to handle. You should also enable “Prevent Windows To Go from accessing internal disks” since leaving it unchecked can mess up your Steam Deck’s internal SSD.
If you opt for Windows 10 instead of Windows 11 you’ll be served with most of the same options aside from the “Remove requirement for an online Microsoft account.”
Next, click another “Ok” button on the warning window and wait for Rufus to do its work. This can take a while, especially if you use a slower A1/U1 microSD card.

Step 3: Get the Steam Deck Windows Drivers
Once Rufus finishes creating Windows To Go installation, it’s time to download the Steam Deck Windows drivers.
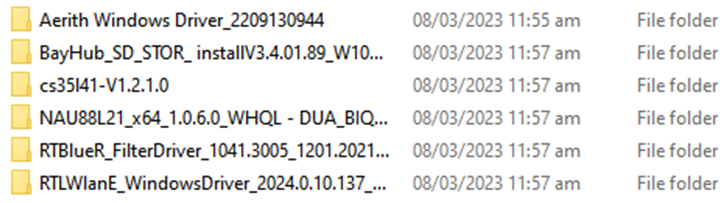
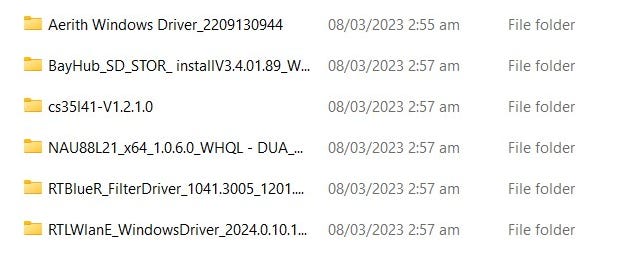
You can download them from Valve’s Steam Deck Windows Resources page. Download all six drivers, including both audio drivers.
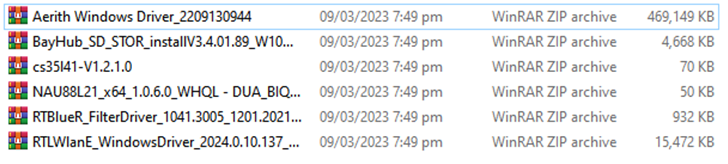
Save them all to a single folder and then extract the six archives into the same folder.

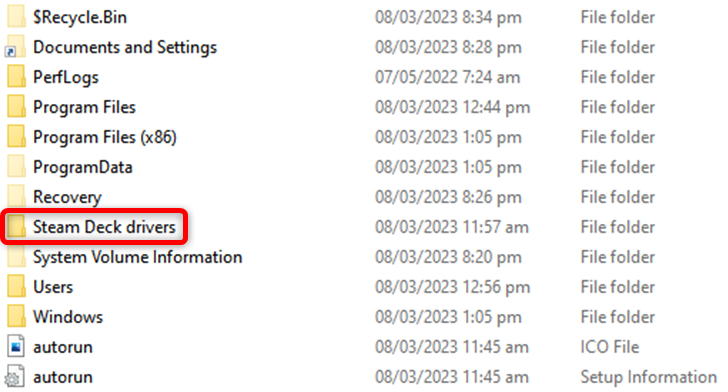
Next, create a new folder inside the root of your microSD card — don’t worry, this won’t mess up Windows installation — and copy the six driver folders inside it.
Now you have everything you need to run Windows 11 on your Steam Deck from an SD card.
Step 4: Boot Using the SD Card and Install Windows
After you’ve created a bootable Windows To Go installation on your microSD card with Rufus, turn your Steam Deck off by holding the power button and selecting the “Shutdown” option.
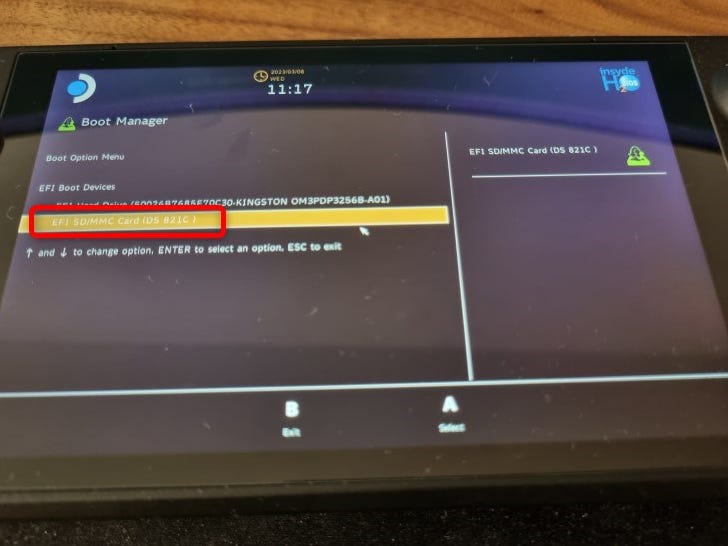
Once you’ve turned your Deck off, place the card inside your Steam Deck’s microSD card slot. Next, hold the volume down button and then press the power button. Once you hear the sound playing release both buttons.
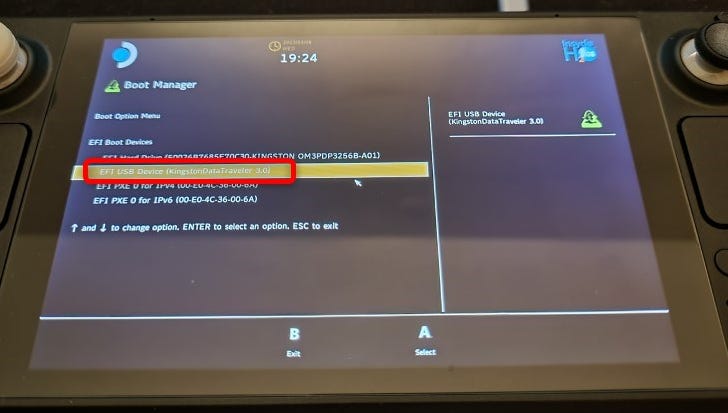
Now you’ve entered the Steam Deck boot selection menu. In there, select your microSD card, press the “A” button, and wait for Windows to boot. This can take a while; we waited about 15 minutes for the Windows setup to start.
Note that if didn’t connect your Deck to an external monitor, the screen will be in portrait mode. Once the setup starts, pick the options you want and click the “I Don’t Have Internet” button on the “Connect you to a network” dialog.

Since this is Microsoft we’re talking about, Windows will try to connect your Deck to a wireless network once again in the following window, so click the “Continue With Limited Setup” button.
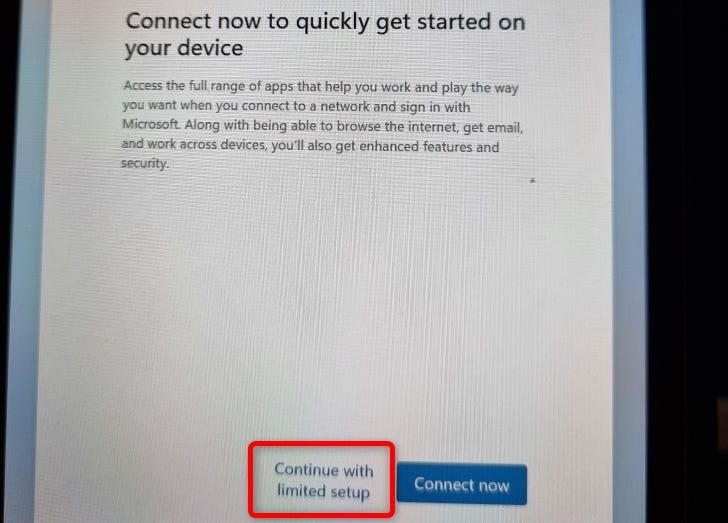
While Wi-Fi works on Windows 11 from the get-go, it’s rather slow until you install the Wi-Fi driver; downloading updates during the initial setup would take hours. This is why you should skip connecting to Wi-Fi during the initial setup.
Once you boot into Windows for the first time, change the screen orientation back to landscape. To do that right click on Desktop > Display Settings > Scale & Layout > Display Orientation > Switch to Landscape.
Step 5: Install the Necessary Drivers
To install the first two drivers — the APU one and the one for SD card storage — enter the first two folders on the list below, locate the “Setup” executable files (EXE) and double-click them. Note that the first folder has a sub-folder you need to enter to locate the “Setup” executable.
Install the third driver — the first audio driver — by finding the “cs35I41” file that has “Setup Information” listed as its type, right click it, and select “Install.”

To install the fourth driver — the second audio driver — locate the “NAU88L21” file that has “Setup Information” listed as its type, right click it, and again select the “Install” option.

You can install the fifth driver — the Bluetooth driver — by double clicking the “InstallDriver” file.

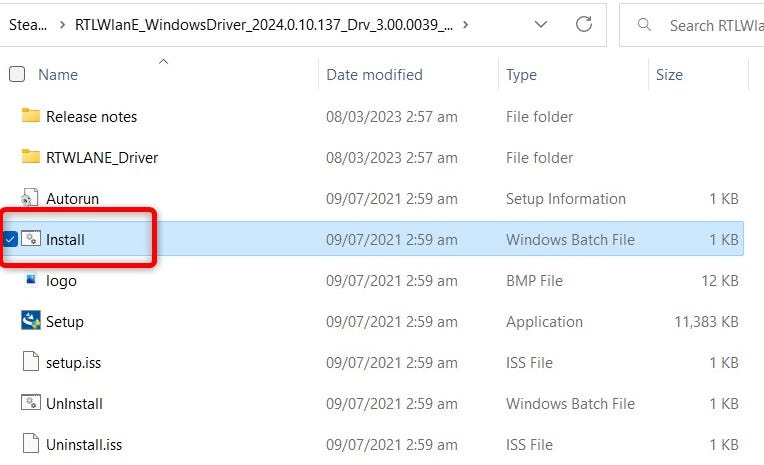
To install the sixth and final driver — the Wi-Fi driver — double click on the “Install” file with “Windows Batch File” listed as its type. Do not click on the “Setup” file.
Okay, now you have everything needed, and you can continue setting up Windows on your Steam Deck to your liking!
How to Boot Back Into SteamOS
To boot back into SteamOS after setting up Windows on an SD card, turn off your Steam Deck via the usual Windows option: right click the Start Menu > Shut Down or Sign Out > Shut Down. Then wait for the screen and the fan to turn off.
Once the fan stops spinning, hold the volume down button and press the power button. Wait for the sound to play, enter the Steam Deck boot menu, select the first option—Steam Deck’s internal SSD—press the “A” button and wait for SteamOS to boot. Your Steam Deck should boot straight into Game Mode. That’s it!
How to Install Windows on Steam Deck’s Internal SSD
To install Windows on your Deck’s internal SSD, you’ll follow many of the same steps for the SD card method, but with a few differences in Rufus settings.
Warning: This process will delete all data on your Steam Deck’s internal drive, so make sure you’ve backed up anything you don’t want to lose.
First, grab any USB flash drive with at least 32GB of space and that you can connect to your Steam Deck, then follow the same steps for creating a Windows ISO file we’ve explained above.
With your ISO ready to go, open Rufus and select your USB drive as the target device.
Then, pick the “Disk or ISO Image” under the “Boot Selection” button, locate your Windows ISO file, and open it. Next, select “Standard Windows Installation” under the “Image Option” selection, rename the USB flash drive if you want, and click on the “Start” button.

After you’ve done that, you should pick the options shown below in case you choose to install Windows. The four options include “Remove requirement for 4GB+ RAM, Secure Boot and TMP 2.0,” “Remove requirement for an online Microsoft account,” “Set regional options to the same values as this user’s,” and “Disable Data Collection.”
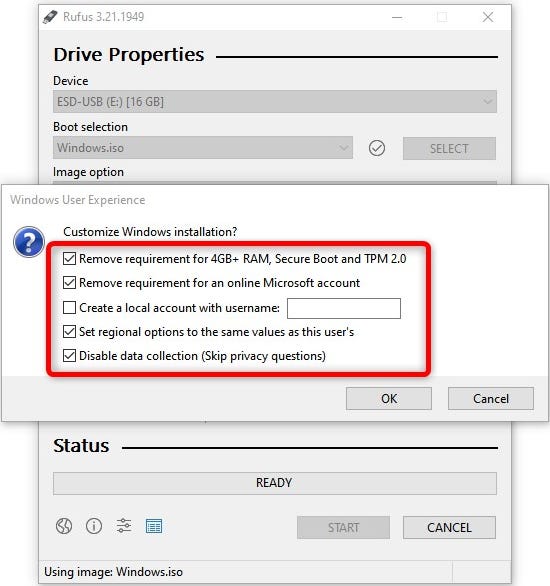
The second, fourth, and fifth boxes are optional, but make sure to check the “Remove requirement for 4GB+ RAM, Secure Boot, and TMP 2.0” box since Steam Deck doesn’t support the Secure Boot feature by default. Next, click the “Ok” button and another one in the “Warning” window and wait for Rufus to finish.
After Rufus finishes setting up the bootable USB flash, repeat the process of copying Steam Deck Windows drivers to the root of the USB flash we explained above.
Next, connect the USB drive to your Steam Deck, hold the volume down button, press the power button, wait for the sound to play, and then release both buttons. The screen should turn on and show you the “Boot Option Menu” list. Pick your USB flash drive, press the “A” button, and wait for the Windows installation to begin. Note that during the installation, the screen will switch to portrait mode.
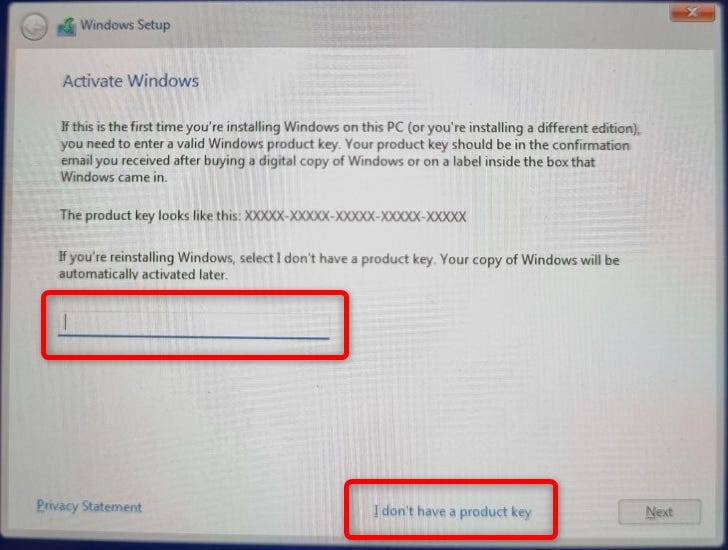
Then, follow the prompts, and once you arrive at the “Activate Windows” window, either enter an activation key if you have one or click the “I Don’t Have a Product Key” button.
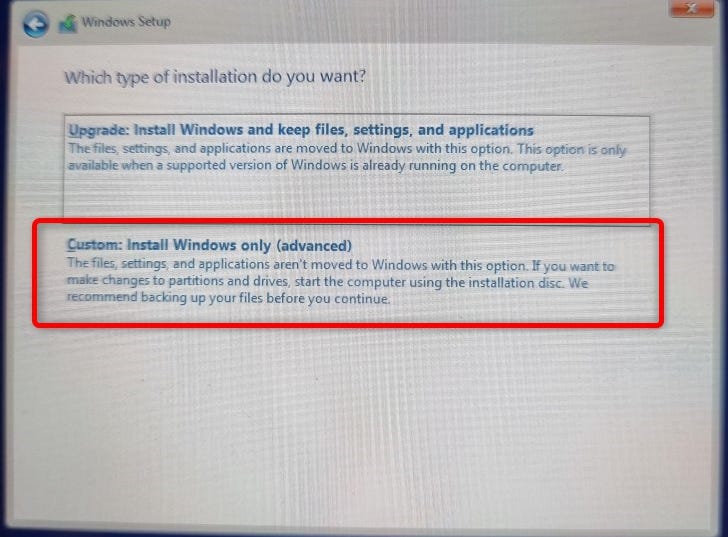
Next, select the “Custom: Install Windows Only” option in the following window.
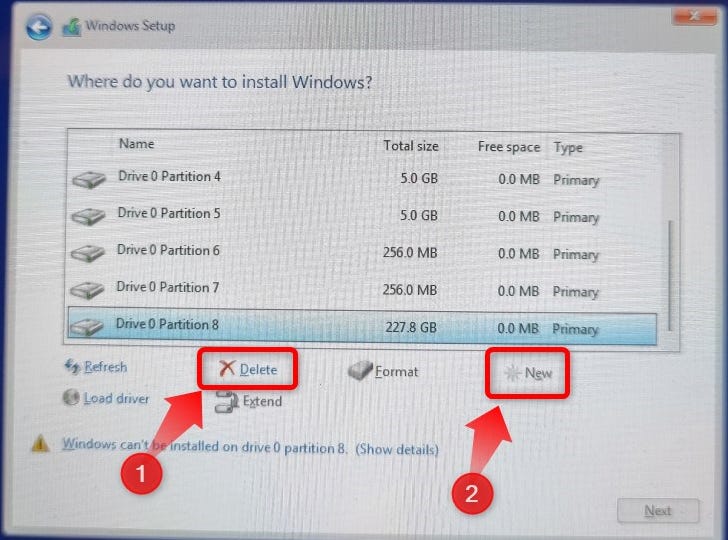
Finally, once you arrive at the window where you’re asked where to install Windows delete all partitions and then create a new one. Once you create the new partition, install Windows on it.
Warning: This will delete all data on your Steam Deck drive. Double-check that your important data is backed up before proceeding.
Once the setup is finished, it’s time to install the Steam Deck Windows drivers. Jump to the Installing Necessary Drivers section to read how to do it.
Once you’ve installed your drivers, you’re good to go! Make the most of your Windows experience on the Steam Deck by learning what hidden Windows 10 features you should be using, or which new Windows 11 features are worth trying.