
WSL isn’t new to this audience, and with the new improvements over WSL2 Microsoft has enabled access to Linux from Windows to even greater audiences. While you can download multiple distributions of Linux from the Microsoft Store on Windows 10. If you are an existing WSL user, chances are you don’t want to download a separate new version of the existing Linux that you already have installed.
In this guide we will show you how to upgrade your existing Ubuntu 18.04 TLS to 20.04 TLS without installing a separate instance of Ubuntu so you can keep all your existing OS and all it’s configuration the way is.
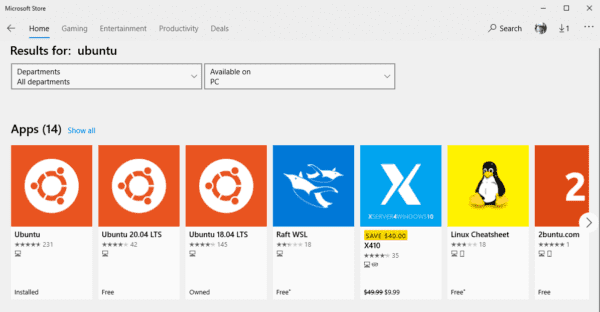
You can install the latest Ubuntu 20.04 from the Microsoft Store, however, if you already have a previous version installed this will become a separate instance, unless you want to have two Ubuntu 18.04 and 20.04 side by side. There is no need to download a separate distribution. The best way to upgrade to the latest is by upgrading the existing Ubuntu version.
Assuming you have 18.04 LTS Ubuntu installed with WSL or WSL2.
lsb_release -aUpgrade to 20.04 won’t be much hassle.
No LSB modules are available.
Distributor ID: Ubuntu
Description:    Ubuntu 18.04.4 LTS
Release:        18.04
Codename:       bionic
First, we confirm that you are on the latest 18.04 LTS distribution, follow the guide here step by step closely.
sudo apt update
sudo apt list --upgradable
sudo apt upgrade
Next we want to clean up the package source and remove any unused packages.
sudo apt --purge autoremoveIt’s important to install this update manager core package this will trick the system to think there is a new LTS available and allow you to do an in place upgrade.
sudo apt install update-manager-coreIf you attempt upgrade now you might ran into the follow message.
sudo do-release-upgradeDon’t worry you can still proceed with the -d
Checking for a new Ubuntu release
There is no development version of an LTS available.
To upgrade to the latest non-LTS develoment release
set Prompt=normal in /etc/update-manager/release-upgrades.
This should trigger the upgrade.
sudo do-release-upgrade -dAccept all packages you have to download, and it will take a while depends on your disk speed mostly.
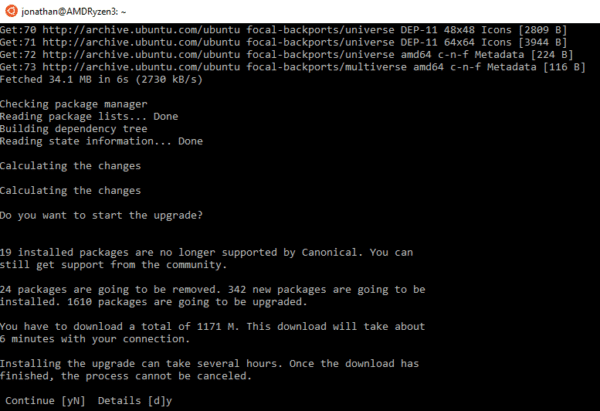
With any luck you will be prompt a few times during the in place upgrade you need to accept all and the last step will prompt you to clean up and remove few packages before you are prompt for the message “System upgrade is complete. Restart required” Press Y to continue.

Note, you do not need to reboot your host (Windows) machine, you will wait for the Ubuntu Linux daemon to reboot, close all Ubuntu terminals and restart.
Check the version again you should see something like this below.
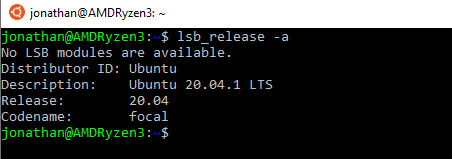
Congratulation now you have successfully upgraded to the latest version of Ubuntu with your WSL/WSL2.
The post How To Upgrade Existing WSL/WSL2 Ubuntu 18.04 to 20.04 appeared first on Next of Windows.