After learning about LibreOffice Writer’s user interface and basic text formatting, we will learn about Views and Document Navigation so we can see better and moving around text more quickly. You will learn about two views, Normal and Web, and also three paging modes, Single-Multiple-Book. You will also learn about how to use zoom features and Navigator dialog. Lastly, you will learn to hide and show several important stuffs such as Rulers, Grid, and Pictures which in turn can help you reduce computer memory usage. Happy learning!
1. Switching Between Normal and Web Views
To switch to either view:
- Go to menu View > Normal.
- Go to menu View > Web.
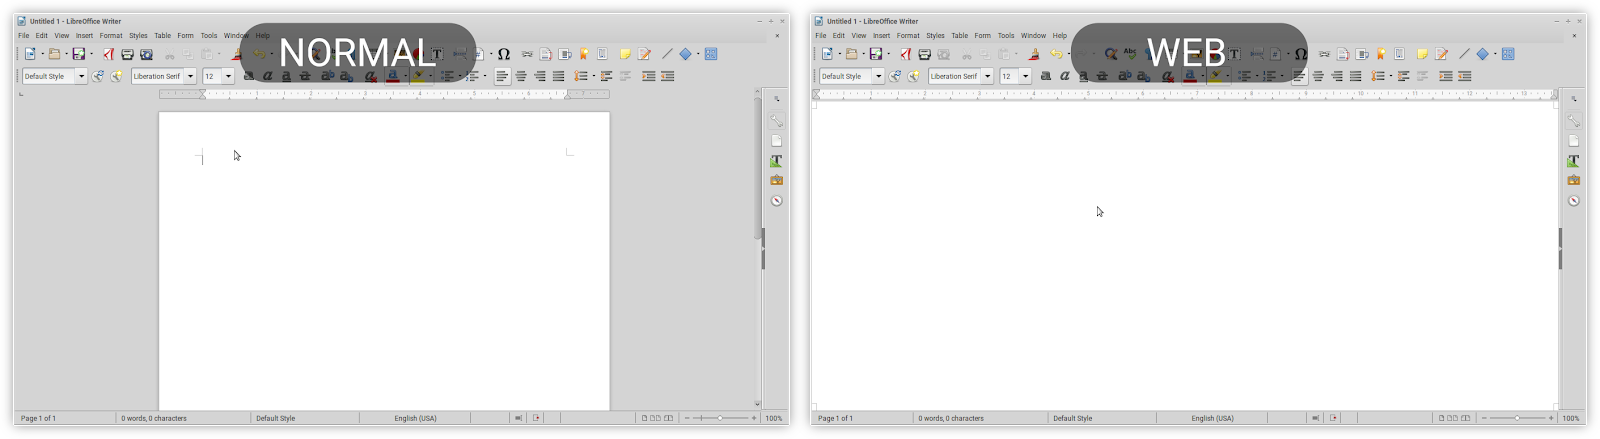
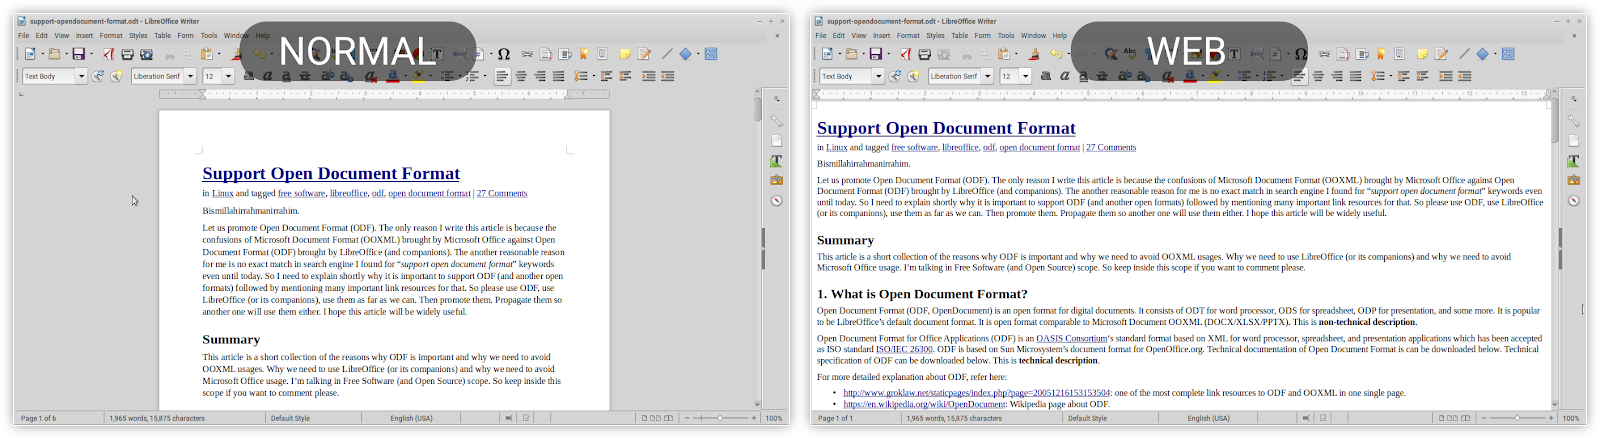
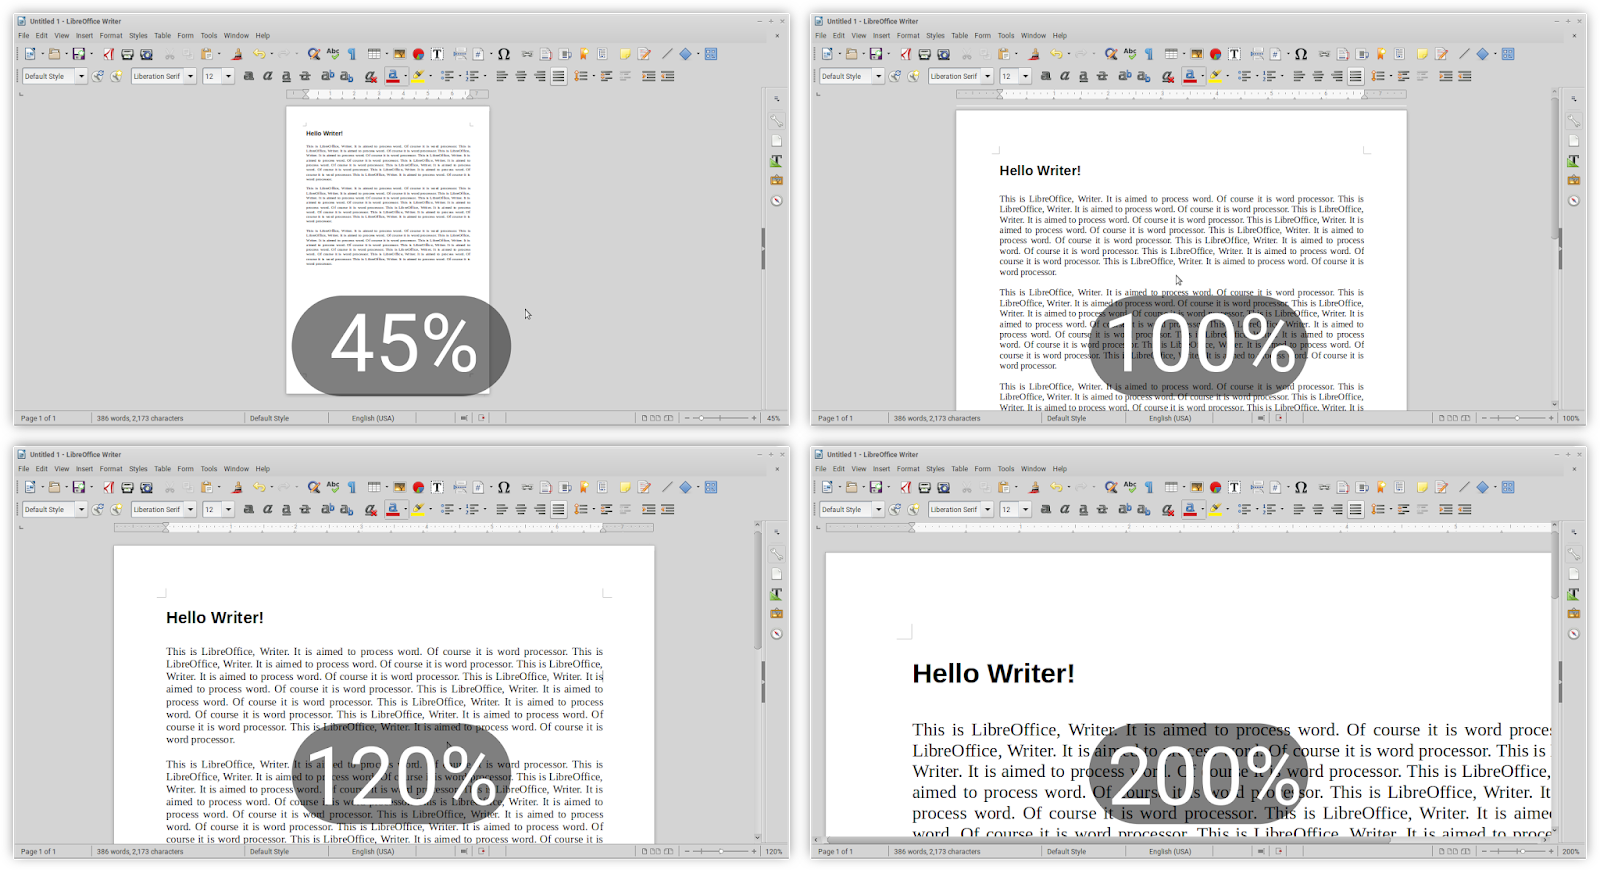
Writer provides two view modes, Normal and Web, as depicted below. The view we usually see is the Normal one. If we change it to Web view, it loses paper boundaries and looks far wider. For most cases , you use Normal view. How about Web View? As we already learned on previous part, LibreOffice Writer is a WYSIWYG editor so if you want to create web in visual way without coding, there is Web View for you. It is similar to Microsoft FrontPage. With web view you can type text, format them as you please, include pictures and tables, etc. then Save As HTML file just that easily. The resulting HTML file is a web page formatted as you edit which the code generated automatically by LibreOffice Writer.
This is comparison between Normal and Web views with empty document.
This is a comparison of both Views with text (text taken from my old writing Support ODF).
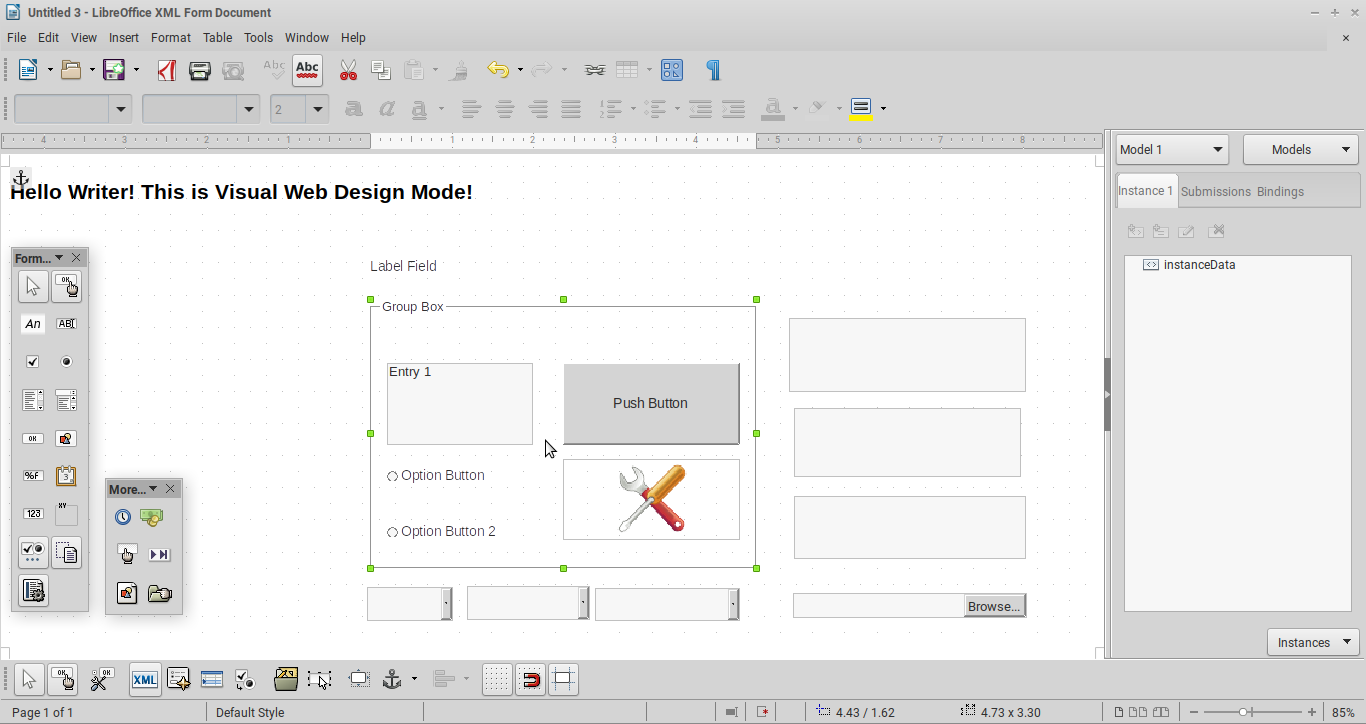
2. Visual Web Form Editor
To open visual form editor:
- Go to View > Toolbars > enable Form Controls > a floating dialog of buttons appears.
- Go to View > Toolbars > enable Form Design > a new toolbar appears.
- Click Design Mode on Form Controls dialog (index finger with an OK) to enable form creation, click it again to test clicking buttons.
With this editor, Writer can visually design user interface form (involving button, combo box, etc.) in a document with certain functions to receive inputs and process them. The created form document can then be exported as HTML (web page), ODT, PDF, and the buttons will be clickable there. You can, for example, create a simple website with go forward and go back buttons to navigate between pages. This editor works in both Normal and Web views.
2. Zoom and Fullscreen
Too zoom in and out:
- Click + on zoom section on status bar to zoom in a level.
- Click – instead to zoom out a level.
- Alternatively, scroll up or bottom to zoom in and out.
- Alternatively, click View > Zoom > select a zoom level.
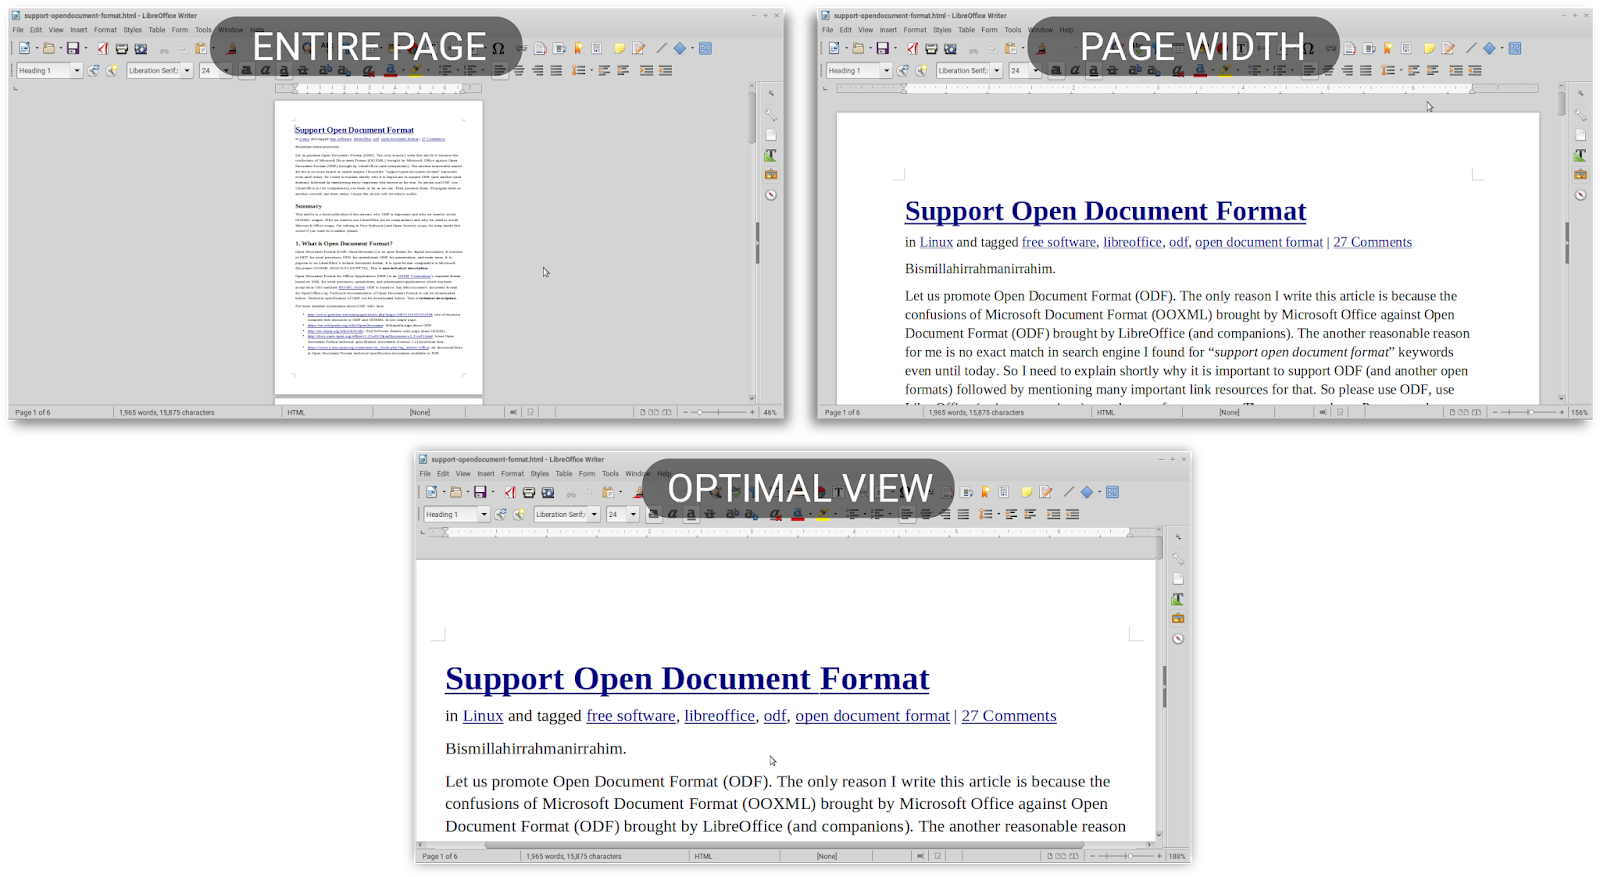
Writer gives you two kinds of zooming, either with slider (on statusbar), or preset (Page Width, Entire Page, Optimal View).
Picture below compares zoom presets available:
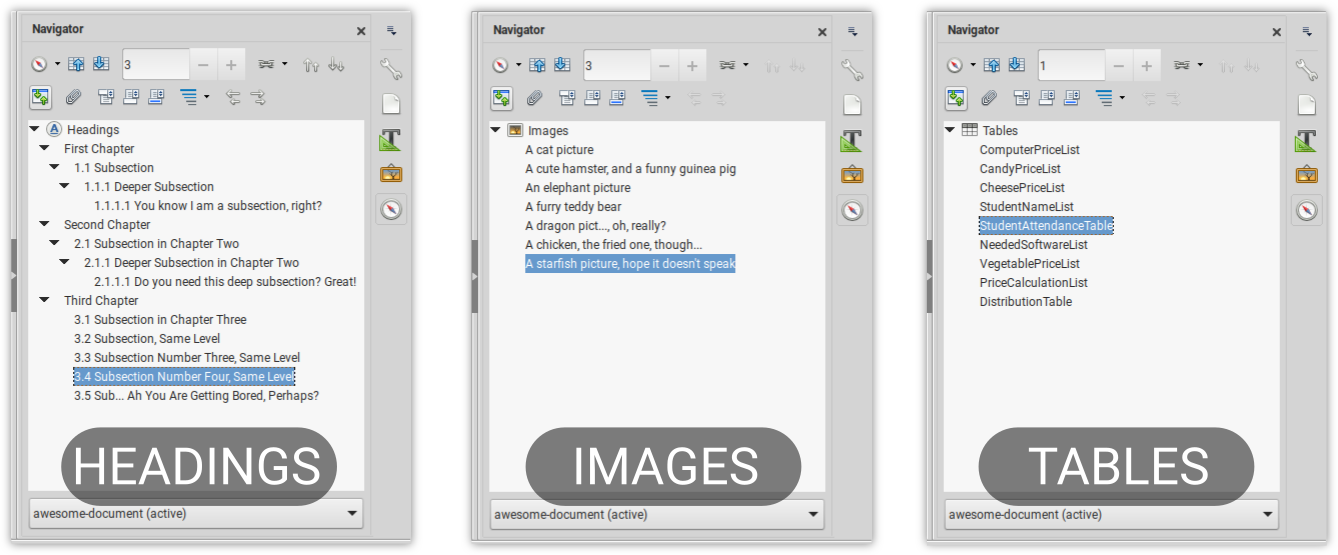
3. Using Navigator
To show Navigator dialog:
- Go to View > Navigator.
- Alternatively, click compass logo on right sidebar.
To jump to a point in document:
- Click Headings item > collapse arrows under it > you see all headings > double-click a heading name > you jumped to section right under that heading.
- Click Images item > collapse arrows under it > you see all image names >double-click a image name > you jumped to section right under that image.
- Click Tables item > collapse arrows > you see all table names > double-click a table name > you jumped there.
In a word processor user can “jump” (quickly move viewport) to a certain point in text document. That is the purpose of Navigator dialog. Navigator shows list of headings, list of images, and list of tables (among other types of item) within a document for you to navigate.
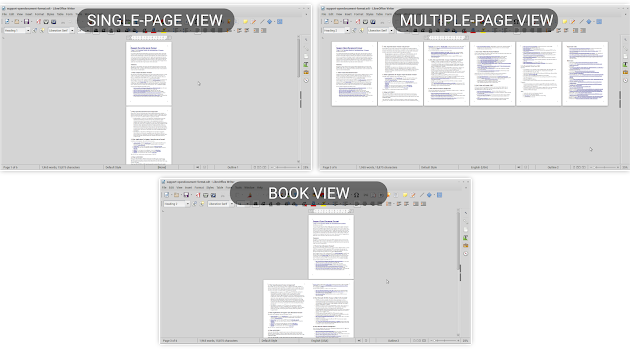
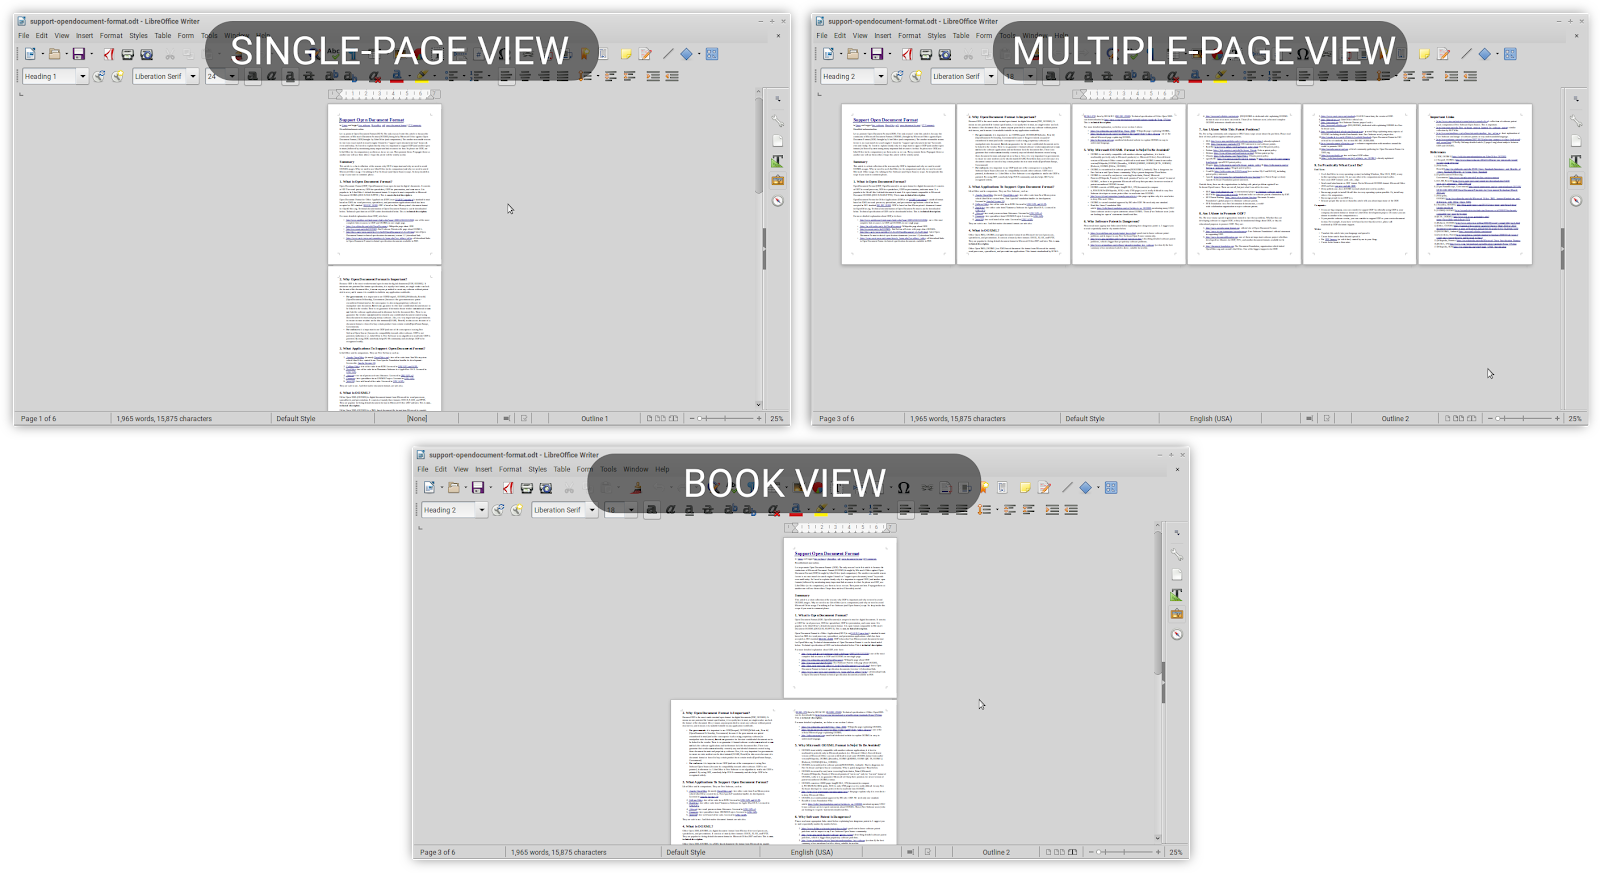
4. Single, Multiple, and Book Page Views
- Single-page: displays document page per page in a straight vertical line order.
- Multiple-page: displays pages in overview in horizontal and vertical order.
- Book view: displays pages side by side, except front and back cover pages, just like a book.
To switch to either one, simply click one of three paper piece logos on statusbar near zoom slider.
![]()
Normally you use Single-Page one. It is enough for most cases. For overview purpose, the best is to use Multiple-Page one. If you are a book author and want to quickly see how your book looks in print, Book View is the best.
5. Hide/Show Things
- Hide/Show Pictures: click menu View > uncheck Images and Charts > all pictures hidden within empty frames > check to show them again. This reduce memory usage a lot.
- Hide/Show Tables: click menu View > uncheck Table Boundaries > all tables now lost their border lines > check to show them again.
- Hide/Show Text Boundaries: click menu View > uncheck Text Boundaries > four L-shaped lines on each page now gone (also Section’s border lines) > check to show them again.
- Hide/Show Non-Printing Characters: click menu View > uncheck Formatting Marks > all non-printing characters (such as ¶) are now gone.
- Hide/Show Grid: click menu View > Grid and Helplines > uncheck Grid > background grid is now gone > check to show it again.
- Enable/Disable Toolbars: click menu View > Toolbars > uncheck to hide, check to show a toolbar among choices available.
- Rulers: click menu View > Ruler > Rulers for horizontal only and View > Rulers > Vertical Rulers for the vertical one.
- Data Sources: click menu View > uncheck Data Sources > Data Sources panel is now gone > check to show it again.
These things are important because sometimes one might figure they see things on screen they unusually see or think that it is annoying but they do not know how to hide them.
Summary
Now you know several things about viewing document in Writer such as how to switch between two views, how to switch between three paging modes, and to hide/show crucial things like rulers and table borders. Next time you will learn about previewing document before printing it out. Happy writing!