
Ubuntu 22.10 Kinetic Kudu is out! Time to install the new system and do same configurations before ready for use. And, here are a list of things I can tell for you.
1. Update cache & install Media Codec
On a new Ubuntu system, user may need to refresh package index before being able to install software packages. And, this can be done easily by:
- Launch ‘Software Updater’, and wait for automatically ‘checking for updates’ done.
- Or, press Ctrl+Alt+T on keyboard to open terminal, and run command:
sudo apt update
type user password when it asks while no asterisk feedback.
Ubuntu does not include multimedia codec to play video and/or music with default applications out-of-the-box. It’s however quite easy to install them
- Either open ‘Ubuntu Software’, search for and install ‘Ubuntu restricted extra’
- Or, open terminal (Ctrl+Alt+T) and run command:
sudo apt install ubuntu-restricted-extras
While installing the MS fonts, it will prompt to accept licence, just press Tab to highlight OK and hit Enter.
For KUbuntu user, replace ubuntu-restricted-extras with kubuntu-restricted-extras in command.
2. Enable Flatpak & AppImage support
Ubuntu officially supports Snap and Deb package formats. But, we can avoid the popular Flatpak and AppImage software packages today in Linux.
AppImage requires libfuse2 which is NOT pre-installed since Ubuntu 22.04, due to switch to fuse3. The package is however still available in system repository.
- Open terminal (Ctrl+Alt+T) and run command to enable AppImage support:
sudo apt install libfuse2
Ubuntu also does not support Flatpak out-of-the-box, but it can be enabled by running a single command:
- Enable Flatpak in Ubuntu:
sudo apt install flatpak
After that, you may go to flathub.org to find out and install your favorite apps as Flatpak.
3. Hide USB/Mounted Disk from left Panel, Enalbe Minimize on click
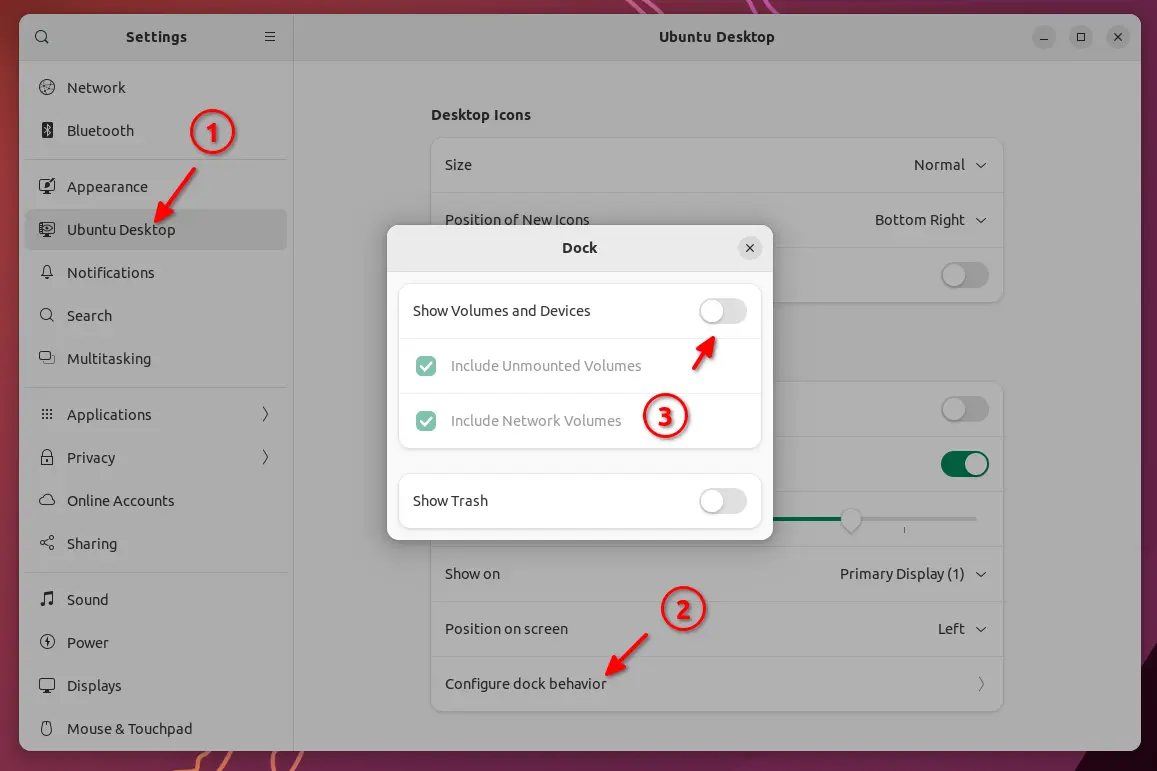
The left (or bottom) panel shows the connected USB stick, mounted disk volume out-of-the-box. User can however hide them using the new ‘Ubuntu Dock’ settings.
- First, go to top-right corner system tray menu, and click on ‘gear’ button to open settings.
- When ‘Settings’ opens, navigate to the new ‘Ubuntu Dock‘ tab. Then, click on “Configure dock behavior” in button right
- Finally, you may use the ON/OFF switch to show/hide the mounted drivers as well as trash can icon.
To enable the behavior that click the app icon on left (or bottom) dock panel to focus or minimize app window, open terminal (Ctrl+Alt+T) and run command:
gsettings set org.gnome.shell.extensions.dash-to-dock click-action 'minimize'
Ubuntu 22.10 introduced a new feature that when clicking app icon on dock, it goes to overview screen for easy switching this app if multiple windows opened. So, use the command below instead can be a better choice:
gsettings set org.gnome.shell.extensions.dash-to-dock click-action 'focus-minimize-or-appspread'
After that, clicking app icon on dock panel will either open/focus window, minimize or goes overview for switching window.
4. Enable ‘New Documents’ context menu
GNOME is now working to make it easy to create new documents in ‘Files’ (aka Nautilus file manager). Until then, user need to manually create an empty document in ‘Templates’ folder to enable this context menu option.
- First, click top-left ‘Activities’ to open overview screen. Then search for and open ‘Text Editor’.
- In text editor window, go to ‘≡’ menu and select ‘save as’ option (You don’t have to insert anything, just save as empty document).
- Finally, save the empty file as ‘Empty Document‘ into your ‘Templates‘ folder.
After that, right-click on blank area either in desktop or file manager window to see the ‘New Document’ option.
5. Install useful configuration tool
There are some useful configuration tools that you may need. Either install them via “Ubuntu Software” app or run the apt commands below in terminal.
- Open terminal (Ctrl+Alt+T) and run command to install Gnome Tweaks:
sudo apt install gnome-tweaks
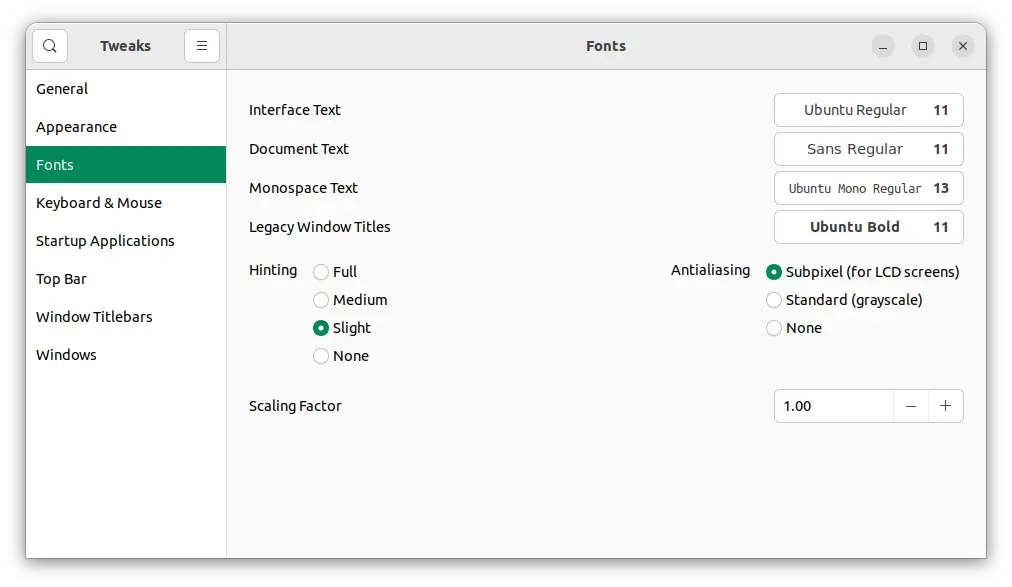
GNOME Tweaks
- Run command to install ‘Extension Manager’ for install & managing extensions:
sudo apt install gnome-shell-extension-manager
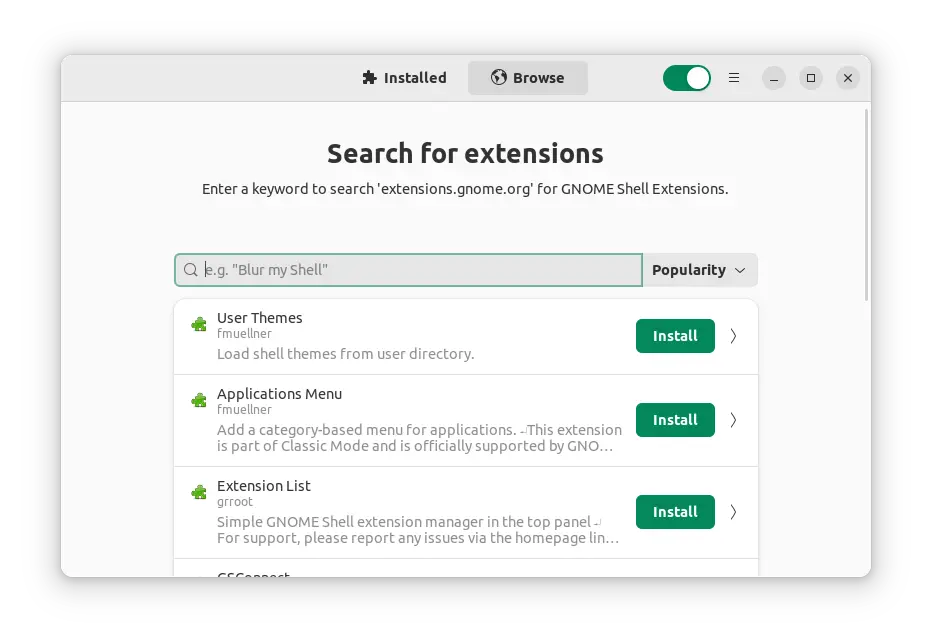
Extension Manager
Install some cool Gnome Shell Extensions, (e.g. ‘Just Perfect’, ‘Blur my shell’), via extension manager app under ‘Browse’ tab.
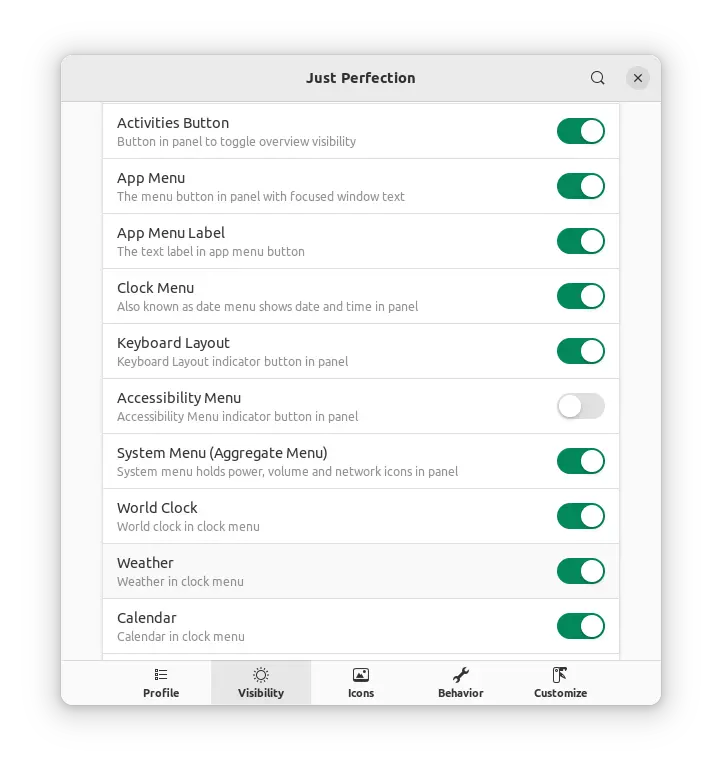
Just Perfection with even more configuration options
6. Set light/dark photo images as wallpaper that switch automatically
GNOME 40 introduced adaptive wallpaper that changes automatically depends on system color scheme. It’s not available in Ubuntu 22.04 due to custom ‘Settings’ dialog. For Ubuntu 22.10, you can set your photo images with light and dark versions to wallpaper via following steps.
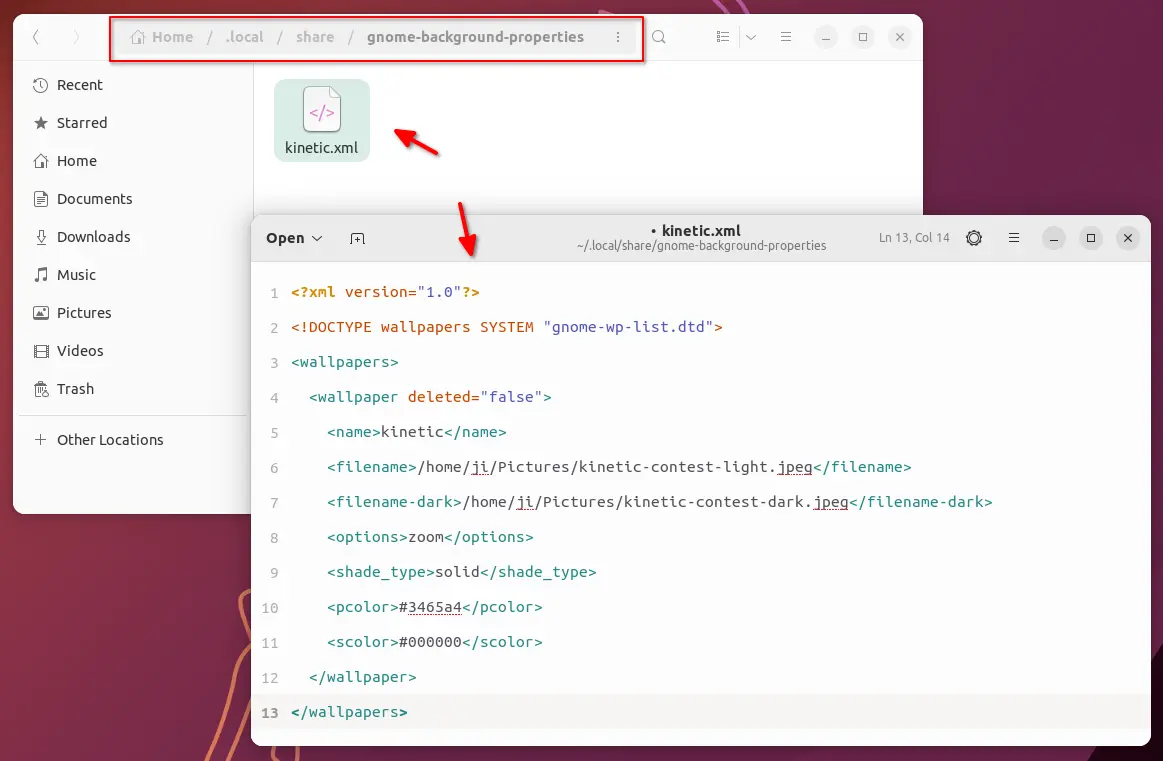
- First, open ‘Files‘ (nautilus file manager), then press Ctrl+H to show hidden files/folders.
- Then, navigate to .local/share and create a new sub-folder called ‘gnome-background-properties‘
- Finally, create a .xml file under that folder with whatever name, and insert following content (change path-to-file accordingly).
<?xml version="1.0"?>
<!DOCTYPE wallpapers SYSTEM "gnome-wp-list.dtd">
<wallpapers>
  <wallpaper deleted="false">
    <name>TYPE_NAME_HERE</name>
    <filename>/PATH/TO/PICTURE_LIGHT</filename>
    <filename-dark>/PATH/TO/PICTURE_DARK</filename-dark>
    <options>zoom</options>
    <shade_type>solid</shade_type>
    <pcolor>#3465a4</pcolor>
    <scolor>#000000</scolor>
  </wallpaper>
</wallpapers>
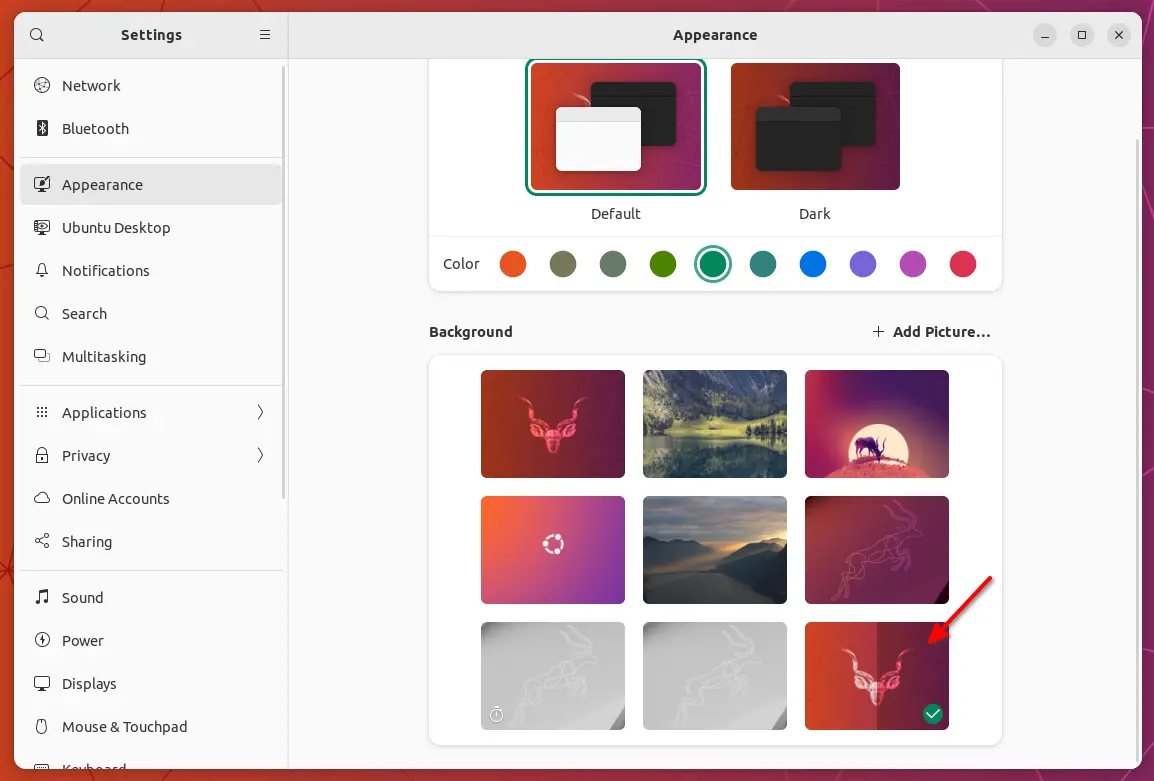
After that, open ‘Settings’ and navigate to ‘Appearance’ for the new adaptive wallpaper:
7. Get ‘Login Manager Settings’ to configure login screen
GDM Settings is a login screen managing tool for GNOME display manager. The application now is stable for daily use though it’s young project.
- First, go to project page below and select download the AppImageDownload Login Manager Settings (under ‘Assets’)
- Right-click on the AppImage, go to ‘Properties‘, and then turn on the option for ‘Executable as Program‘
- Finally, right-click and click ‘Run’ to launch the configuration tool.
- There go to ‘Appearance’ -> Background -> Type ‘Image’ and select a photo image for login screen.
- Configure font, color, logo, disable user list,etc as you want and finally click ‘Apply’ button to make changes.
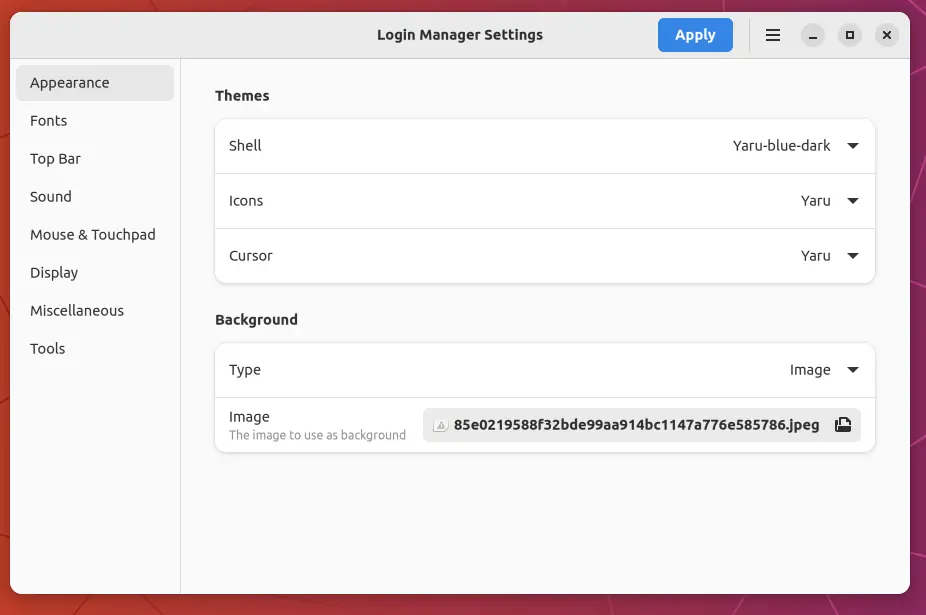
Configure Login Screen Appearance
8. Install Firefox as classic Deb package
For those prefer the classic Deb to Snap, open terminal (Ctrl+Alt+T) and run the commands below one by one to switch Firefox from Snap to DEB.
- Backup your important data if any.
- Remove commands below one by one to remove Firefox:
sudo apt remove --autoremove firefox
sudo snap remove firefox
- Add Mozillateam PPA:
sudo add-apt-repository ppa:mozillateam/ppa
- Finally, install Firefox as deb form PPA:
sudo apt install -t 'o=LP-PPA-mozillateam' firefox
To prevent Ubuntu from automatically updating Firefox to Snap again, you also need to set a higher PPA priority. See this tutorial for details.
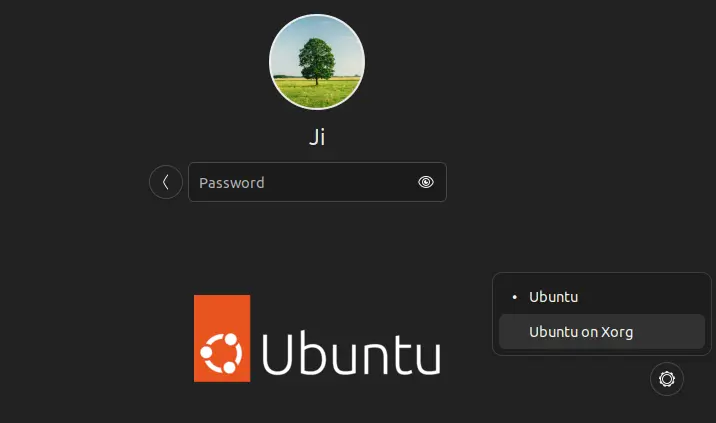
9. Switch back to Xorg session
If you have some old applications that are still NOT running properly in the default Wayland session. Simply log out, click username and use the bottom right ‘gear’ button menu to switch back Xorg session, and finally login.