
Is your Netgear wireless router not working on Windows? Some Windows users have reported that their Netgear wireless router is not working correctly. They keep experiencing internet connectivity issues like slow internet, connection drops, no internet access, etc. Some users have also reported that their PC is not even detecting their Netgear wireless router. If you are facing any of these issues, we got you covered. Here, we will be listing all possible fixes that you can use to get your Netgear wireless router working correctly.

How do I get my Netgear router to work again?
You can first reboot your Netgear router or power cycle it to fix any temporary issue with the device. Apart from that, check your cable connections and make sure there is no loose connection. You can also update your router firmware, update or reinstall network drivers, change your router settings, or factory reset your router to fix the issue. We have discussed these fixes in detail below, so check them out.
Fix Netgear Wireless Router not Working or Detected on Windows
If your Netgear wireless router is not working or detected on your Windows PC, you can first reboot your computer and see if the problem is resolved. In case the Netgear router still doesn’t work, you can use the following solutions to fix the issue:
- Restart or power cycle your router and modem.
- Check if there is a loose connection.
- Update your router firmware.
- Update or reinstall your wireless network driver.
- Try changing your WiFi name or password.
- Connect your Netgear router using an ethernet cable.
- Change the Wi-Fi channel.
- Change your DNS server.
- Factory reset your Netgear router.
- Contact Netgear Support.
1] Restart or power cycle your router and modem
You can restart your networking devices and check if the problem is resolved. Temporary glitches and issues can be fixed by a simple restart. So, press the Power button on your Netgear router until it switches off. Wait for a few minutes and then reboot your router and see if the issue is resolved.
If the issue persists even after restarting the router, you can perform a power cycle on your device and then connect to the internet. To power cycle your Netgear router, here are the steps you can follow:
- First, tap on the Power button on your Netgear router and modem and switch your devices off.
- Now, unplug your devices from the main switch and let the devices unplug for a few minutes.
- After some time, connect the power cord of your router and modem and turn them on.
- Next, connect your PC to the internet and see if the problem is resolved.
2] Check if there is a loose connection
Your Netgear router might not be working correctly due to a loose connection. If your power cord or cable is faulty or damaged, your router will not be detected by your computer. So, check whether all cables are firmly connected and make sure there is a constant power supply to your router. If you are using an ethernet cable, ensure that it is properly connected.
If you checked the cable connections, move on to the next solution to fix the problem.
TIP: How to set up Netgear or any Wireless Router Network on Windows?
3] Update your router firmware
Another reason why your Netgear wireless router is not working correctly is due to outdated firmware. This scenario may apply to you when you are connected to the internet without internet access. So, make sure that your router firmware is up-to-date.
Here are the steps to manually update Netgear router firmware:
First, use an ethernet cable to connect your computer to your Netgear router.
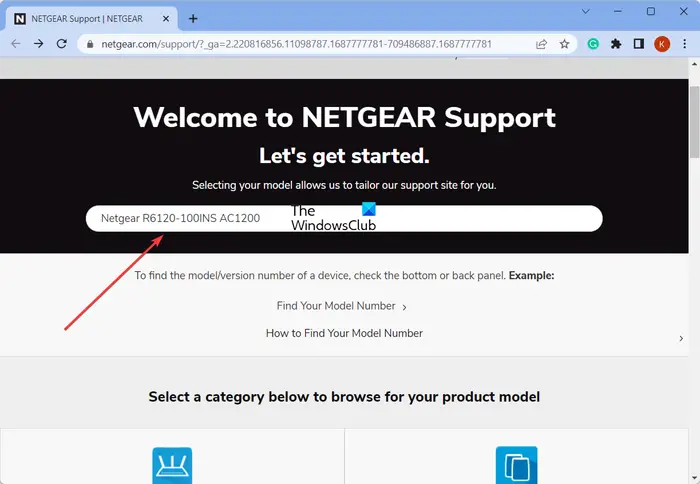
Next, go to the NETGEAR Support page in your web browser and enter your router’s model number or product name in the search box.
Tip: Use a mobile hotspot or another available network to connect to the internet if your internet is not working at all.
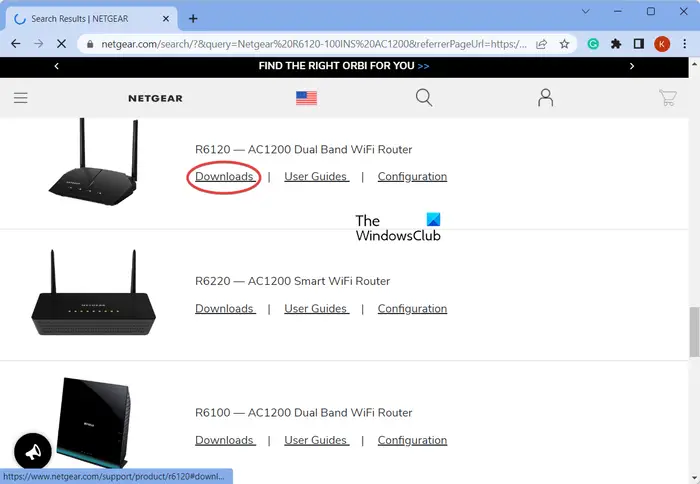
Now, scroll down on the results page and click on the Downloads button to access downloads related to your router device.

Next, under the Firmware Version option, press the Download button to download the latest firmware for your router.
After that, unzip the downloaded ZIP file using Windows built-in file extractor or a third-party file extractor tool.
Now, open the Netgear router login page in a web browser. You can copy your router’s Gateway IP address and paste it into the address bar. Or, go to the routerlogin.net page to access the Netgear login page. And then, enter the correct login credentials to access your router settings page.
Next, go to the ADVANCED > Administration settings or Settings > Administration option, as applicable.
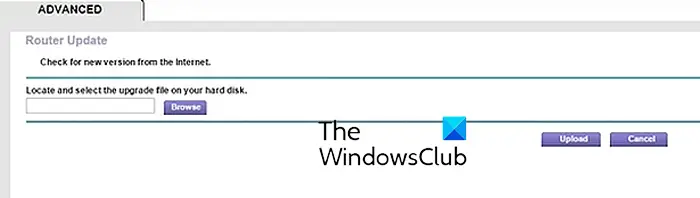
Then, click on the Firmware Update or Router Update option and then browse and select the source firmware file that you previously downloaded (.img or .chk). Now, press the Upload button and the update process will start. When done, the router will be restarted.
You can now try connecting to the internet and see if the problem is fixed.
Read: Unable to access Router configuration page using login URL or IP address.
4] Update or reinstall your wireless network driver
Internet connectivity problems are often triggered due to a bad driver file. If your network driver is outdated or corrupted, the Netgear router won’t work correctly and you will experience connectivity issues. Now, if the scenario is applicable, you can update your wireless network drivers and then check if the issue is resolved.
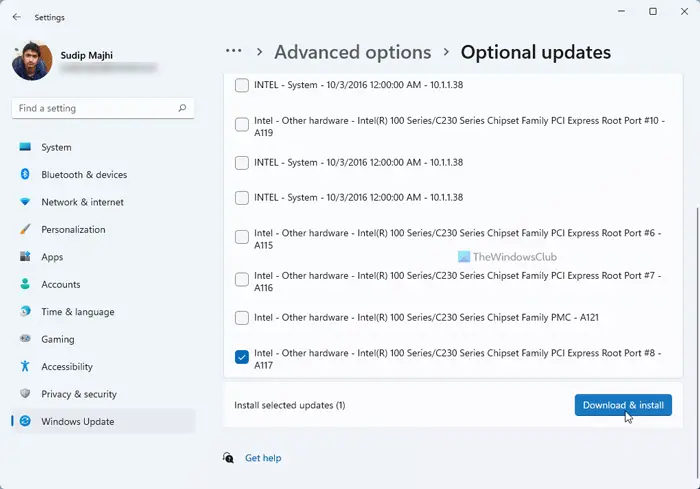
To update network drivers, press Win+I to launch Settings and move to the Windows Update > Advanced options > Optional updates section. Here, you will see a list of pending optional updates that also include wireless network drivers and other device driver updates. Tick the checkbox associated with your wireless network driver and click on the Download & install button to start downloading driver updates. Your PC will be needed to be rebooted to complete the installation. Do that and see if Netgear wireless router is working correctly now.
If the problem remains the same even after updating the network driver or the drivers are already up-to-date, your drivers are likely faulty and corrupted. In that case, you can perform a clean install of your network drivers to fix the issue. Uninstall and then reinstall the wireless network driver using Device Manager and see if it helps.
Also, make sure your Windows OS is updated to its latest version.
5] Try changing your WiFi name or password
The next thing you can try to fix the problem is to change your network’s name or password or both and then try connecting to the internet. Here are the steps you can follow to do so:
First, open the router’s login page using its URL (routerlogin.net) or IP address. After that, enter your username and password to log in.
After that, move to the Wireless section and find the Name (SSID) field. You can enter the new network name in this field.
Next, if you want to change your password, enter the new password in the Password (Network Key) box. Finally, press the Apply button to save changes.
See if your Netgear wireless router is being detected by Windows and you can see the new network name under available WiFi on your PC. If so, try connecting to the network by entering the new network key/password and see if the problem is resolved.
Read: Red Cross X on WiFi or Network Icon in Windows.
6] Connect your Netgear router using an ethernet cable
If the wireless internet connection is not working on your PC, you can try setting up an ethernet connection by connecting your Netgear router to your PC using an ethernet cable. Wired connections are more reliable than wireless ones. So, you can use this workaround and see if it helps.
7] Change the Wi-Fi channel
If your Netgear WiFi is slow or laggy, try changing the wireless channel from your router’s settings page and check if it works. Although Netgear routers have pre-configured wireless channels that go well for most users, you can try changing the settings if you experience a lost connection issue, slow data transfers, laggy internet, and other WiFi issues.
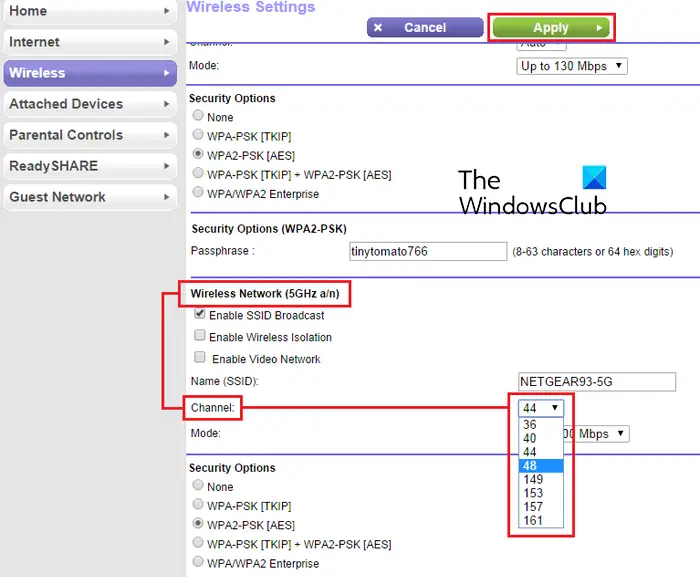
You can follow the below steps to modify the wireless channel on your Netgear router on a PC:
- First, open your router’s login page and sign in with your username and password.
- Now, go to the Wireless section and choose your region from the respective menu.
- Next, move to the wireless band for which you want to tweak the channel, e.g., 5GHz (a/n/ac/ax).
- After that, navigate to the Channel menu and choose a channel number.
- Finally, press the Apply button and the settings will be changed.
Now, check if your Netgear WiFi router is working fine or not.
See: How to change NAT type on Windows PC?
8] Change your DNS server
DNS server inconsistencies can also lead to this issue. Hence, you can try changing your default DNS server and setting up a public DNS server that is more reliable such as Google DNS. Here’s how you can do that:
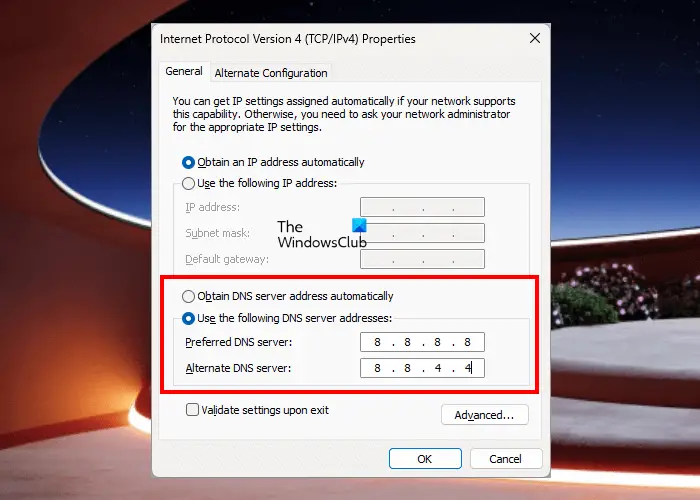
- Firstly, evoke the Run command box using the Windows + R hotkey and enter ncpa.cpl in its Open box to launch the Network Connections window.
- Next, right-click on your network connection, and from the appeared context menu, choose the Properties option.
- Now, click on the Internet Protocol Version 4 (TCP/IPv4) option and press the Properties button.
- After that, select the Use the following DNS server addresses radio button and enter the following addresses:
Preferred DNS server: 8.8.8.8
Alternate DNS server: 8.8.4.4
- Finally, press the Apply > OK button and restart your PC to check if the issue is resolved.
Read: Internet or WiFi gets disconnected after Sleep in Windows.
9] Factory reset your Netgear router

If none of the above solutions worked for you, try resetting your Netgear router to its default configurations. It might be corrupted settings that need a reset causing the issue. So, perform a router reset and check if the problem is resolved. Do note that doing so will erase all your customized router settings and reset them to their original values.
To reset your Netgear router, first, make sure that your router is plugged in and turned on. Now, locate the Restore Factory Settings or Reset button on the back of your router. After that, press the button using a paper clip and hold it for seven seconds. And then, release the button. Your router will be reset now. When done, you can use the default network ID and password written on your router’s back to connect to the internet.
10] Contact Netgear Support
If everything else failed, you can contact the official support team of Netgear or your Internet Service Provider (ISP). They should be able to assist you in how you can fix the issue.
If the problem remains the same, you can change the antenna if it is faulty or replace or repair your modem.
Now read: Wireless Network not detected when using VPN on Windows.
Why is my WiFi router on but not working?
WiFi issues on Windows could be caused due to outdated device drivers, bad router cache, loose cable connections, corrupted router settings, and some other reasons. However, Windows lets you fix these issues by running the Network & internet troubleshooter. If that doesn’t work, update your network drivers, power cycle your network, or contact your ISP.