
Here’s a possible scenario. Your system received a kernel update but somehow things are not working as smoothly as previously.
You realized that if you boot into the older kernel (yes, you can downgrade kernel), things are back to normal.
That makes you happy with a little inconvenience. You have to manually select the older kernel at each boot.
The new kernel update in Linux Mint wasn’t working as expected. Booting into the older kernel ‘fixed’ the issues but choosing the older kernel at each boot was a problem.
Removing the new kernel (while using the older kernel) is not a good idea because the new kernel will be installed and used with the next system updates.
So, I suggested booting into the older Linux kernel by default. How to do that? That’s what I am going to show you in this tutorial.
Booting into the older Linux kernel
If you are not already familiar with it, your Linux distribution keeps more than one Linux kernel installed on your system. Don’t believe me? List the installed kernels in Ubuntu with this command:
apt list --installed | grep linux-imageWhen you get a new kernel version with the system updates, your system automatically chooses to boot into the latest available kernel.
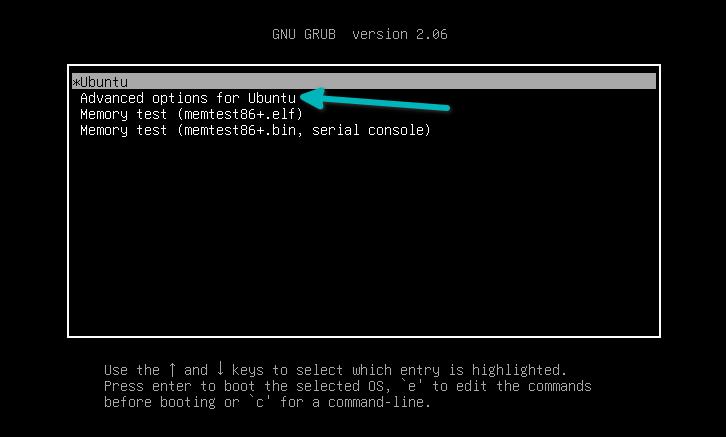
From the grub screen, you can go to the Advanced options (or older Linux versions):
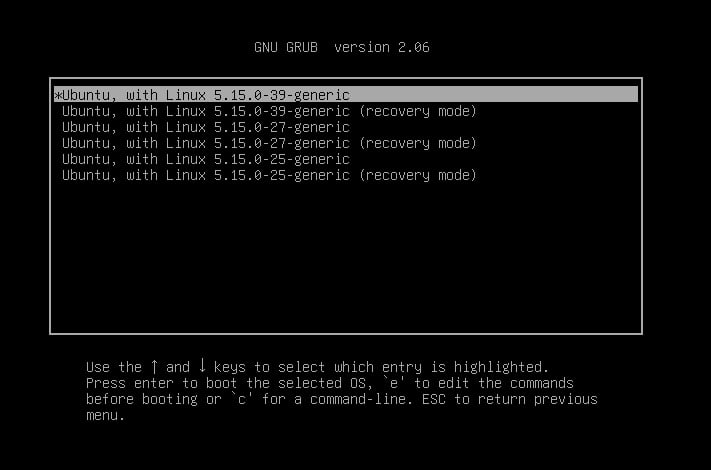
Here, you can see the available kernels to boot into. Choose the older one (without recovery option):
You won’t notice any visual difference. Your files and applications remain the same.
Now that you have booted into the older kernel, it’s time to make your system boot into it automatically.
Making older kernel the default
If you are comfortable with Linux terminal and commands, you can modify the /etc/default/grub file and add the following lines to it:
GRUB_DEFAULT=saved
GRUB_SAVEDEFAULT=true
And then update grub with:
sudo update-grubWhat you did here is to tell your system to save the currently used entry as the default entry for the future runs of GRUB.
However, not everyone is okay with the command line and hence I’ll focus on a GUI tool called Grub Customizer.
Installing Grub Customizer
Use the official PPA to install Grub Customizer in Ubuntu-based distributions:
sudo add-apt-repository ppa:danielrichter2007/grub-customizer
sudo apt update
sudo apt install grub-customizer
For other distributions, please use your package manager to install this tool.
Using Grub Customizer to change the default boot entry
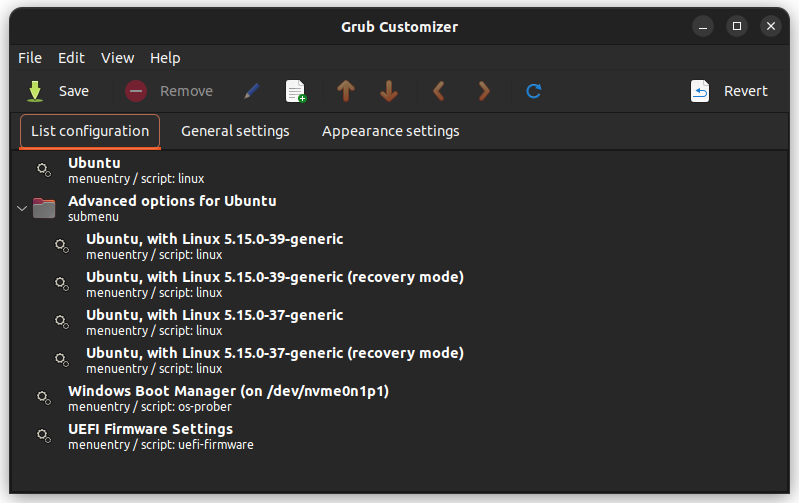
When you run Grub Customizer, it shows the available boot entries.
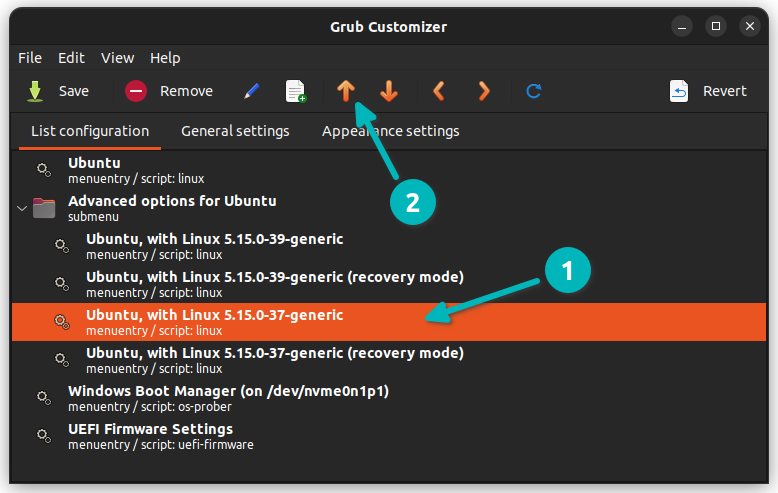
You have two options here.
Option1: Select the desired kernel entry and use the arrow (displayed on the top menu) to move it up the order.
Option2: Make the ‘previously booted entry’ the ‘default entry’.
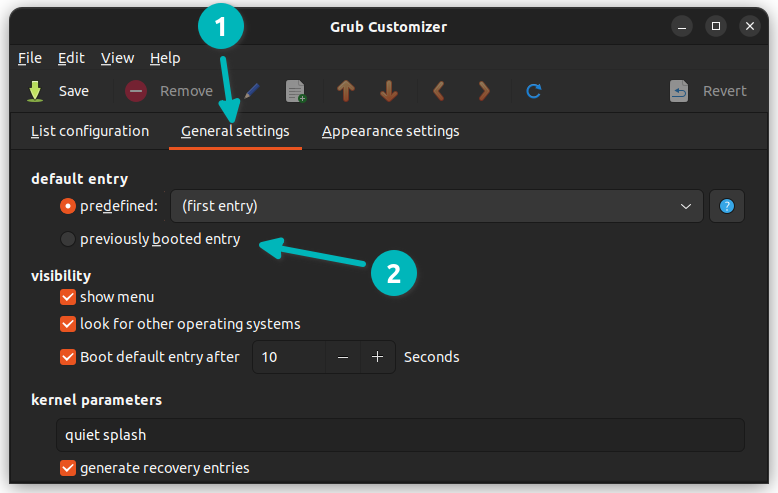
I would suggest going with option 2 because it will work even when there are new kernel updates.
This way you downgrade the kernel in Ubuntu or other distributions without even removing the older kernel version.
Do note that most distributions like Ubuntu only keep two kernel versions at a time. So eventually, your preferred older kernel will be removed with the newer kernel versions.
This neat trick helped me when I installed the latest Linux kernel in Ubuntu and it had issues with my audio system for some reason.
Whatever may be the reason, you now know how to boot into an older kernel automatically.