
As great as Windows is, sometimes you run into issues and they’re not always easy to identify or solve. Safe Mode is a useful feature for these situations. It lets you boot into Windows without loading all the apps and drivers on your PC. This can help pinpoint the cause of certain issues, or make it easier to make changes if your PC is unusable in normal mode. Most Windows versions have Safe Mode, and Windows 11 is no different. In this guide, we’ll show you how to boot into Safe Mode in Windows 11.
There are three different types of Safe Mode in Windows 11, which can be helpful in specific situations. The basic Safe Mode gets you the usual Windows UI but with most programs removed and some drivers disabled. That includes networking drivers, so you can’t access the internet. There’s also a Safe Mode with networking if you need internet access to troubleshoot your PC. Finally, there’s Safe Mode with Command Prompt, which disables the Windows UI and lets you solve problems with the command line.
How to boot into Safe Mode in Windows 11
Recent Windows versions made it a lot easier to boot into Safe Mode. Thanks to the new advanced startup options, you can more easily make your way to these settings without having to press a key at the right time when your computer is starting. That’s helpful because previously what key you had to press could depend on what laptop you had, so it could be different if you had a Surface PC compared to an HP one. This method, on the other hand, works for every Windows 11 PC.
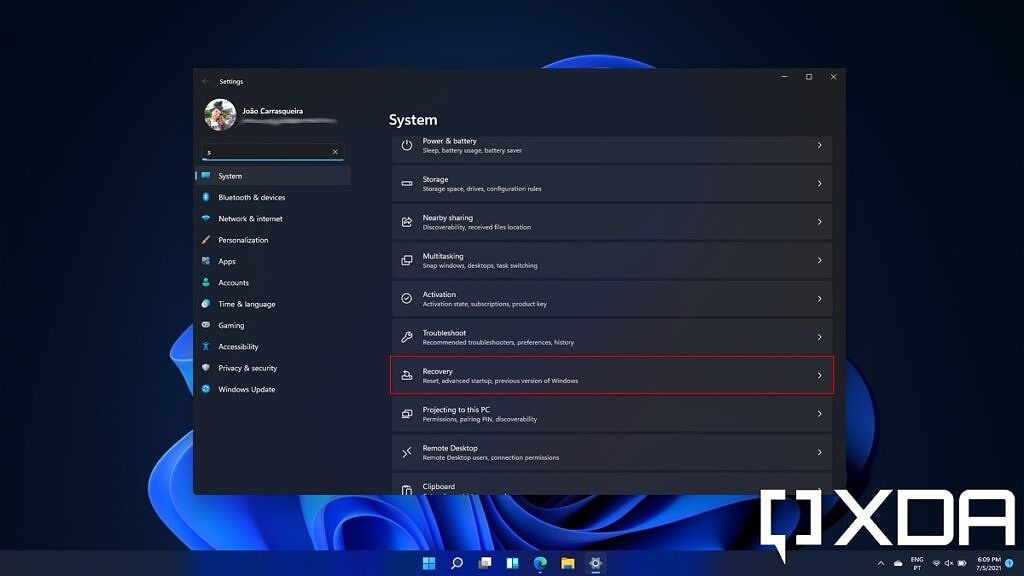
- Open the Settings app and click Recovery on the main page.
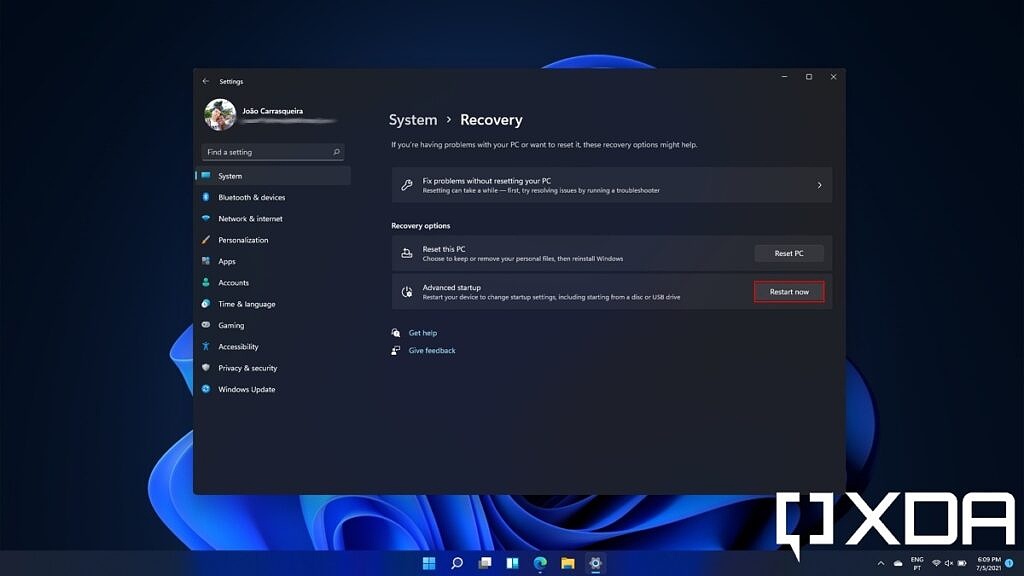
- Next to Advanced startup, click Restart now.
- You’ll be taken to the Windows UEFI environment. Click Troubleshoot.
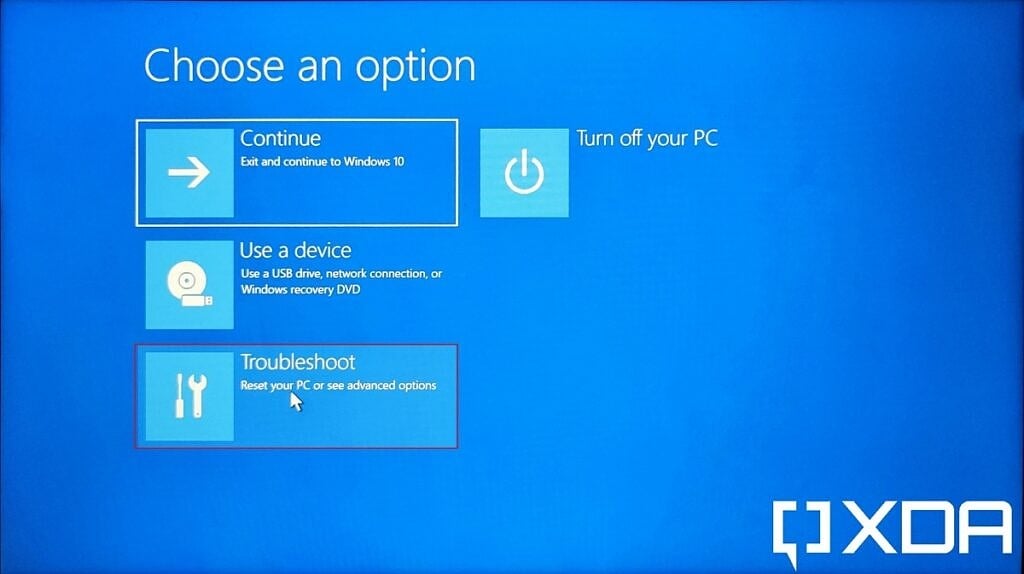
- In the next page, choose Advanced options.

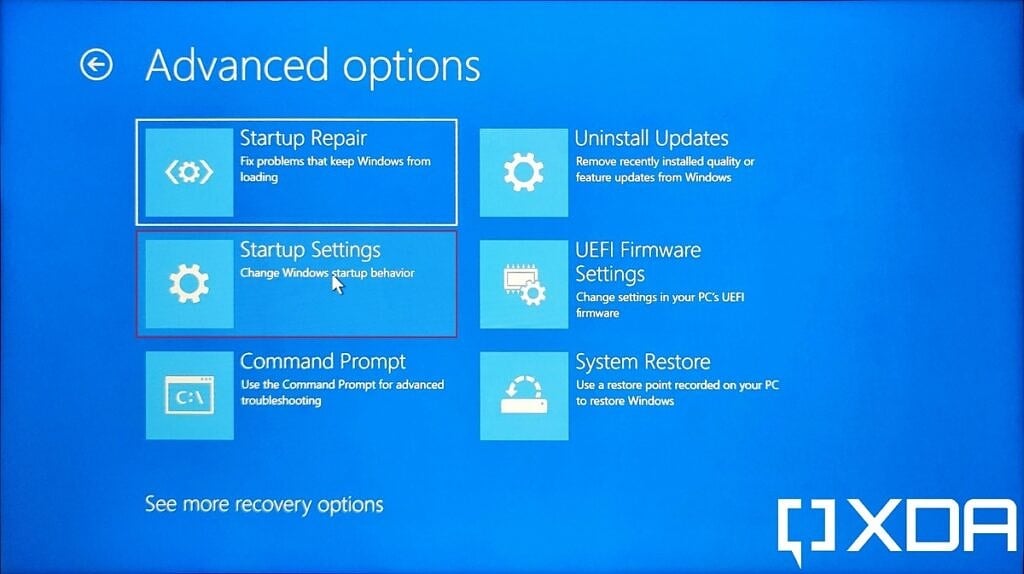
- Then click Startup Settings, and restart.
- You’ll have a few startup options you can choose with your keyboard. Pressing 4 will boot into normal Safe Mode, 5 will give you Safe Mode with networking, and 6 will get you Safe Mode with Command Prompt. Your PC will restart as soon as you press one of the keys.

- Your PC will now boot into Safe Mode, and you can log in as normal.
One thing that may be worth noting with this procedure is you’ll only boot into Safe Mode the first time after all of this. Once you restart, you’ll be back to normal. If you think you may need to boot into Safe Mode multiple times, you can also set your PC to always boot into Safe Mode.
How to make Safe Mode the default
If you want to always boot into Safe Mode until you actively disable it, you can follow these steps:
- Press the Windows key and type msconfig. Press Enter to open the System Configuration tool.

- Switch to the Boot tab, and enable Safe boot.
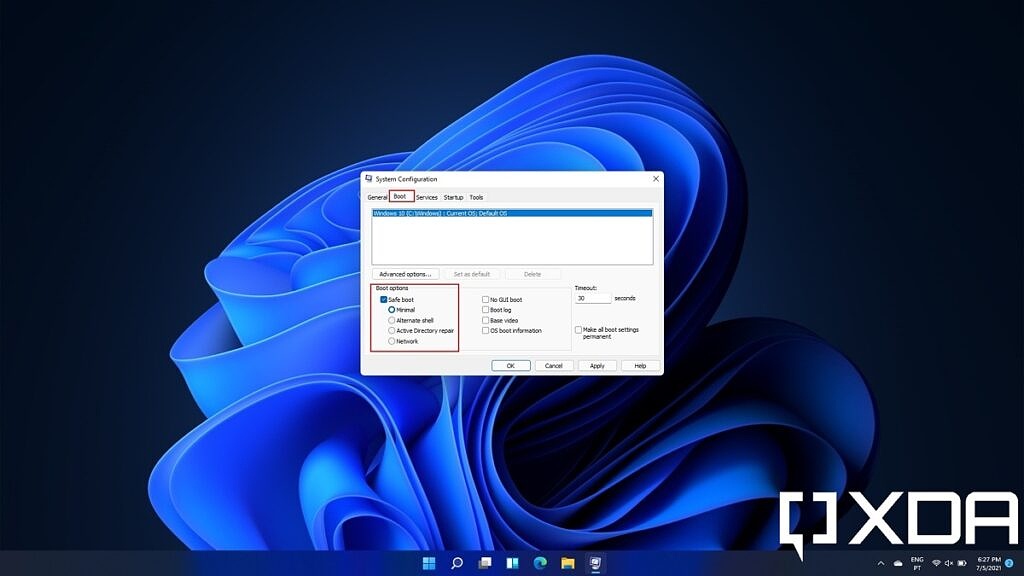
- The three options below let you choose between different Safe Mode variants. Minimal is standard Safe Mode, while Alternate Shell gives you the Command prompt interface.
- Click OK and restart the PC. You’ll now boot into Safe Mode after every restart. You can run the System Configuration tool again to go back to the normal Windows mode by disabling Safe Mode.
That’s all you need to know about booting Windows 11 into Safe Mode. As we’ve mentioned, this can be an important tool to troubleshoot issues with your PC, but it’s not something you want to be doing all the time. Still, it’s always useful to know for when you do need it.
The post How to boot Windows 11 into Safe Mode for troubleshooting appeared first on xda-developers.