
If you’re creating different styles of Microsoft Word documents, you may want to set a new default font. Here’s how.
How many Microsoft Word documents have you seen using Calibri or Times New Roman? Too many to count, we’d surmise. Unfortunately, most users don’t stray past the default formatting when they’re creating Word documents. That’s a shame, as there’s actually a wide range of fonts to choose from to fit with the style of document you’re creating.
If you have a font that you use regularly, having to change the font every time can be a pain. The good news is that it’s possible to change the default font in Word. This allows you to use the same font in every new Microsoft Word documents you create.
If you want to change the default font in Word, here’s what you’ll need to do.
Changing the Default Font in Microsoft Word
In order to change the default font, you need to open your Word document and access the Font dialog box. There are two ways to do this.
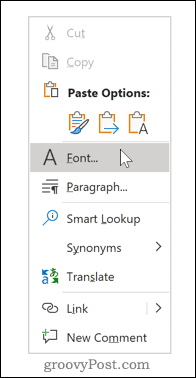
To start, open your document, right-click in the text body (it doesn’t matter where), and hit the Font option.
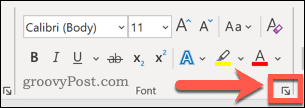
Alternatively, you can click the Font dialog box launcher.
To do this, select the Home tab on the ribbon bar, then click the small arrow icon in the bottom right-hand corner of the Font section.
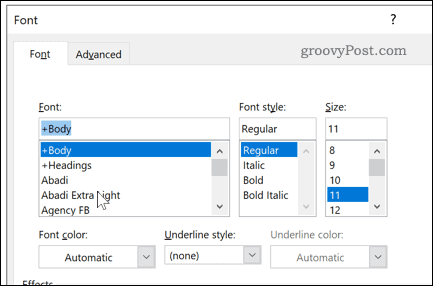
Once the dialog box opens, you can choose the font that you wish to use. As well as changing the font itself, you can also change the style, size, and color of your text.
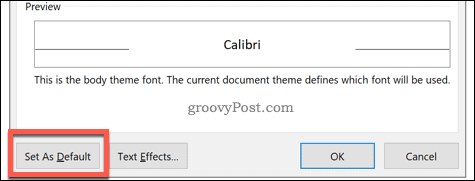
Once you have made your changes, click the Set as Default button. This will set the font you’ve selected as the default font for all future documents.
Select All documents based on the Normal template.
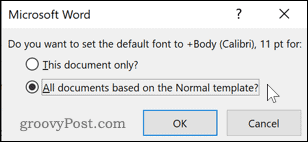
Click OK to confirm your choice. Once confirmed, your chosen font should appear as the new, default font in any new document.
Editing or Deleting the Word Template File
If changing the default Word font hasn’t worked, it’s possible that you don’t have permission to edit the Normal.dotm template file. This is the template that Word uses to create new documents that contain your default formatting settings.
Access to this file can be restricted in some workplace environments for security reasons. You may need to unlock access to edit or delete the file. Deleting the template file will restore your default Word formatting settings, should you wish to do so.
You can start by closing your Word document, opening Windows File Explorer, typing Normal.dotm in the search field, and hitting enter.
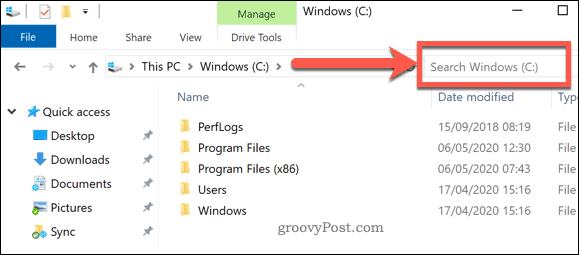
Windows will search for the file.
To allow for changes to your Word template file, right-click the Normal file and press Properties.
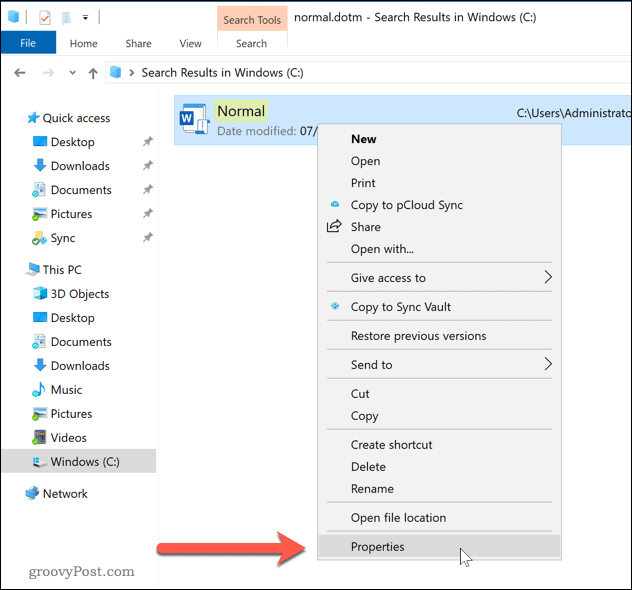
In the Normal properties window, make sure the General tab is selected.
Uncheck the Read-only checkbox in the Attributes section to allow changes to the file to be made.
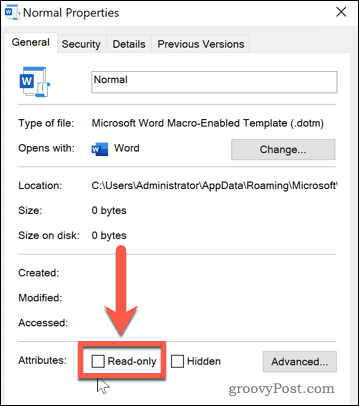
Save the settings at this point—you should now be able to make changes to your default Word formatting settings. If you are unable to change these settings, consult with your IT administrator for access.
If you want to reset your Word template file, you can delete it entirely. This will force Word to recreate the Normal.dotm template document using its preset default settings, including the default font choice.
Once you’ve searched for the file, right-click and press Delete to remove it.
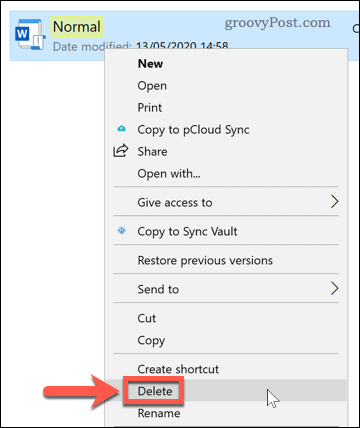
With the file removed, open Microsoft Word again to regenerate the template and restore your default settings.
Regular Microsoft Word Users
If you use Word regularly, setting a default font can save you a lot of time. You can take this a step further by creating your own Microsoft Office templates with the formatting you’re looking to use on a regular basis. You can set your own fonts, page sizes, and more.
If you’re happy with your Word document, then consider how you can create more advanced documents. Adding a table of contents, for instance, could help you to organize much longer documents.
