
Widely used PDF files capture text and images nearly exactly as they display in the application that created them. The format is designed to store text and both bitmapped and vector images, with the text available for searching, copying, and even editing in the proper app. That “copying” part can lead to oceans of trouble when people try to remove details from a PDF before distribution—redacting details from a court case, government documents, or even inter-company communications—by drawing black boxes over the words and paragraphs they want to protect.
In most cases, however, drawing boxes over text in a PDF just adds the boxes—it doesn’t delete the text underneath them. Someone who would like to extract the text beneath the obfuscation can just drag over the area with a selection tool or select Select All on the page. The copied text can then be pasted into a word processor or text editor.
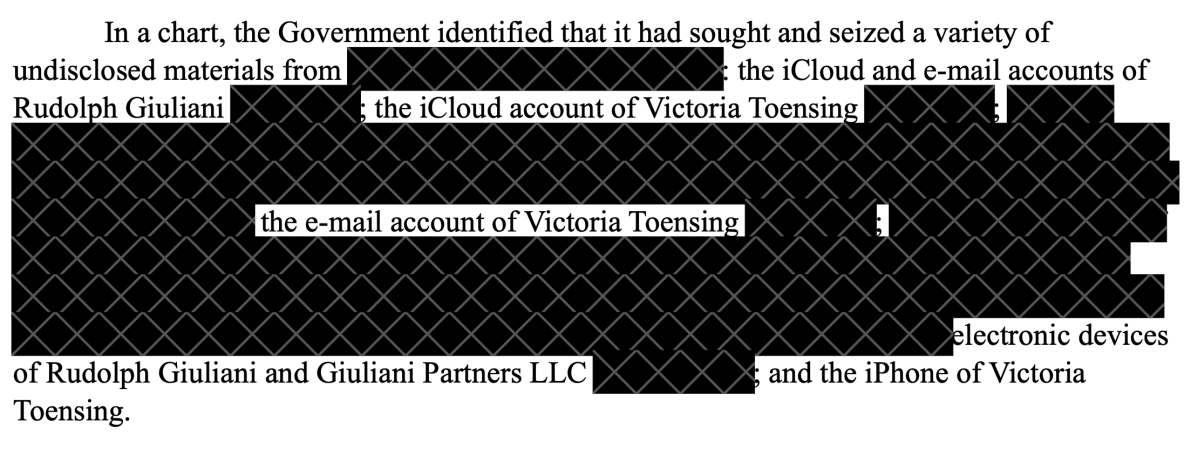
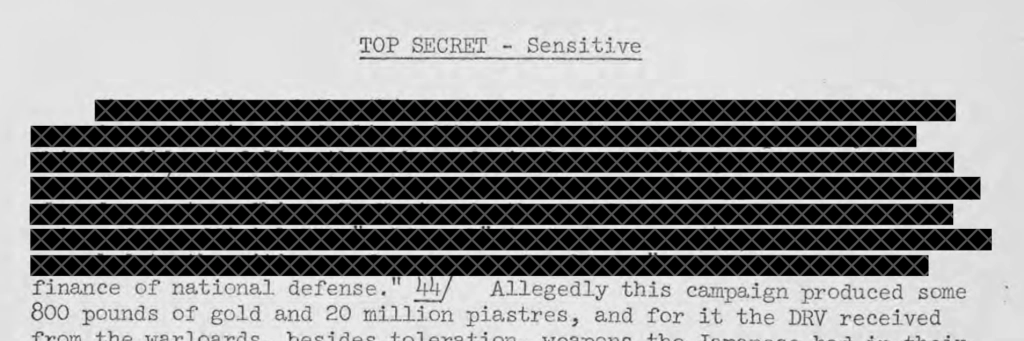
These black-box overlays have led to embarrassing and legally disastrous situations stretching back a couple of decades. Three notable incidents: the accidental release of information in a filing in 2011 in long-running litigation between Apple and Samsung, the disclosure of key allegations in the Paul Manafort prosecution in 2019 alleging his connection to a purported Russian-connected associate—and on May 25, 2021, when information was revealed when CNN performed a copy and paste in filings by attorneys for a defendant in a case that involves former New York City mayor Rudolph Giuliani.
If you need to remove text from a document from a PDF before sending it—and you can’t simply eliminate information in the source document used to create the PDF and make a fresh one—you can turn to several apps to snip secret, legally prohibited, embarrassing, or proprietary text out of a PDF before sending it on its way.
How to redact in macOS Preview
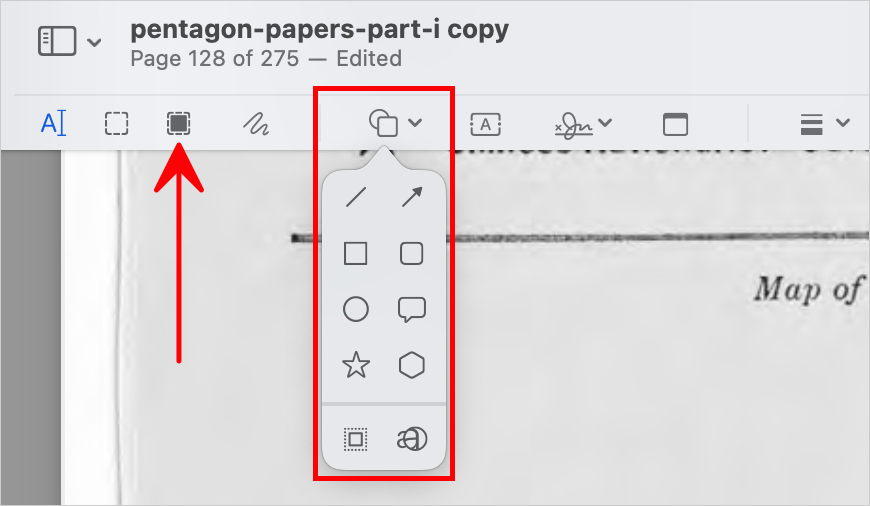
Apple added a redaction tool and redaction-related warnings in Preview for macOS Big Sur in 2020. You’ll notice this whenever you select certain tools in Preview’s Markup toolbar. Display that editing toolbar by choosing View > Show Markup Toolbar or clicking the Markup icon at the right-hand side of the standard toolbar, just to the left of the Search field.
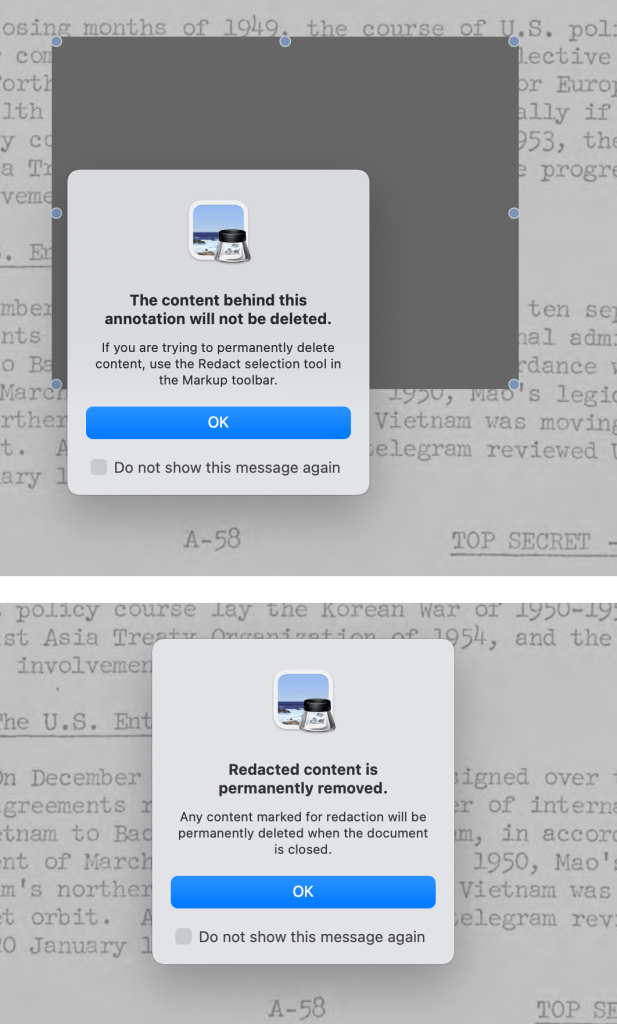
Click any item in the Shapes menu, including a line of the thickness in the sixth or seventh heaviest options, and Preview prompts you with a warning: “The content behind this annotation will not be deleted.” It advises you to use the new Redact selection tool.
Select that tool and you receive a different alert: “Redacted content is permanently removed.” Apple further explains: “Any content marked for redaction will be permanently deleted when the document is closed.” (With both those warnings, you can check a box so you never see them again, too.)
Drag with the Redact selection tool across the text, and a black bar with an X’d pattern appears. Save, and that text can’t be recovered from that version of the file, although you can use File > Revert To to select a previous version before redaction or pull a copy out of a Time Machine backup.
Apple added more powerful PDF tools in macOS Sonoma, including intelligent form detection and enhanced AutoFill, so Preview may be all you need for PDF editing.
How to redact in Adobe Acrobat
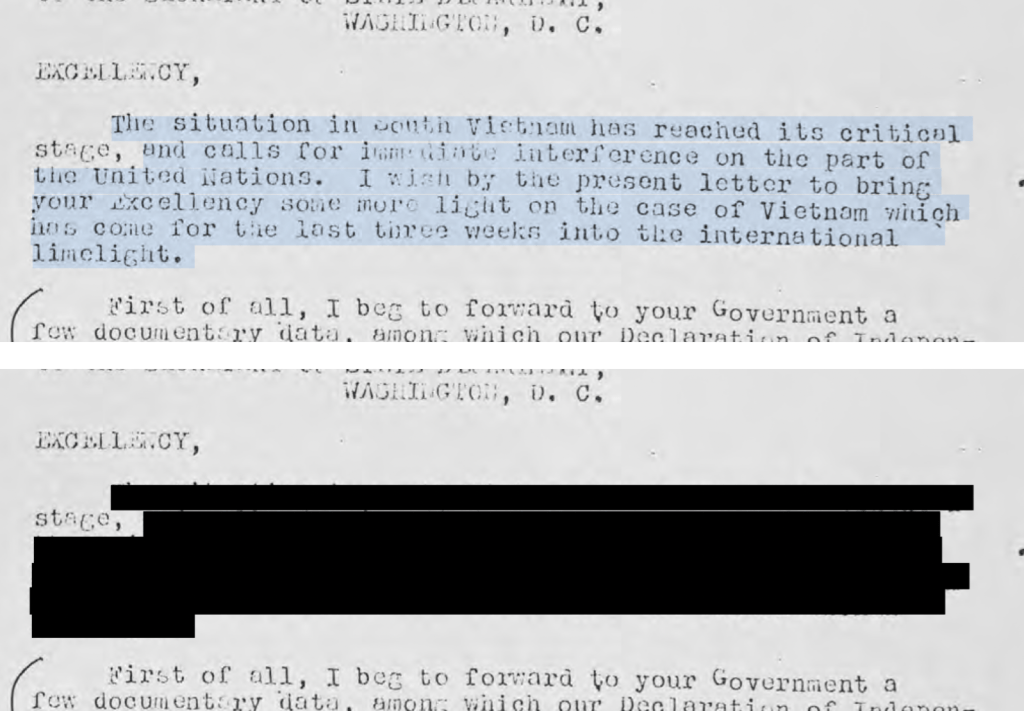
Adobe Acrobat Pro DC (part of a Creative Cloud subscription) also offers a redaction tool, available via Edit > Redact Text & Images. Adobe warns you about how the feature works when you first select it.
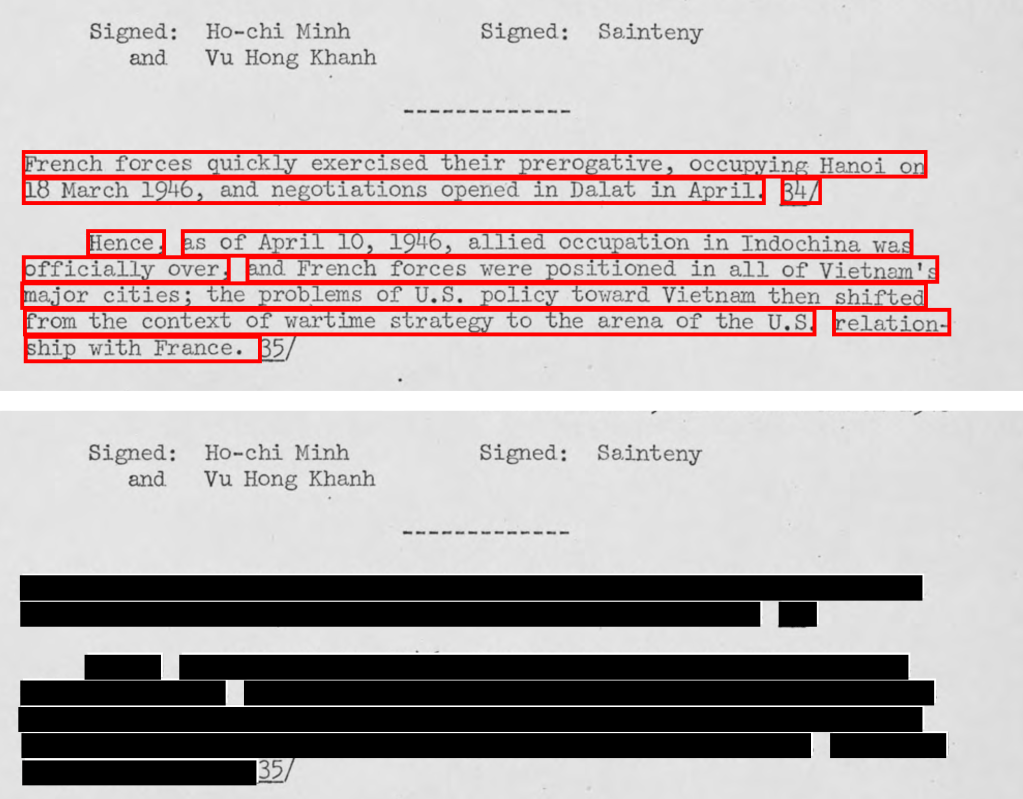
With the tool selected, you can drag over both text and images, which Acrobat marks up with a red outline to indicate it will be completely removed when the file is saved. Acrobat provides a new file name with the word “Redacted” inserted when you next manually save the file to prevent overwriting your original.
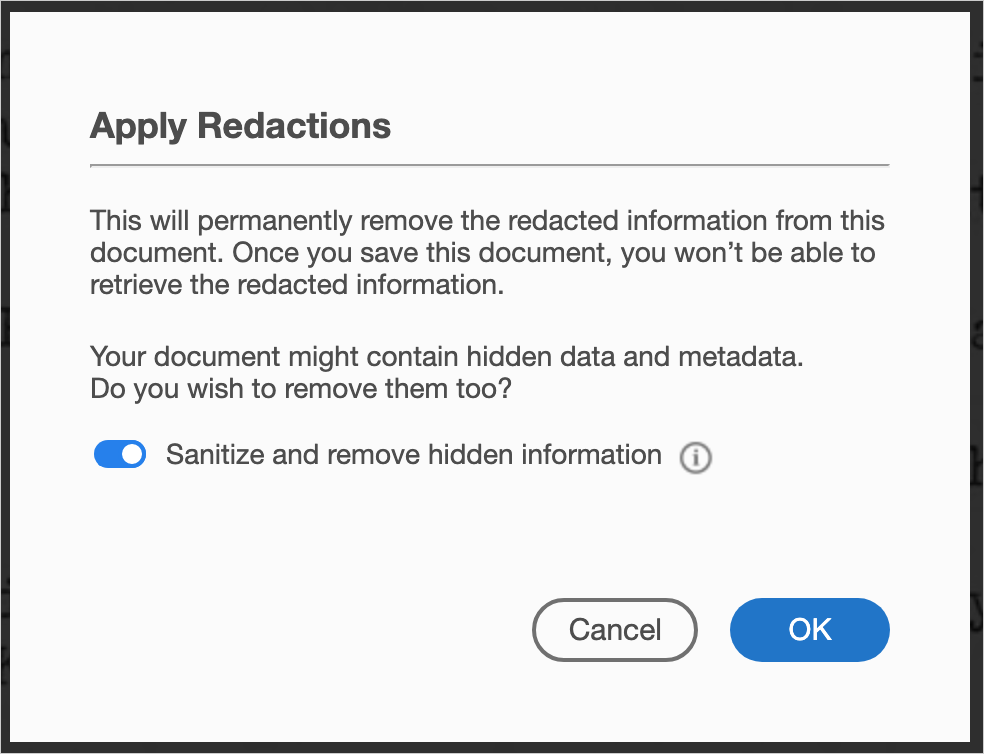
Acrobat also includes a “sanitize” feature, which removes a variety of hidden metadata, such as the document’s author, which is often pre-filled with the name of the person using the computer or app; invisible but searchable text layers that are created when a document is imported as a set of images, and the text is algorithmically identified; and any text that runs off a page or is entirely off in the margins and can’t be selected.
Sanitization is automatically selected when you apply redaction, though you can flip a switch to disable it. You separately sanitize without redacting any visible text by clicking Sanitize Document.
Redact with PDFPen and PDFPen Pro
Smile’s PDFPen and PDFPen Pro feature redaction, too. You can either select text via Tools > Select Text or a region via Tools > Select Rectangle Tool and then apply Format > Redact Text – Block. The resulting image has been scrubbed.
Both versions also offer Format > Redact Text – Erase, which removes the text leaving areas of white behind instead of black. This may be preferable in documents with a white background.