In this tutorial, we will guide you through the steps of installing Bludit on a Debian 9 VPS.
 Bludit is a flexible and easy to use open-source flat-file CMS written in PHP which doesn’t need a database server to function. This of course makes installation more simple, and makes the overall usage of this CMS more lightweight when compared to database-oriented CMS platforms such as WordPress. Let’s begin with the installation.
Prerequisites
- A Debian 9 VPS. For the purposes of this tutorial we will use our SSD 1 VPS hosting plan.
- SSH access with root privileges (or access to an admin account with sudo privileges)
- PHP 5.6 or greater with mbstring, GD, DOM, XML and JSON PHP extensions enabled.
- Apache web server 2.0 or higher compiled with mod_rewrite module. Alternatively, we can use PHP Built-in web server, Nginx or Lighttpd as a web server.
Step 1: Log in via SSH and Update the System
Log in to your Debian 9 VPS using SSH.
ssh [email protected]IP_Address -p Port_number
Don’t forget to replace “IP_Address” and “Port_number” with the proper values for your VPS.
You can check whether you have the proper Debian version installed on your server with the following command:
# lsb_release -a
You should get this output:
Distributor ID: Debian
Description: Debian GNU/Linux 9.9 (Stretch)
Release: 9.9
Codename: stretch
Then, run the following command to make sure that all installed OS packages on the server are updated to their latest available versions:
apt update
apt upgrade
You can also enable automatic updates on your Debian 9 VPS by following one of our previous tutorials.
With that out of the way, we can start installing the packages that we’ll need.
Step 2: Apache Web Server Installation
To install the Apache web server, run the following command:
apt-get install apache2
After the installation is complete, you should enable Apache to start automatically upon server boot with:
systemctl enable apache2
You can also check the status of your Apache service with the following command:
systemctl status apache2
Output:
● apache2.service - The Apache HTTP Server
   Loaded: loaded (/lib/systemd/system/apache2.service; disabled; vendor preset: enabled)
   Active: active (running) since Wed 2019-08-07 03:34:36 CDT; 3min 47s ago
 Main PID: 429 (apache2)
   CGroup: /system.slice/apache2.service
           ├─429 /usr/sbin/apache2 -k start
           └─430 /usr/sbin/apache2 -k start
Step 3: Install PHP 7.2
PHP 7.2 is not available through the Debian built-in repositories, so we will use a third-party repo instead. If you already have PHP 7.2, you can skip this step. PHP 7.2 can be installed using a third-party repo. To do this, install the ‘software-properties-common’ and few other packages packages:
apt-get install software-properties-common apt-transport-https lsb-release ca-certificates
Then, add the repo and update your sources:
wget -O /etc/apt/trusted.gpg.d/php.gpg https://packages.sury.org/php/apt.gpg
echo "deb https://packages.sury.org/php/ $(lsb_release -sc) main" > /etc/apt/sources.list.d/php.list
apt-get update
Finally, install PHP 7.2 using the following command:
apt-get install php7.2 php7.2-cli php7.2-common
To install the required PHP 7.2 extensions, you can use the following command:
apt-get install php7.2-mbstring php7.2-gd php7.2-json php7.2-intl php7.2-curl php7.2-xml php7.2-zip
Use the following command to check the PHP version currently installed on your server:
php -v
You should receive the following output:
PHP 7.2.20-2+0~20190725.24+debian9~1.gbp69697c (cli) (built: Jul 25 2019 11:53:56) ( NTS )
Copyright (c) 1997-2018 The PHP Group
Zend Engine v3.2.0, Copyright (c) 1998-2018 Zend Technologies
with Zend OPcache v7.2.20-2+0~20190725.24+debian9~1.gbp69697c, Copyright (c) 1999-2018, by Zend Technologies
Disable PHP 7.0 in Apache and enable PHP 7.2:
a2dismod php7.0
a2enmod php7.2
Also, enable the mod_rewrite module in Apache if it is not enabled yet:
a2enmod rewrite
Then, restart Apache2 for the changes to take effect:
service apache2 restart
Step 4: Download and Install Bludit
At the time of writing this tutorial, the latest stable version is Bludit. Download the latest stable version of Bludit to the /var/www/html directory. The download link has been added to the command for you:
cd /var/www/html
wget https://s3.amazonaws.com/bludit-s3/bludit-builds/bludit_latest.zip
Extract the ‘bludit_latest.zip’ archive and rename the directory:
unzip bludit_latest.zip
Create a .htaccess file in the /var/www/html/bludit/ directory (you can use your preferred text editor if you like):
vi /var/www/html/bludit/.htaccess
Add the following text to the file:
AddDefaultCharset UTF-8

<IfModule mod_rewrite.c>

# Enable rewrite rules
RewriteEngine on

# Deny direct access to .txt files
RewriteRule ^bl-content/(.*).txt$ - [R=404,L]

# All URL process by index.php
RewriteCond %{REQUEST_FILENAME} !-f
RewriteRule ^(.*) index.php [PT,L]

</IfModule>
Save and close the file.
Change the permissions of the files and directories inside the /var/www/html/bludit directory so the web server user (www-data) can access them:
chown www-data: -R /var/www/html/bludit
Step 5: Create an Apache Configuration File
Now we will configure the Apache configuration file for Bludit. This file will control how users access Bludit content. Run the following commands to create a new configuration file called bludit.conf
nano /etc/apache2/sites-available/bludit.conf
Then copy and paste the content below into the file and save it. Replace the yourdomain.com string with your own domain name and directory root location.
<VirtualHost *:80>
ServerAdmin [email protected]yourdomain.com
DocumentRoot /var/www/html/bludit/
ServerName yourdomain.com
ServerAlias www.yourdomain.com

<Directory /var/www/html/bludit/>
Options FollowSymlinks
AllowOverride All
Require all granted
</Directory>

ErrorLog ${APACHE_LOG_DIR}/yourdomain.com_error.log
CustomLog ${APACHE_LOG_DIR}/yourdomain.com_access.log combined

</VirtualHost>
Save the file and enable the newly created Apache configuration and restart Apache for the changes to take effect.
a2ensite bludit
systemctl restart apache2
Step 6: Access Bludit
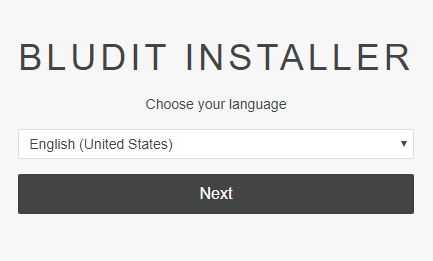
Now, open your web browser and type the URL of your server. In our case, the URL is http://yourdomain.com/. You will be redirected to the Bludit installer page (http://yourdomain.com/install.php):

Select the Language during the install process, then create a new administrator user account.
That’s it. If you followed all of the instructions properly now you should be able to access the administrator back-end at http://yourdomain.com/ admin and start using Bludit.
