Installing Windows 11 on Raspberry Pi4 enables many possibilities as it allows you to have a mini PC at your disposal. However, Microsoft tends to have strict protocols that we need to bypass to install Windows on an ARM computer. In this post, we will see how you can bypass these restrictions and install Windows 11 on Raspberry Pi4.
Install Windows 11 on Raspberry Pi4
Before we go ahead and install Windows 11 on your Raspberry Pi, it is crucial to meet the following system requirements.
- You need 4GB (minimum) or 8GB (recommended) Pi versions of Raspberry Pi 4.
- An external flash drive or SSD (recommended) to install Windows 11 onto. It should at least have 64 GB of space.
- An SD Card is required if you wish to install Windows 11 on your Raspberry Pi device directly.
- Hardware such as keyboard, mouse, and an HDMI monitor.
- A decent network connection.
Once you have met these requirements, it’s time to update it to the latest firmware. If you are already done with updating your firmware, skip to the installation part of the article. To update Raspberry Pi4 firmware, open Terminal and run the following commands one by one.
sudo apt update
sudo apt full-upgrade
sudo shutdown - r
Once your Raspberry Pi4 is updated, follow any of the mentioned methods to install the latest version of the tool.
Let’s get started.
1] Directly from the Raspberry Pi OS

One of the most efficient ways to install Windows 11 to the device is directly installing from the Raspberry Pi OS. To do the same, follow the steps mentioned below.
- First of all, we need to install Windows on Raspberry Pi. For that, open Terminal and execute the following command.
git clone https://github.com/Botspot/wor-flasher
- Execute the command mentioned below to run WoR Flash.
~/wor-flasher/install-wor-gui.sh
- Give Y for confirmation when asked.
- Windows for Raspberry screen will pop up, select Windows 11 and Pi4/400 in their respective sections.
- Click on Next.
- Keep your USB connected, select the appropriate language, and proceed.
- You then have to select the correct location where you want to install Windows.
- Finally, click on Flash.
- Make sure that the device is running and USB is connected as it will take some time to flash.
- Once done, turn off the Raspberry Pi 4 and remove the card that has Raspberry Pi OS.
- Make sure that the USB drive containing flashed Windows 11 is connected and start the device.
- You will see Windows Installation Wizard, just follow the on-screen instructions to complete the process.
This will install Windows 11 on your Raspberry Pi4 device.
2] Using a Windows computer

If you are not familiar with Raspberry OS and want to install Windows 11 using your Windows computer, we can do something for you. Follow the steps mentioned below to install Windows 11 on a Raspberry Pi using a Windows computer.
- Open any browser and visit uupdump.net.
- In the search bar, enter “Windows 11 dump” and hit Enter.
- Click on the version you want to install, select the Language on the next page, and click on Next.
- Select the correct Windows version and click on Next.
- In the Download Method, select Download and Convert to ISO, and finally, click on Create download package.
- This will download the ZIP file, which you need to extra and run the uup_download_windows.cmd script as an administrator. It will download all the Windows components and create a Windows 11 ARM ISO file.
- Go to worproject.com and download the WoR image ZIP file.
- Extra the ZIP file and run WoR.exe as an admin.
- You will be asked to select language, do that, and click on Next.
- Select the USB drive that you are flashing Windows 11 into in the Storage drive section and then make the Device type Raspberry Pi 4.
- In the Select image section, choose the Windows 11 ARM ISO file we just created in the UUPdump script folder. Click Next once other fields are automatically filled.
- In the Select the drivers page, check the option, Use the latest package available on the server, accept terms and condition, and click on Next.
- In the Select the UEFI firmware page, select Use the latest firmware available on the server and click Next once it is downloaded.
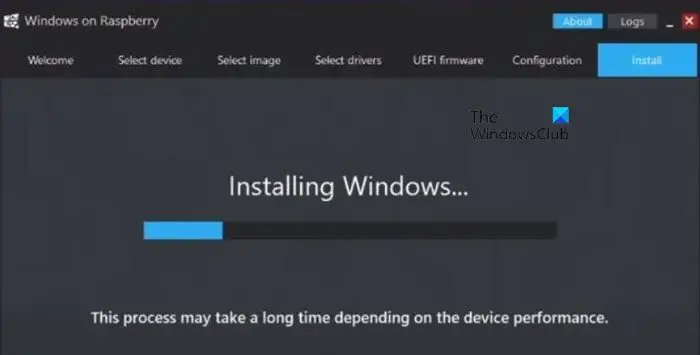
- Move to the installation page, and there, click on Install to trigger the installation process.
- Once it’s done, connect the USB drive and it will boot up the Windows 11 installation wizard, you can just follow the on-screen instructions and you will be good to go.
That’s it!
How to install Windows 10 in Raspberry Pi 4?
The process of installing Windows 10 on Raspberry Pi 4 is similar to that of Windows 10. All you need to do is, instead of downloading Windows 11 ARM, download Windows 10 ARM and then install it.
Can Windows 11 run on Raspberry Pi 4?
The ARM version of Windows 11 can run pretty smoothly on Raspberry Pi 4 after the introduction of WoR-flasher. It is a free tool that allows us to install Windows 11 on Raspberry Pi 4. Follow the aforementioned steps to know how to do the same.
