
You must know how to make deleted files unrecoverable on iPhone if you’re gifting, selling, or sending your phone for repair services. Cybersecurity experts and hackers can easily recover most of the deleted files on your device.
Improve your data privacy and security by trying the following methods to make deleted file recovery challenging or impossible:
How To Make Deleted Files Unrecoverable on iPhone
Solution 01: Empty the Recently Deleted Folder
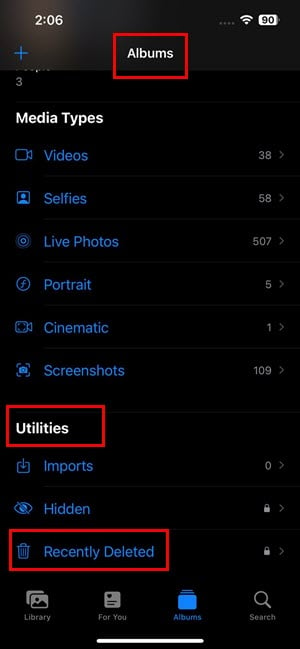
App With Recently Deleted Folder
- Open the Photos app.
- You should be on the Albums tab.
- Scroll down to the bottom to find Utilities.
- There, you should see Recently Deleted.
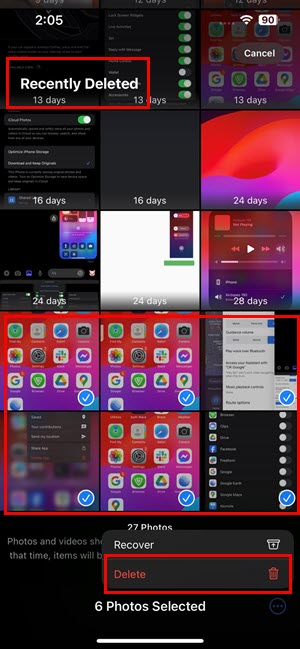
- Tap Select on the top.
- Select all the files in this folder.
- Tap on the three dots menu at the bottom right corner of the screen.
- Select Delete to permanently delete the photos.
Apps Without Recently Deleted Folder
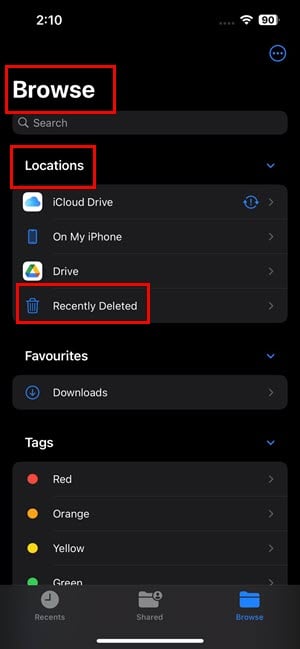
- Open the App Library on your iPhone.
- Tap on the Browse app inside the Productivity & Finance app group.
- Tap the Browse tab.
- Below the Locations, tap the Recently Deleted option.
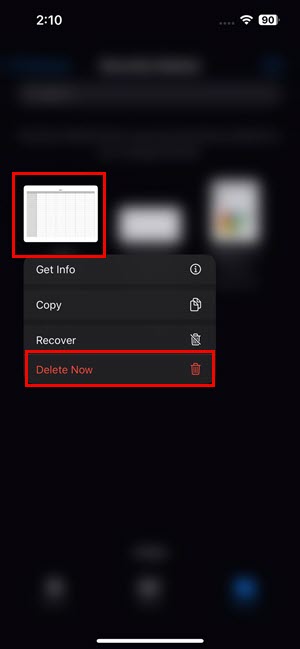
- To remove a document, long tap on a file.
- Choose Delete Now.
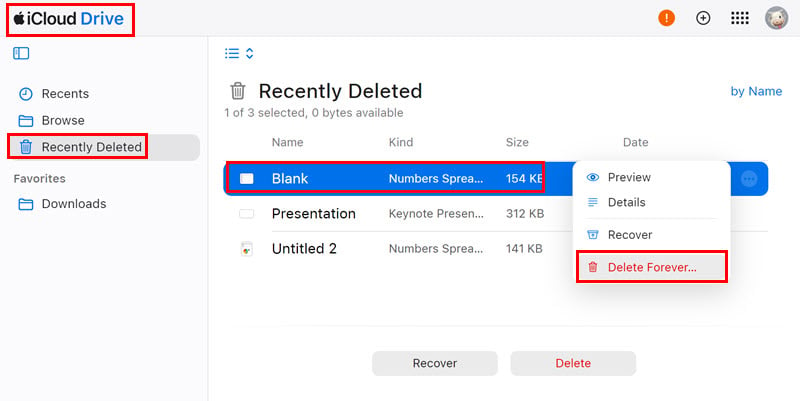
Solution 02: Delete Files From iCloud Drive
- Log in to your iCloud account.
- Click on the Drive app.
- Select the Recently Deleted tab on the left-side navigation panel.
- Now, remove these files by clicking the three dots and choosing Delete Forever.
Solution 03: Record Large Videos
After deleting sensitive files from your iPhone, you need to replace the blank space with random files, like videos.
Suppose, you deleted some private files totaling 5 GB. So, your goal is to record a video on the iPhone that’s 5 GB or more.
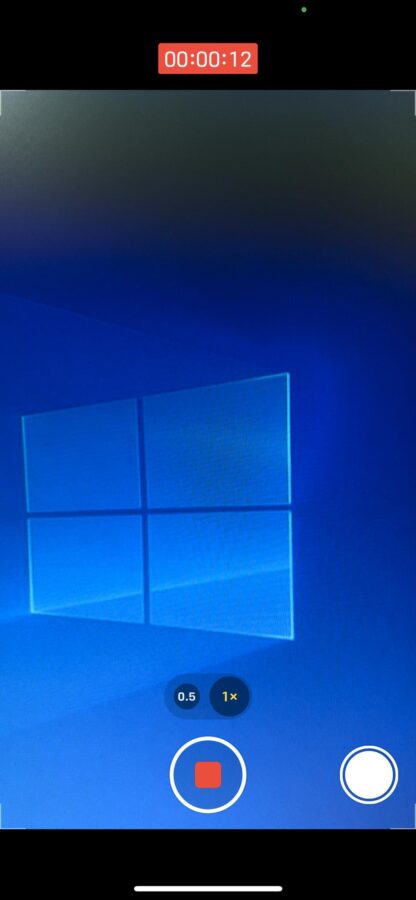
This video will occupy the free space left by the sensitive documents or photos you deleted earlier.
So, it’ll become tough for data recovery apps to recover the old files.
Solution 04: Create a Dummy File
Alternatively, you can create dummy files to occupy the free space left by sensitive data.
On Windows
- Open the Command Prompt on your Windows PC with admin rights / elevated rights.
- Copy and paste the following CMD command: cd C:/
- Hit Enter.
- Now, execute this code: fsutil file createnew dummy 5000000000
- You’ll find the dummy file in the selected drive.

- Transfer that to the iPhone through iTunes.
On Mac
- Launch the Terminal app on your Mac.
- Execute the following command into the Terminal tool: dd if=/dev/zero of=testfile bs=1g count=5
- You should find the dummy file on the Mac Home Screen.
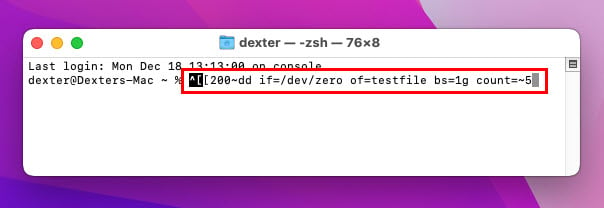
- Use the Finder to transfer the file to your iPhone.
Solution 05: iOS Factory Data Reset
- Launch the Settings app from the Home Screen or App Library.
- Scroll down to find the General settings menu and tap on that.
- Scroll down to the bottom and tap on the Transfer or Reset iPhone menu.
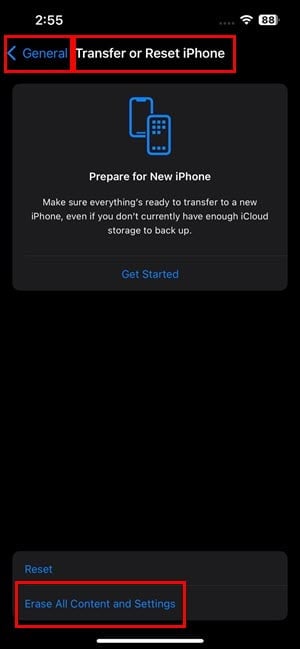
- On the next screen of settings, tap Erase All Content and Settings.
- Tap Continue on the Erase This iPhone screen.
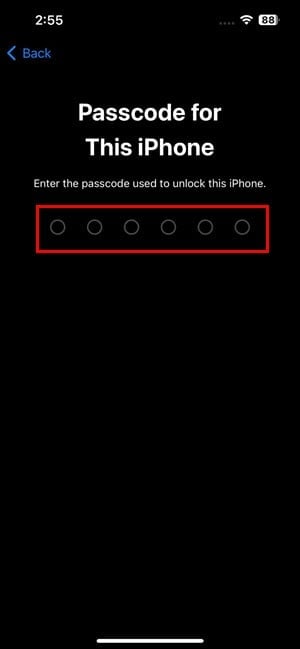
- Authenticate the process with your iPhone Passcode or PIN.
Note: This method deletes all content so perform it only after backing up your device data. On some iPhone models or iOS editions, you can find Erase All Content and Settings in Settings > General > Transfer or Reset iPhone > Reset.
Solution 06: Using a Third-Party iOS App on Your Phone
You can download and subscribe to various iOS file-cleaning apps to delete files. Some of these offer iOS data eraser features for deep cleaning of the device data. For example, you can check out the Cleanup: Phone Storage Cleaner.
Most of these apps including Cleanup don’t offer free trials without signing up.
You can cancel the subscription within the trial period to avoid getting charged. If you like the app, you can continue with the subscription.
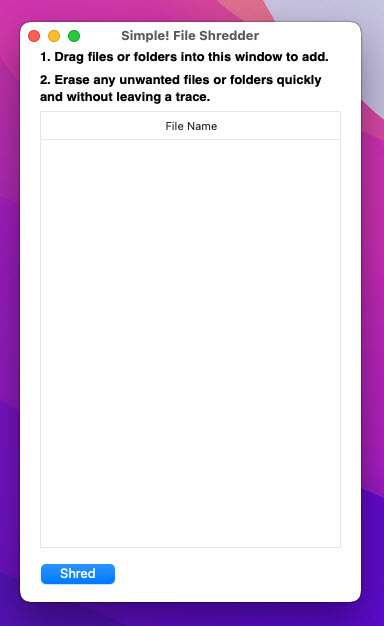
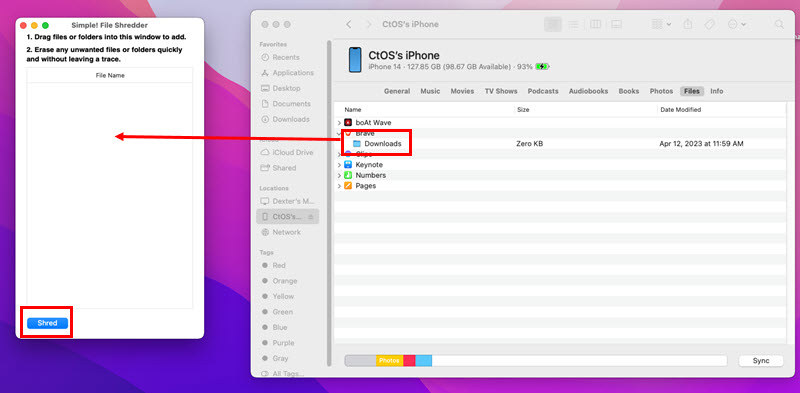
Solution 07: Use a Free File Shredder on a Mac
- Download and install the Simple! File Shredder from Mac App Store.
- Connect your iPhone to the Mac using a USB cable.
- Open Finder or iTunes to access files on the iPhone.
- Click on the Locations menu on the left-side navigation panel of Finder.
- There, click on your iPhone.
- The iPhone window will open on the Finder app.
- By default, you should see the General tab.
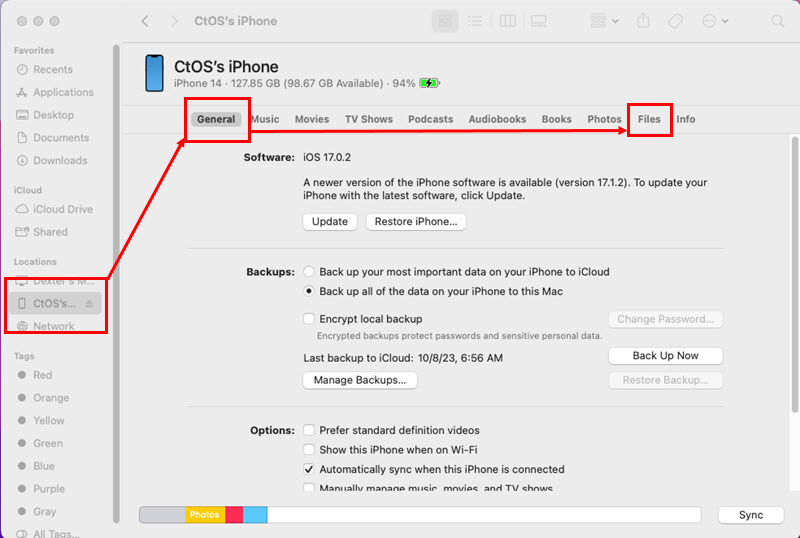
- Go to the Files tab.
- Expand any app in the list.
- Now, open the Simple! File Shredder app on Mac.
- Drag and drop a file from the iPhone > Files tab to the file shredding app.
- Click the Shred button.
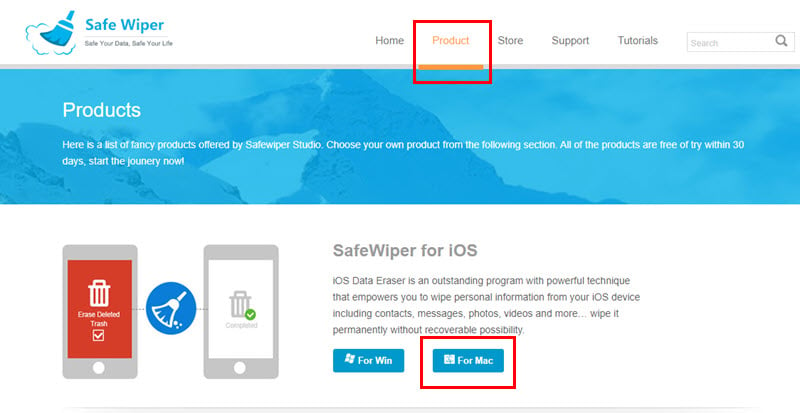
Solution 08: Using a Third-Party iOS Eraser for Mac or PC
Alternatively, try SafeWiper for iOS.
- Download and install the app on your Mac or Windows PC.
- Connect your iPhone using USB-C or Lightning cable.
- Authorize or Trust the device as indicated on the app and device screen.
- Click on the Erase Deleted Files menu on the left-side navigation panel of Safe Wiper.
- Now, click on the Scan button.
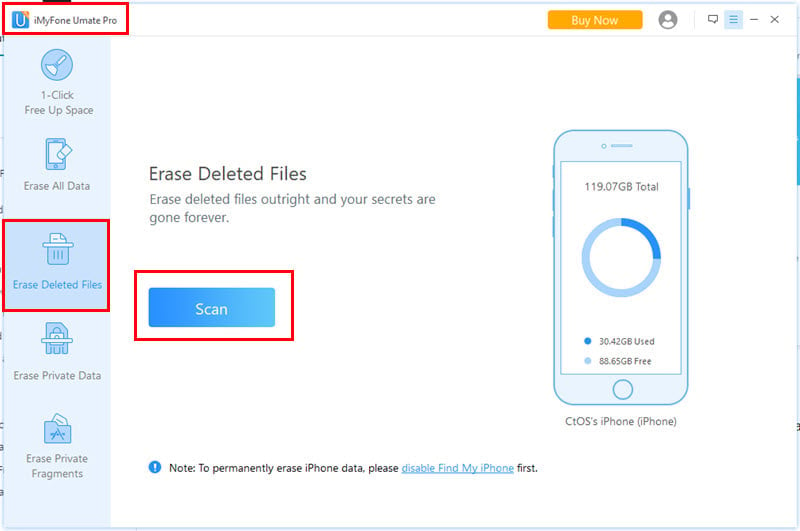
- Authenticate the scanning process with the iPhone PIN.
- Once the scanning is done, click on the Erase Now button.
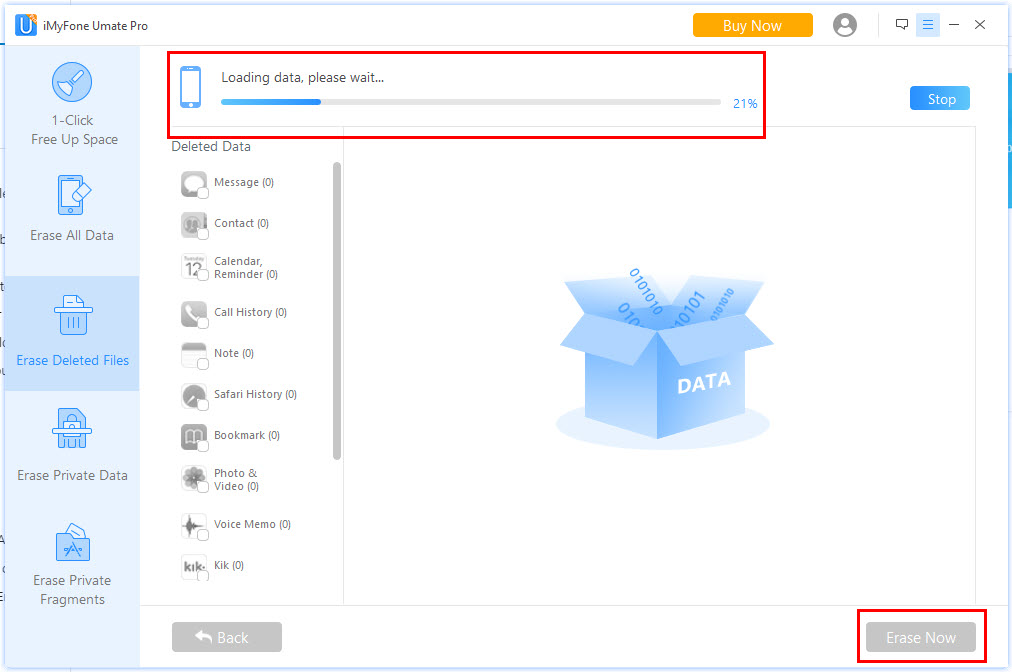
- Hold on until the Safe Wiper app deletes all files from your iPhone.
Related readings:
- 9 Best iPhone Password Unlocker Software [Free & Premium]
- iPhone Security Lockout? 4 Ways To Unlock or Bypass It!
Summary
So, now you know how to make deleted files unrecoverable on iPhone.
Choose any of the methods mentioned above to protect your data privacy and security. If you follow the manual methods, you must try more than once to make file recovery nearly impossible.
Alternatively, you can try third-party apps to automate the process.