
When Apple announced the iPhone 12 Pro, it introduced a powerful new camera feature: ProRAW. This feature is available now for all Pro and Pro Max models, starting with the 12 series and newer, and if you’re picky about your photo processing, it’s definitely a feature worth checking out. ProRAW combines the benefits of computational photography with traditional RAW image capture — kind of the best of both worlds.
So why would you want to use ProRAW in the first place? Let’s go back to digital photography school. A traditional RAW image file preserves a lot more of the information that’s captured when you take a photo. Usually, your iPhone’s camera will process that data into a HEIF or JPEG image, throwing away the extra data and essentially “baking in” things like white balance, exposure, and detail in shadows and highlights. It’s a smaller, more manageable file, but it’s not as flexible for post-processing. A RAW image retains more of that original information and provides a lot more flexibility for photo editing.
Shooting RAW images on a traditional camera is generally preferred if you want to get the very most out of your images, but it’s not quite the same story on a phone camera. That’s because a traditional RAW file is just one frame, and it misses out on computational photography benefits like multi-frame processing. A smartphone camera JPEG image might be less flexible, but it can include more detail and less noise than a smartphone photo processed from a RAW image that didn’t benefit from those computational techniques.
Enter ProRAW. A ProRAW image combines all those benefits into one file. Multi-frame processing is applied, and the final image that’s saved preserves much more information than a standard iPhone JPEG.
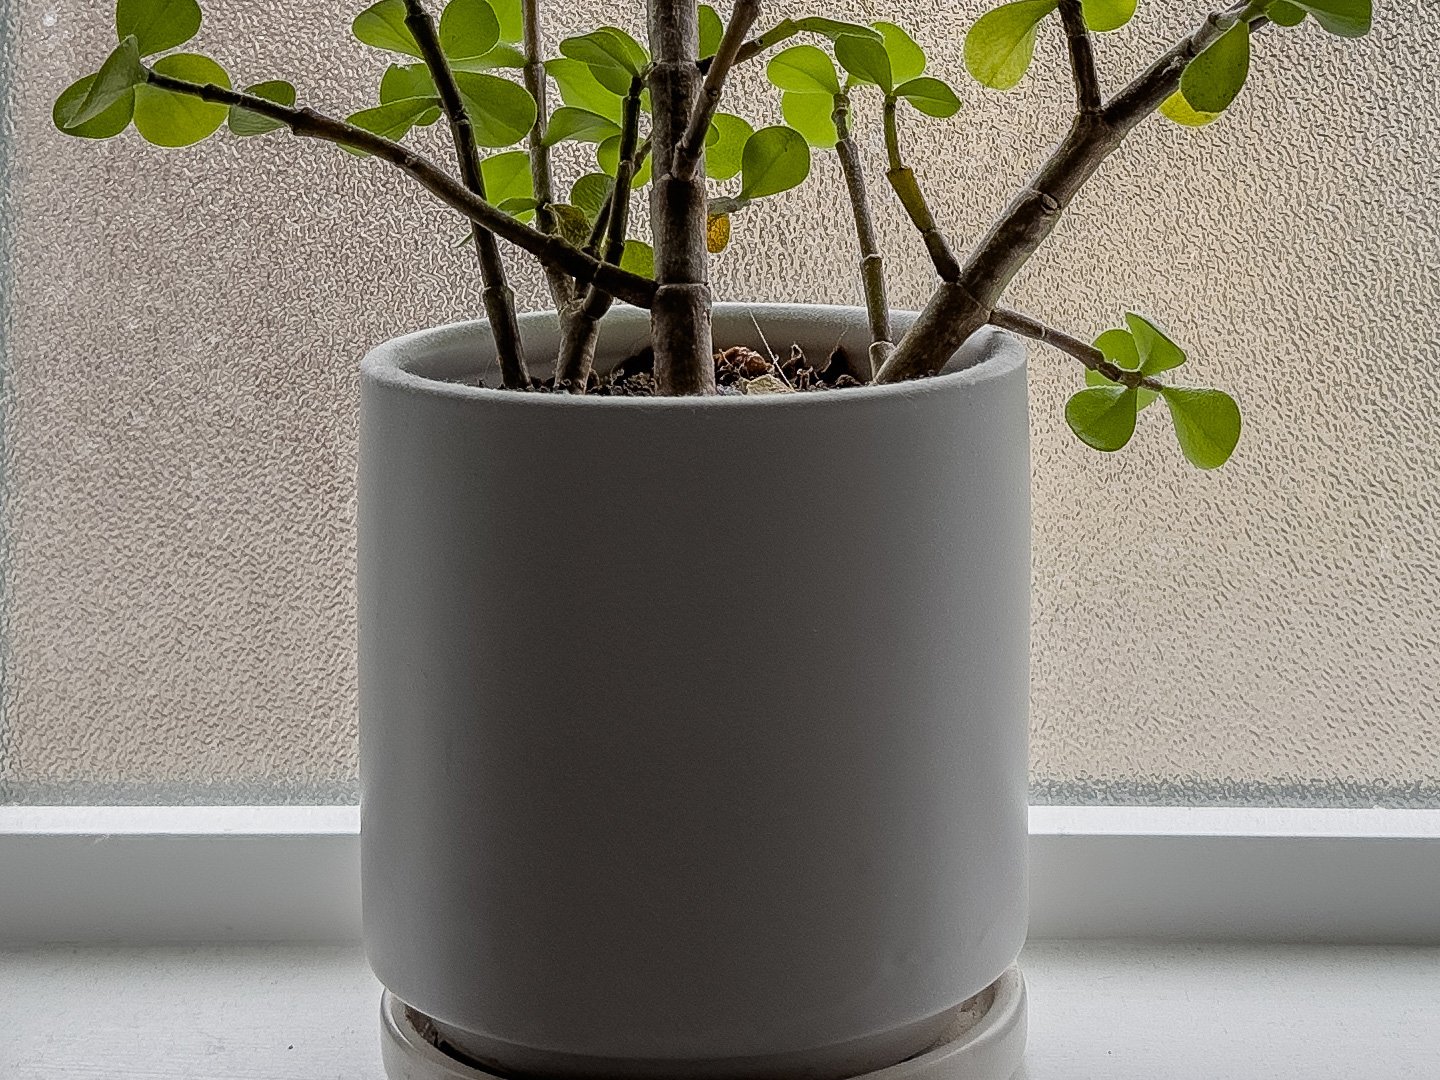
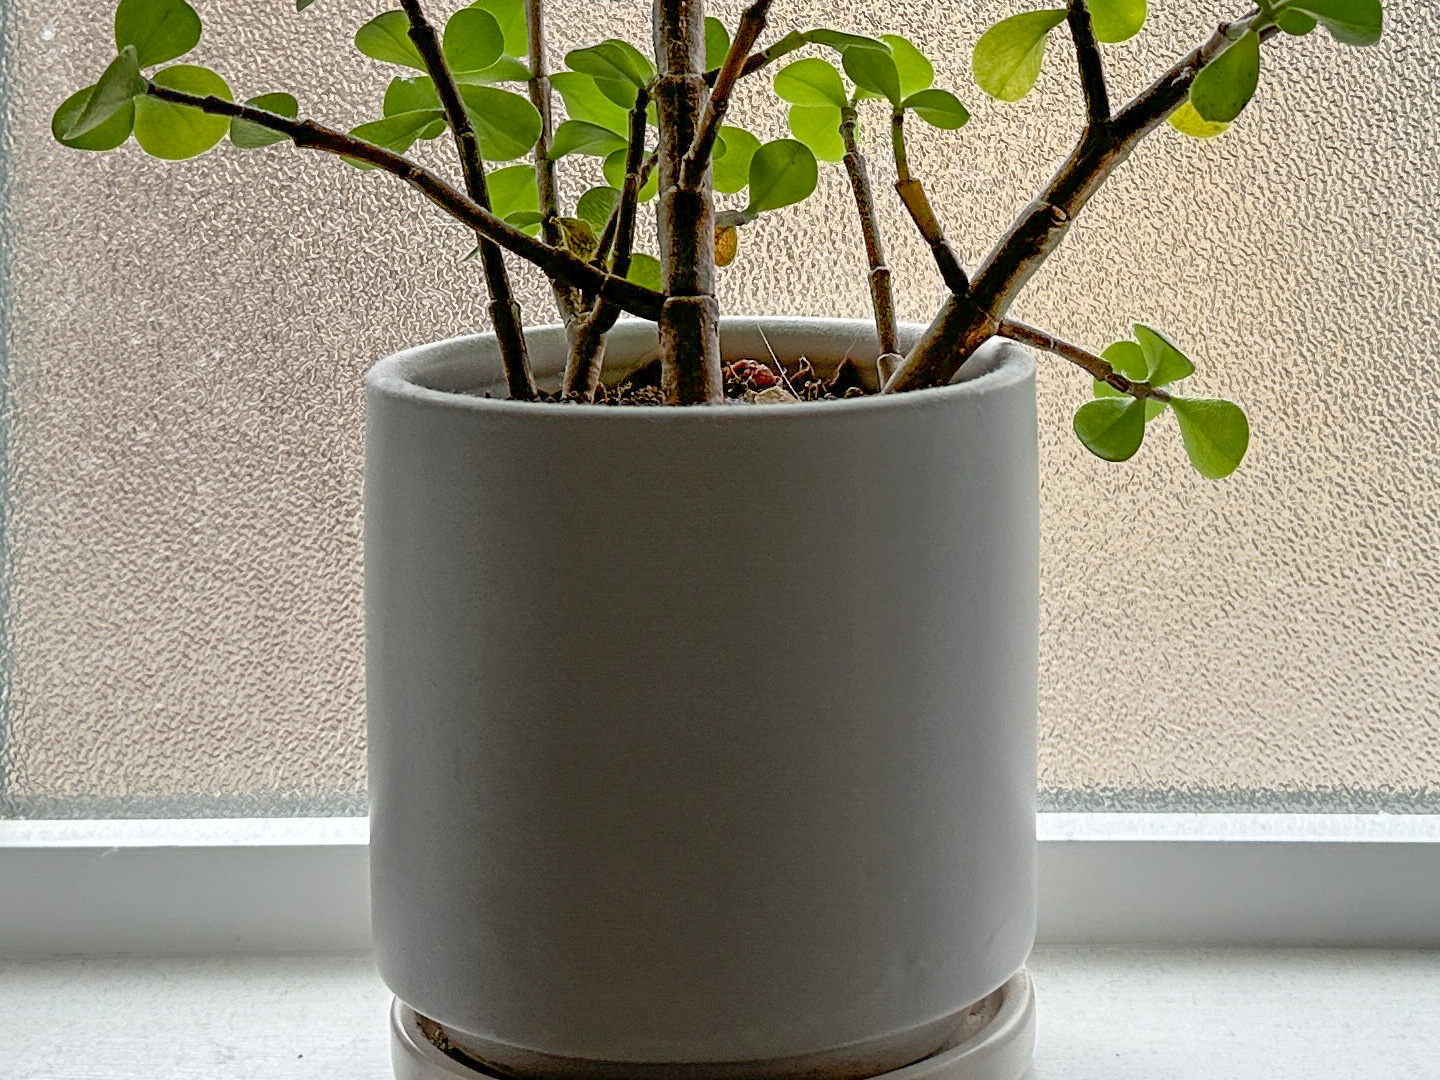
A ProRAW file (left) and a standard JPEG (right) cropped at 100 percent. I’ve boosted the shadows +100 on both files in Adobe Camera RAW. There’s a smoother gradation in the shadow areas on the ProRAW file; on the JPEG, there’s banding and noise visible.
It’s great if you want to process your own photos rather than leave it up to your phone, but there’s a downside: much bigger image files. High-res ProRAW files average around 75MB compared to around 3 or 4MB for a standard JPEG. That means about 14 ProRAW files will add up to around 1GB, so it wouldn’t take long to fill up your phone storage with massive image files.
That considered, ProRAW is a powerful tool to use in specific situations — you just need to know how to enable it on your phone. Here’s how to do it. (I followed these steps on an iPhone 14 Pro running iOS 16.3.1.)
- Go to Settings > Camera > Formats.
- Toggle on ProRAW.
- On an iPhone 14 Pro or Pro Max, you’ll see an option to choose either 12-megapixel or 48-megapixel resolution. If you’re going to use ProRAW more often, 12-megapixel files are a little lighter and easier on your storage. But for maximum detail, go for 48 megapixels.
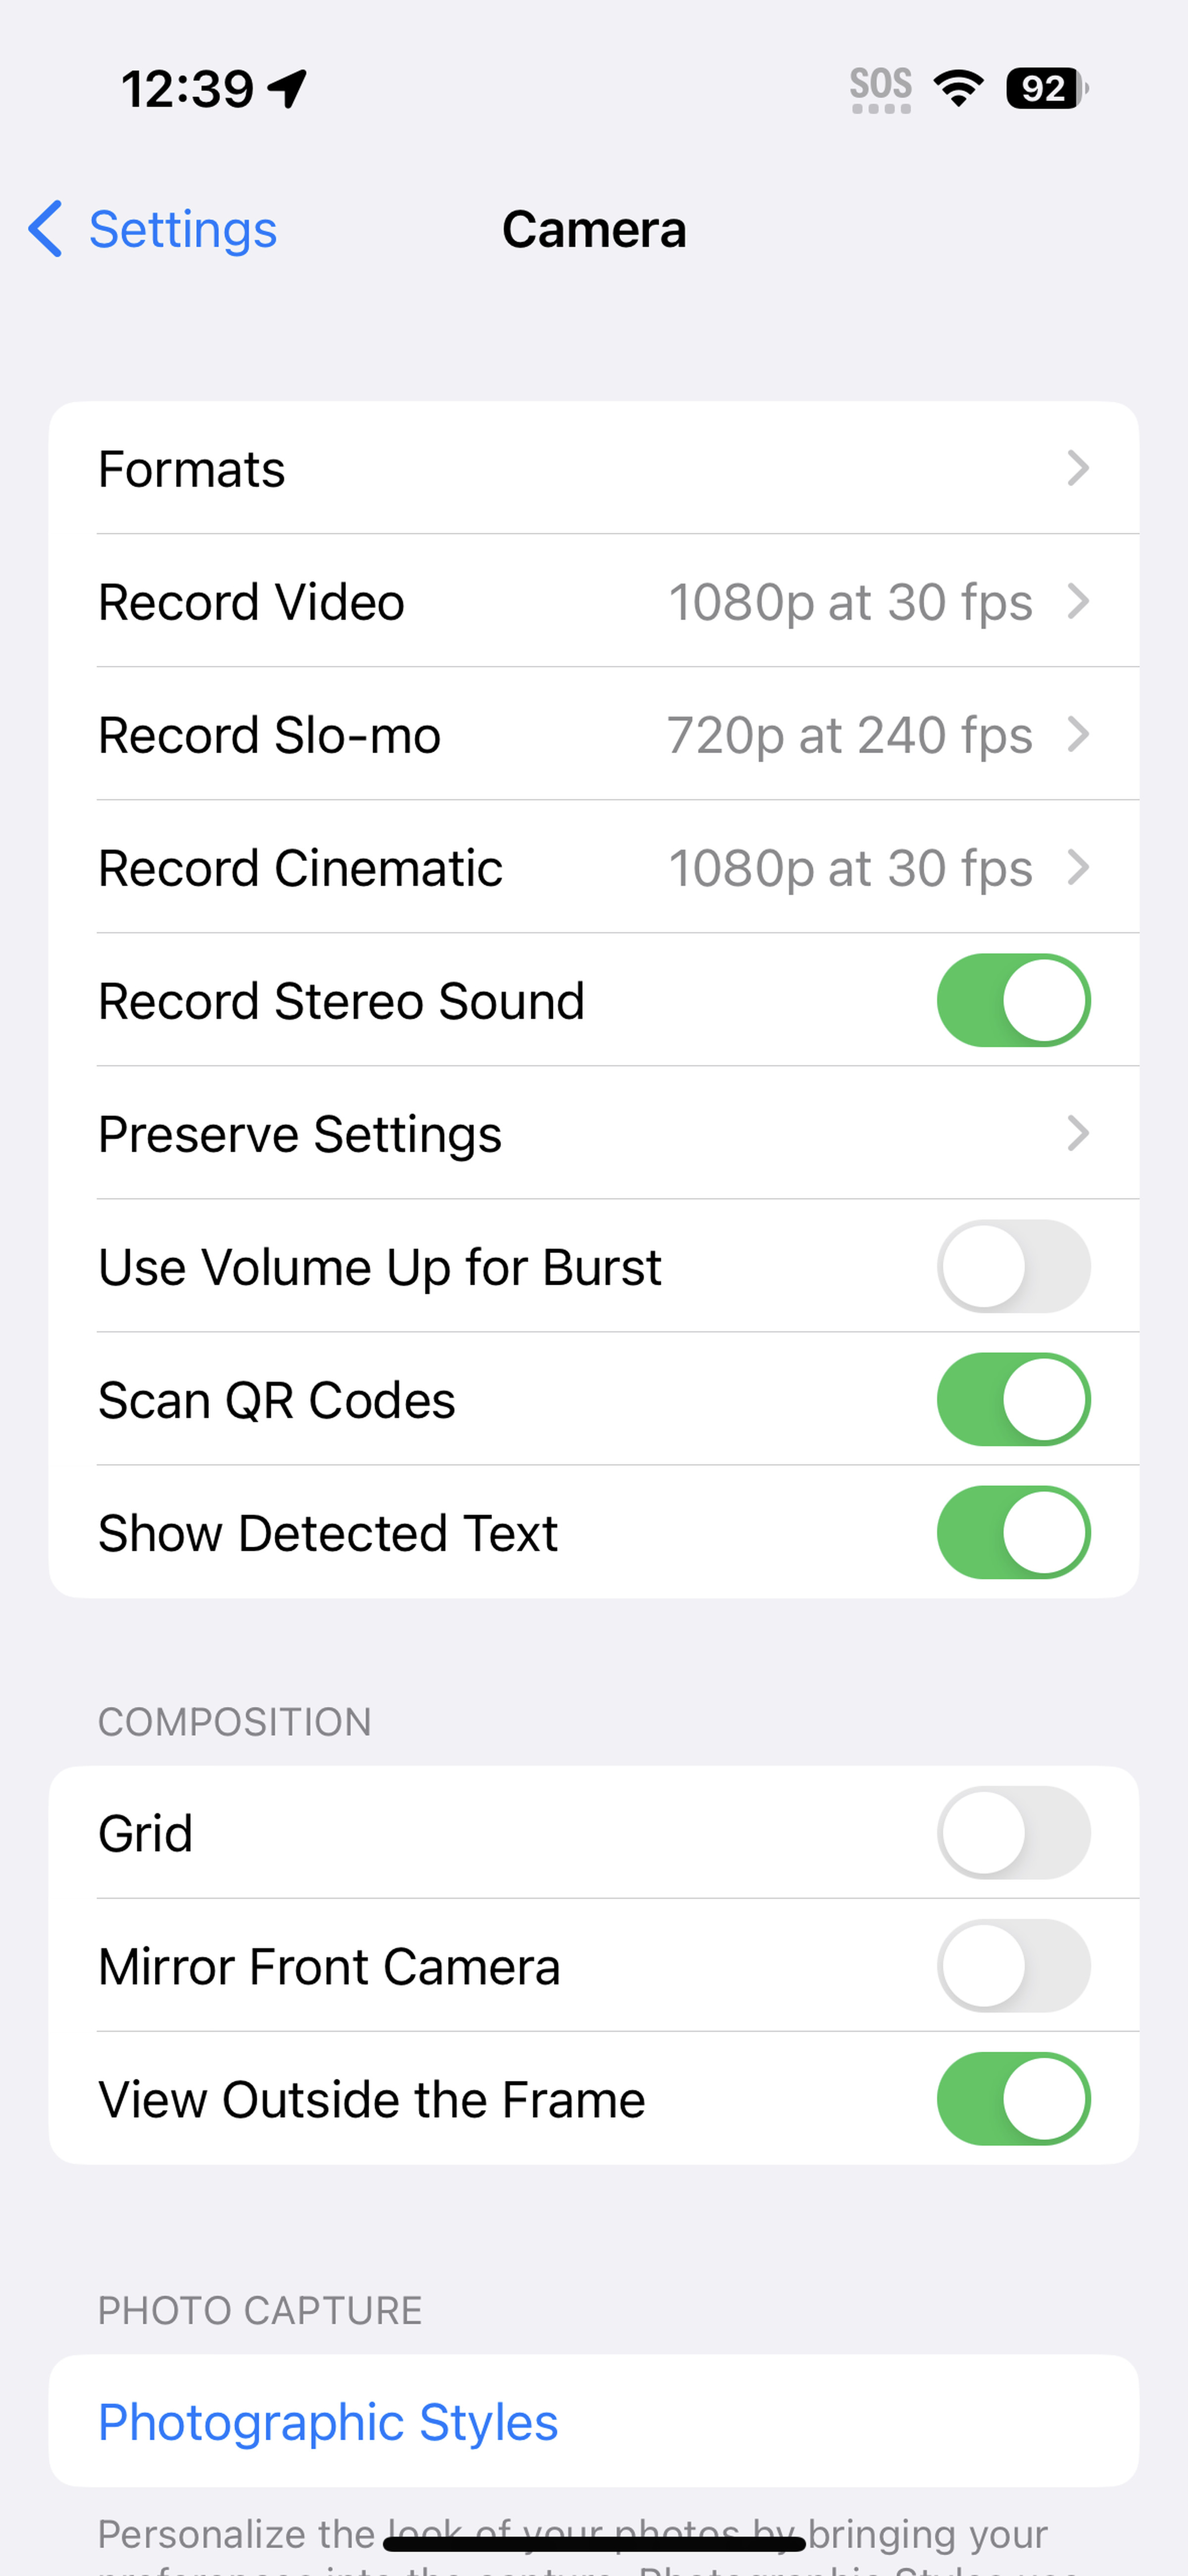
To use ProRAW, you need to first enable it in Settings.
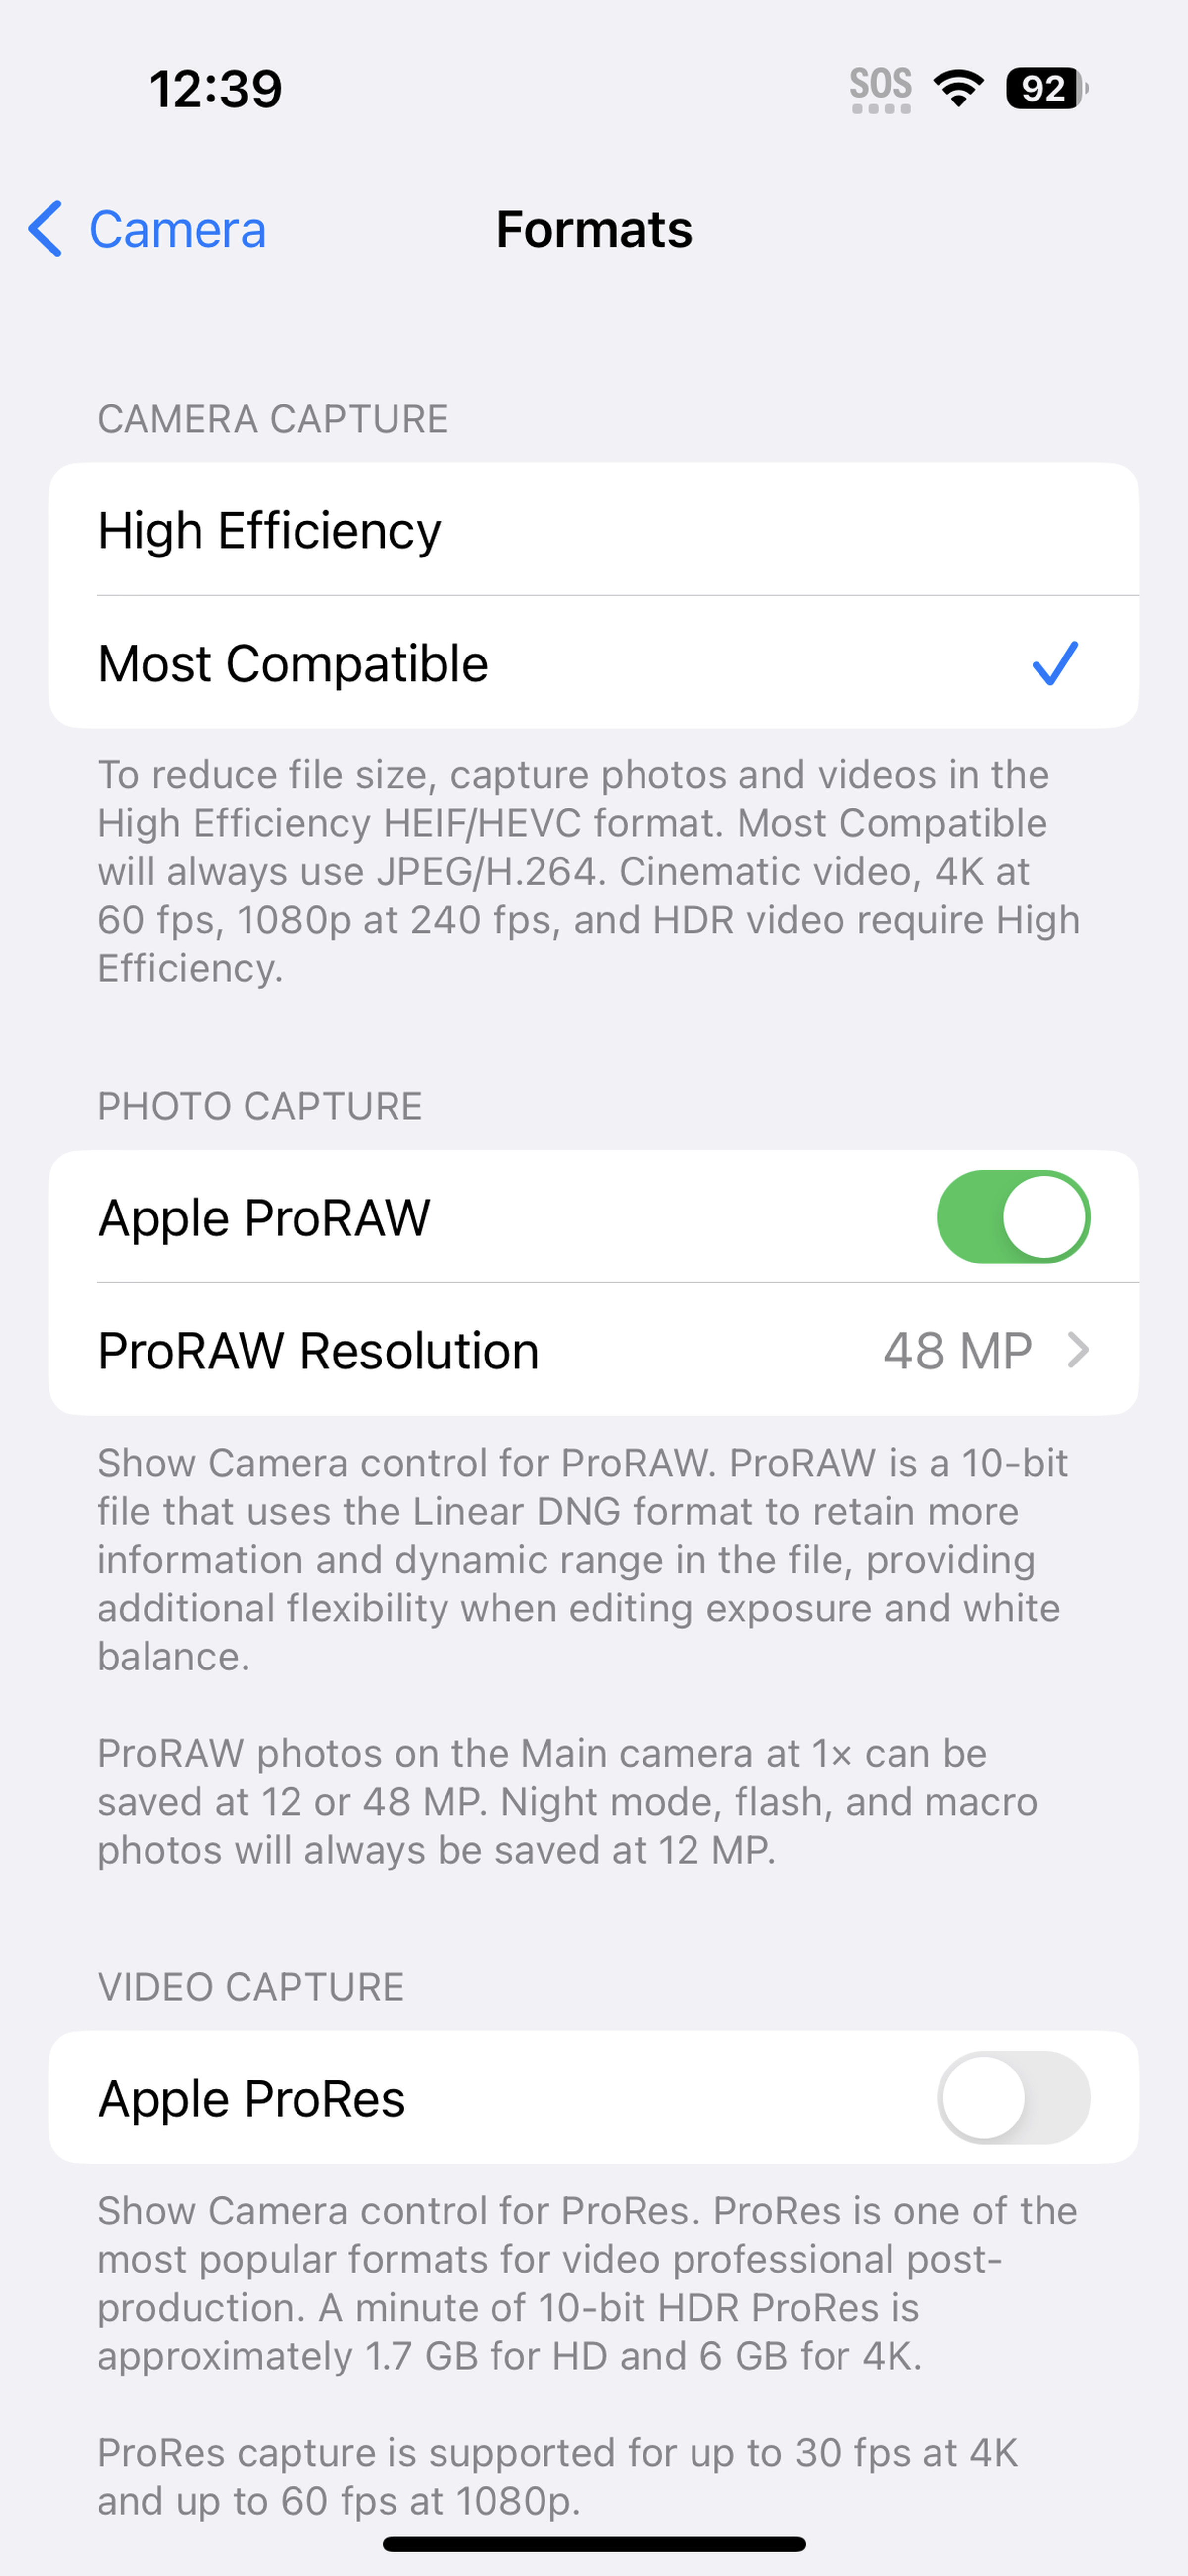
Toggle ProRAW on under Format options. This iPhone 14 Pro has an additional 48-megapixel mode.
Once ProRAW is enabled, you need to turn it on in the Camera app. There are two ways to go about this:
- Open Camera and tap the crossed-out Raw icon in the upper right of the screen to toggle ProRAW on.
- Or tap the ^ icon at the top of the screen to show photo options. Scroll right and tap Raw.
You can use 12-megapixel ProRAW with any of your iPhone’s cameras, including the selfie cam, though 48-megapixel mode will obviously only work with the 14 Pro’s main camera. ProRAW isn’t compatible with portrait mode, either.
Your ProRAW files will be recorded as DNG files, which can be edited right on your phone or in the photo software of your choice, where you can bask in the glory of all those pixels. Just remember to toggle ProRAW off when you’re done for the sake of your device’s storage.