
Linux Nano editor explained for beginners (10 examples)
We at HowtoForge have already covered the Vim editor in detail. But Vim isn’t the only command line editor that Linux offers. There are several that are popular among one section of Linux users or other. So, with that in mind, here, in this tutorial, we will discuss the basic usage of the Nano editor, as well as some of the features it provides.
Please note that all the examples and instructions mentioned in this article have been tested on Ubuntu 16.10 LTS, and the Nano version we’ve used is 2.2.6.
About Nano
The Nano editor is designed to emulate the features and user-friendliness of the UW Pico text editor. The following screenshot shows the editor in action:
Here’s how the official documentation explains the various sections of the editor:
There are four main sections of the editor. The top line shows the program version, the current filename being edited, and whether or not the file has been modified. Next is the main editor window showing the file being edited. The status line is the third line from the bottom and shows importantmessages. The bottom two lines show the most commonly used shortcuts in the editor.
The following sections explain the basic usage usage as well as some of the features of Nano.
1. How to create and open a new file using Nano editor
If you want to create a new file and open it using nano, then you can do this by running the following command:
$ nano
or
$ nano [file-name]
The second way can also be used to open an existing file. Needless to say, if you want to open a file which is not located in your current directory, then you have to provide the absolute or relative path to that file.
The following screenshot shows a file opened in the nano editor:
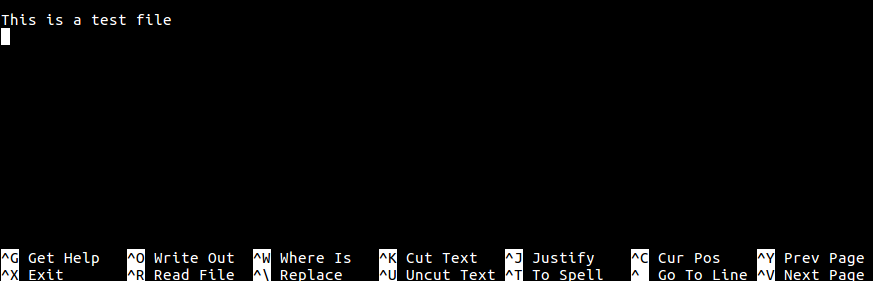
As you can see, at the bottom of the editor window, there’s useful information related to keyboard shortcuts that let users perform some basic operations such as cut and paste text. Shortcuts that let you exit the editor and launch help are also there.
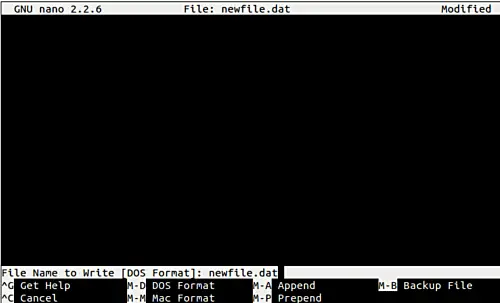
2. How to save a file in Nano
To save a file, use the keyboard shortcut Ctrl+o. When you will hit this key combination, the editor it will ask you to provide a filename (or confirm the name if it was already provided when the editor was launched). Just do the needful, and press Enter to save the file.
Here’s an example screenshot:

Nano also allows you to save files in different OS formats. For example, you can save in DOS format by pressing Alt+d. Similarly, to save in the Mac format, press Alt+m. Note that to change the format, first you have to initiate the usual save process by pressing Ctrl+o, and then use format-specific shortcuts like Alt+d or Alt+m.

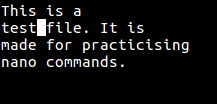
3. How to cut and paste text in Nano
To cut and paste a particular line, first bring the cursor to that line. Now, press Ctrl+k to cut, then head to the place where you want to paste it, and finally use Ctrl+u to paste.
For example, in the screenshot below, if the requirement is to cut the first line and paste it to the bottom. Then, go to the line and press Ctrl+k. Now, navigate your cursor to the bottom and press Ctrl+u.
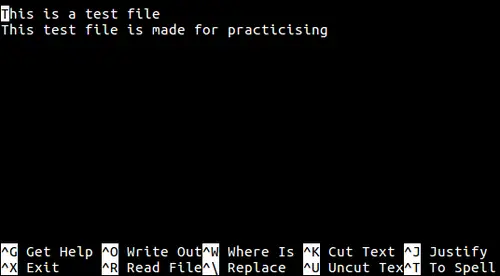
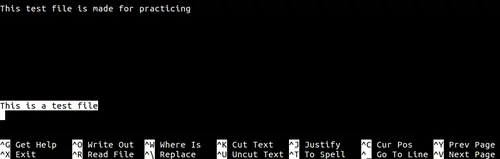
You can also copy a particular string instead of full line. For this, first you will have to select that word/string by pressing Ctrl+6 (or Alt+A) with cursor at the beginning of the string. Now you can press Ctrl+k to cut and Ctrl+u to paste the word.
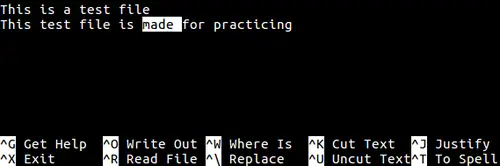
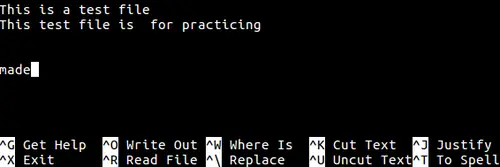
As you can see in the above two screenshots, ‘made’ was selectively cut and pasted at the bottom.
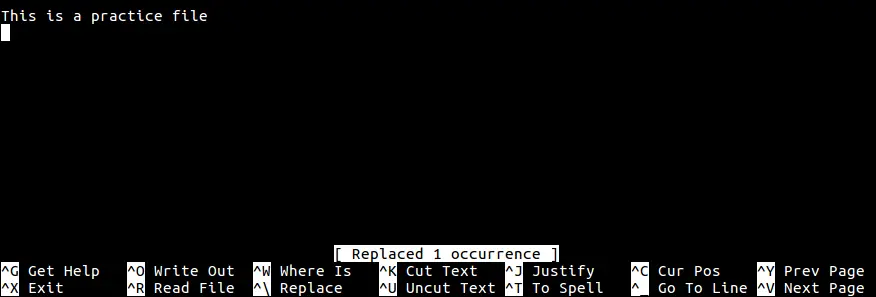
4. How to search and replace a word using nano
The tool also allows you to search for a particular word, as well as replace it with another word.
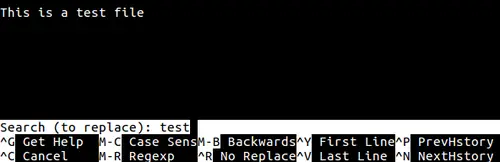
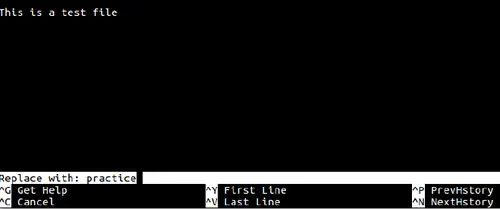
To search for a word in Nano, press Ctrl+w. Then, you will be asked to enter the word which you want to search. After entering the word, just hit Enter and the tool will take you to the matched entry.

You can also replace a keyword with another by pressing Ctrl+. When you press this key combination, Nano asks you for the word which you want to be replaced. After entering the word, press enter and now it will ask for the replacement word. After this, it will ask you to confirm the changes. Once confirmed, changes are made.
Following three screenshots will help you in understanding the whole process.
5. How to insert another file into current one
If you want, you can also insert data from another file into the one which you are currently editing in Nano. For this, press Ctrl+R and then give the path of the file which you want to open.
Following are example screenshots of this feature:

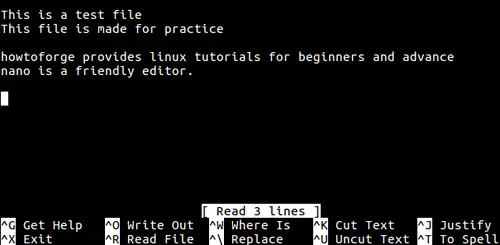
As you can see in the screenshot above, the text of new file was inserted at the cursor position.
6. How to display the cursor position
If you want, you can also check the position of your cursor in the file. This can be done by pressing the Ctrl+c keyboard shortcut.

As you can see in the above screenshot, after Ctrl+c was pressed, the cursor position got highlighted in the editor area, and detailed information about it showed up in the status line (the one that’s highlighted – third line from the bottom of the window).
7. How to place cursor on specific line and column at startup
If you want, you can also have the cursor placed on a specific line and column of a file when the editor is launched. This can be done by providing required details when launching the editor. The command-line switch used for this feature is +line,column (line determines the line number, whereas column determines the column number).
$ nano +line,column [filename]
For example:
$ nano +2,5 abc.txt
As you can see in the above screenshot, the cursor was at the second line and fifth column when the file was opened.
8. How to backup previous version of a file
The tool allows you to backup the previous version of the file being edited. This is done after you make changes and save the file. This feature can be accessed using the -B command line option.
$ nano -B [filename]
For example:
$ nano -B abc.txt
The backup will be saved in the current directory with the same filename but suffixed with a tilde (~).
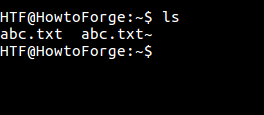
Note that files created for the first time can not be backed up.
9. How to backup files in a specific directory
The tool allows you to save all of your backup files in a specific directory. This feature can be accessed using the -C or –backupdir command line option, which requires the path to the directory where you want to save backup files.
$ nano -B –backupdir=[directory-path]
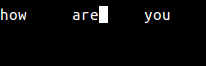
10. How to convert tabs into spaces
The tool also allows you to convert tabs into spaces. This feature can be accessed using the -E command line option.
$ nano -E [filename]
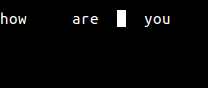
For example, the following screenshot shows text that contains tabs between words.
Now, since the editor was launched with the -E option, when the changes were saved, the tabs were converted into spaces.
Conclusion
Given that the tutorial is targeted at beginners, we’ve just scratched the surface here. Use the Ctrl+G shortcut to learn more about Nano. Oh, and yes, don’t forget to try out the basics we’ve discussed here.