

Recently, I set up Jellyfin media server on my Raspberry Pi. My Pi is wirelessly connected to the router and one problem I faced with this setup is accessing the media server on the TV or other devices.
Why? Because the Pi got assigned a random IP address at times between reboots. And since I was trying to access the media server running on Raspberry Pi though the IP address, it became an issue.
I had to manually enter the IP address on the TV every time the IP address changed. Finding the IP address of the Raspberry Pi was another challenge.
This is where static IP comes into play. If you Pi uses static IP, the IP address remains the same between the reboots.
This is one of the many scenarios where you are better off with a static IP assigned to your Pi. And in this tutorial, I’ll discuss how you can achieve that.
Assigning static IP on Pi device vs on the router
Yes! There are two approaches for your Pi to have a static IP.
- You can set static IP on the Raspberry Pi itself
- You can have your router assign a static IP to the Pi
Both methods have their pros and cons.
Let’s say you set the static IP on the Raspberry Pi. Your Pi will always seek the same IP address from the router (let’s say 192.168.1.51). That’s fine as long as the router remains the same. If you change your router and the new router insists on using a different subnet (let’s say in the 172.16.12.0/32 range), then your PI won’t be connected to WiFi like before. You’ll have to manually update the network settings on the Pi again to use the new IP range. This could work when you just a couple of Pi devices and you can directly login to them (instead of SSH) or connect to them via Ethernet cable. For a fleet of Pis in random locations in the house.
Let’s say you want to assign the Pi a static IP from the router. This way, you are changing nothing on the Pi. If you change the router, the Pi will get an IP address assigned automatically through the DHCP server. The problem is that it’s not easy to assign static IP to devices on all the routers. Some internet companies provide routers with very little scope of configuration changes.
📑To summarize, you should set a static IP on the Raspberry Pi itself if you can easily access the device physically at any time in the future.
I cannot show how to assign static IP to different devices on the router, as it depends on what kind of router you have. So, I’ll discuss how you can set static IP on the Raspebrry Pi itself.
Setting static IP on Raspberry Pi
The procedure comprises the following four steps:
- Get the current IP address of the Pi (if you want to use this one as static IP)
- Get the gateway IP (router’s IP)
- Get the DNS server address (optional)
- Use the above information to change network configuration
The first three steps can be easily done in the command line. The third step can be done easily in both the command line and GUI.
📑Make sure that your Pi is connected to the router. You can also follow these steps if you connect to Pi via SSH.
Step 1: Get the IP address of Pi
If you want to use the current IP address as the static IP,
This is very simple. In the terminal, type the following command:
hostname -IYou may also use this command:
ip aBoth will give you the current IP address of the Raspberry Pi.
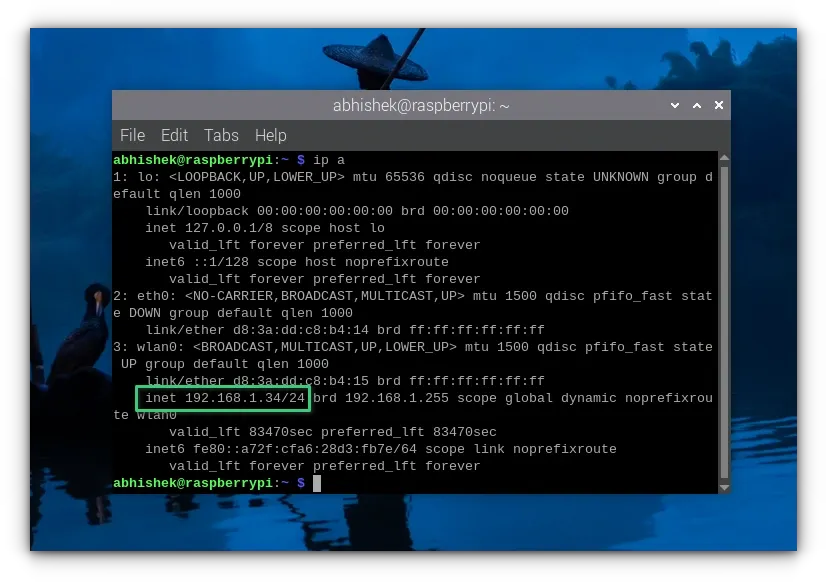
As you can see in the screenshot above, my Raspberry Pi’s IP address is 192.168.1.34.
Step 2: Get the gateway IP
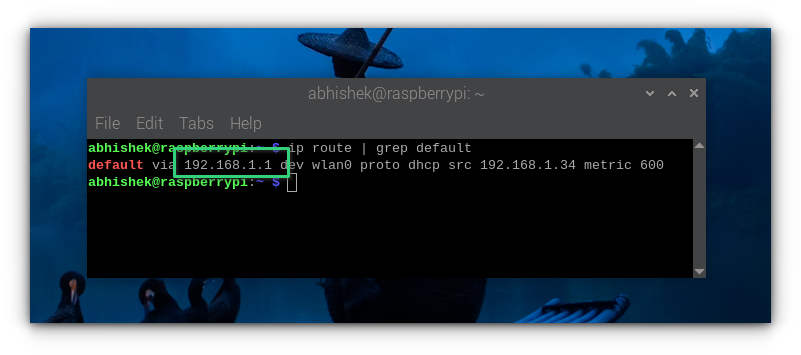
This is also quite simple. To get the gateway IP address (your router’s IP address), use this command:
ip route | grep defaultAs you can see in the screenshot below, the gateway IP in my case is 192.168.1.1.
Step 3: Get the DNS server details (optional)
Some people like to keep the same DNS server which is currently being used on the system. I think you can do without that as well. Most home users have the DHCP server handle it automatically anyway.
Still, if you want, you can get the DNS server address with:
grep nameserver /etc/resolv.conf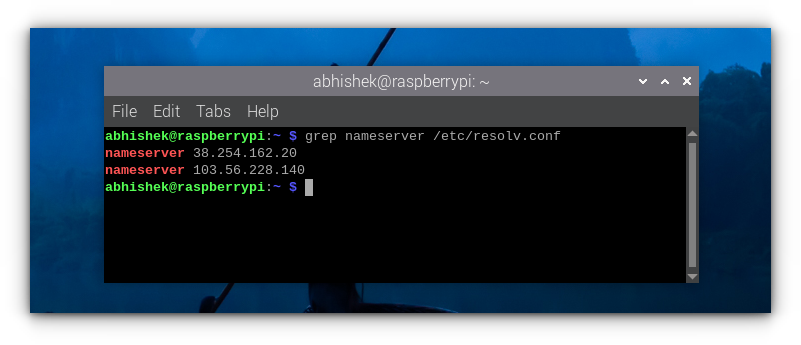
📋By now you must have realized that you set static IP for a particular network connection. If you connect the Raspberry Pi to some other network, it won’t use the same static IP address.
Step 4 (Terminal Method): Change network configuration to set static IP
If you are accessing Raspberry Pi via SSH or if you prefer the command line, you can use the nmtui (network manager in terminal) tool.
✋These steps have been tested on Raspberry Pi 5. If your system doesn’t have nmtui package installed, you may install it and continue following the instructions.
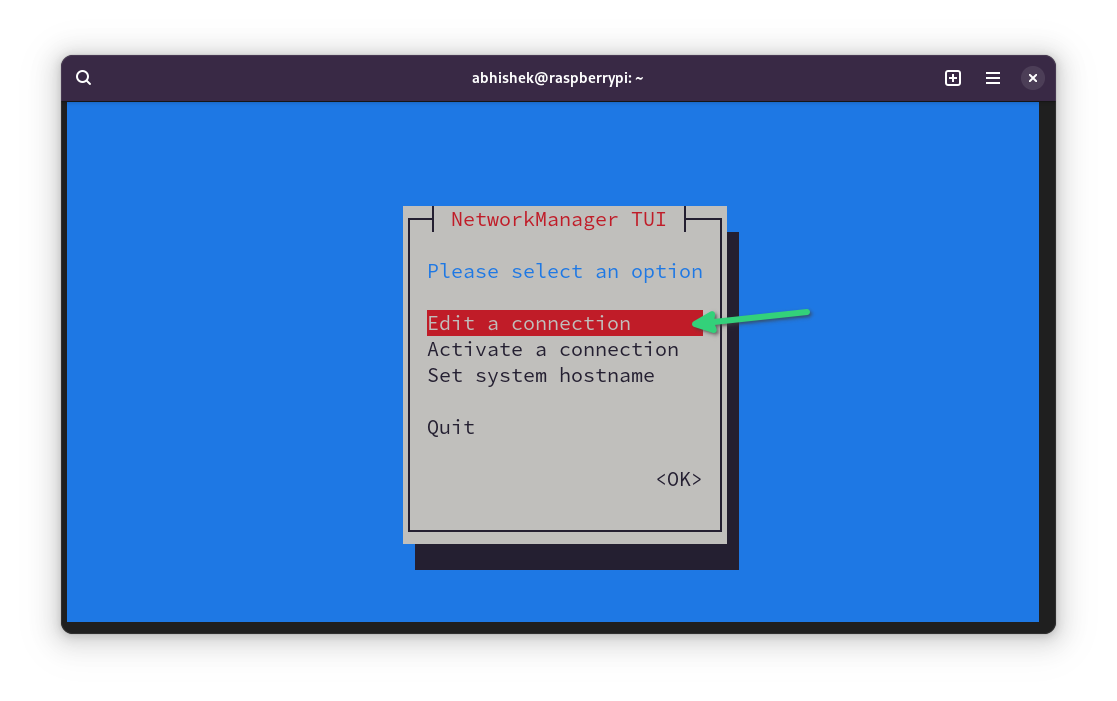
Run this command:
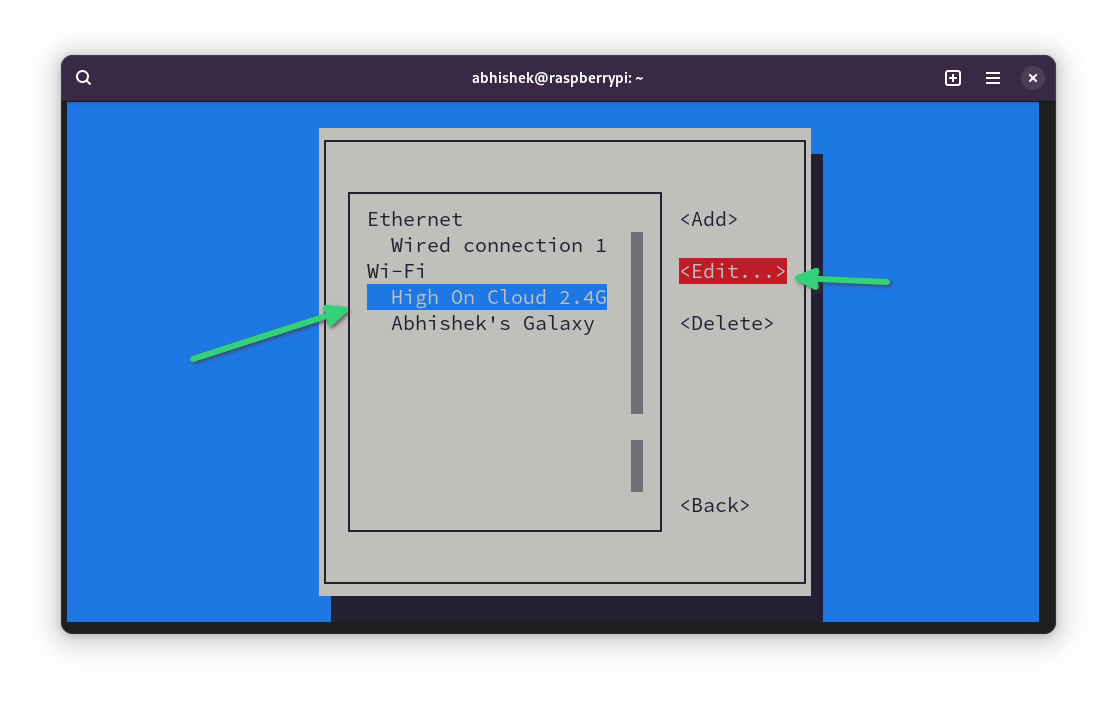
sudo nmtuiYou’ll see an interface like this. Here, select Edit a connection and press Enter.
💡In a TUI (Terminal User Interface) tool, use the up and down arrow keys to move between the option. You may also need to use the tab key to move to other options. Press enter on your selected option.
It will show the connections you have had in the past on your Pi. I believe you want to set the static IP for the currently connected network. Move down to the appropriate network. Now press tab a couple of times to select the Edit option and press enter.
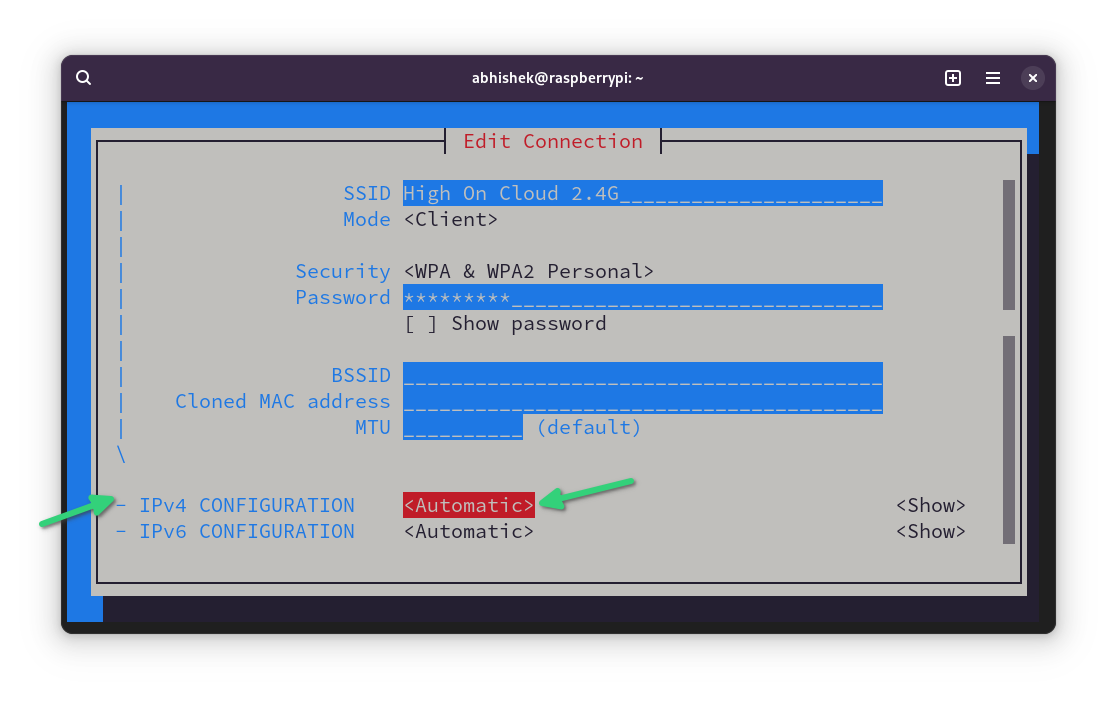
Use the arrow key to scroll down to the IPv4 CONFIGURATION option. Change it from Automatic to Manual.
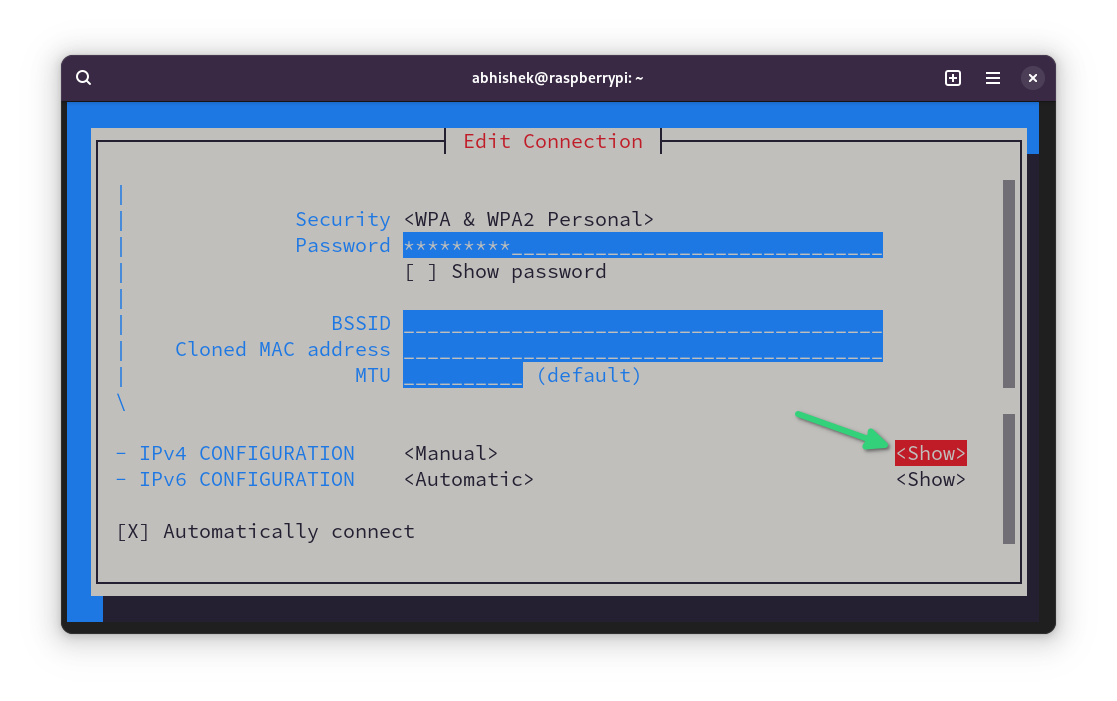
Next, select the Show option of IPv4 CONFIGURATION line.
Use the arrow keys to move down again and reach the IPv4 CONFIGURATION section again. This time you’ll see option to add Address, Gateway and DNS servers.
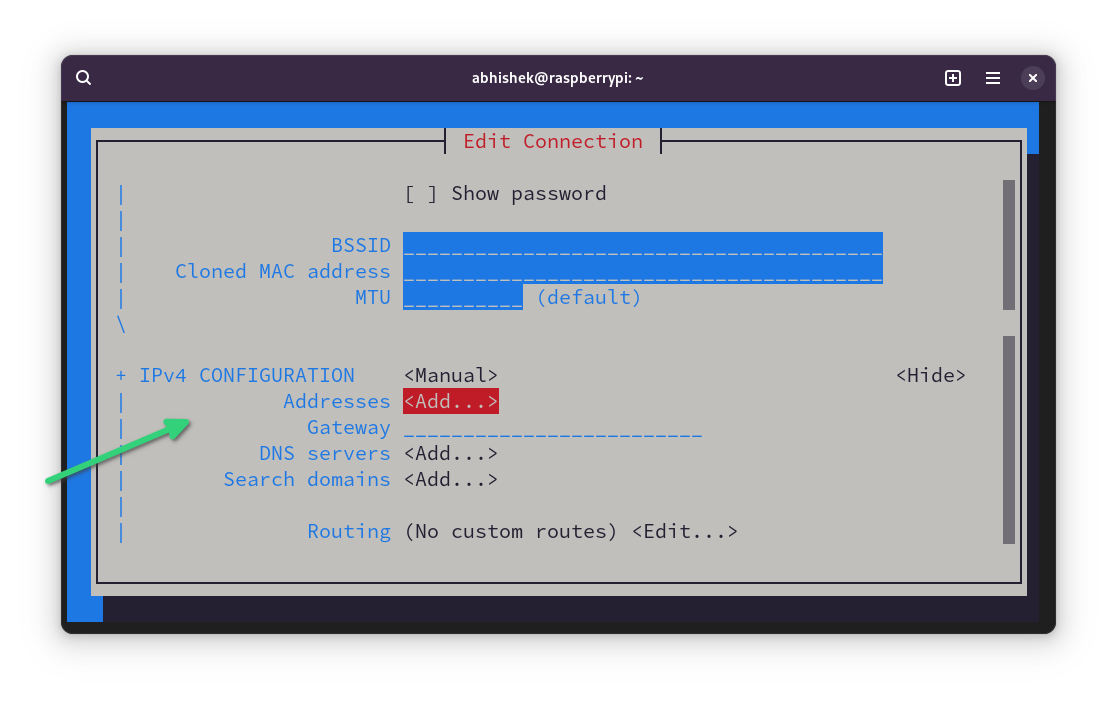
Go to the Addresses line and click enter key. It may take you to the beginning. Scroll down back again.
✋It is important to enter the IP address of your choice with the subnet mask in the format IP_address/24.
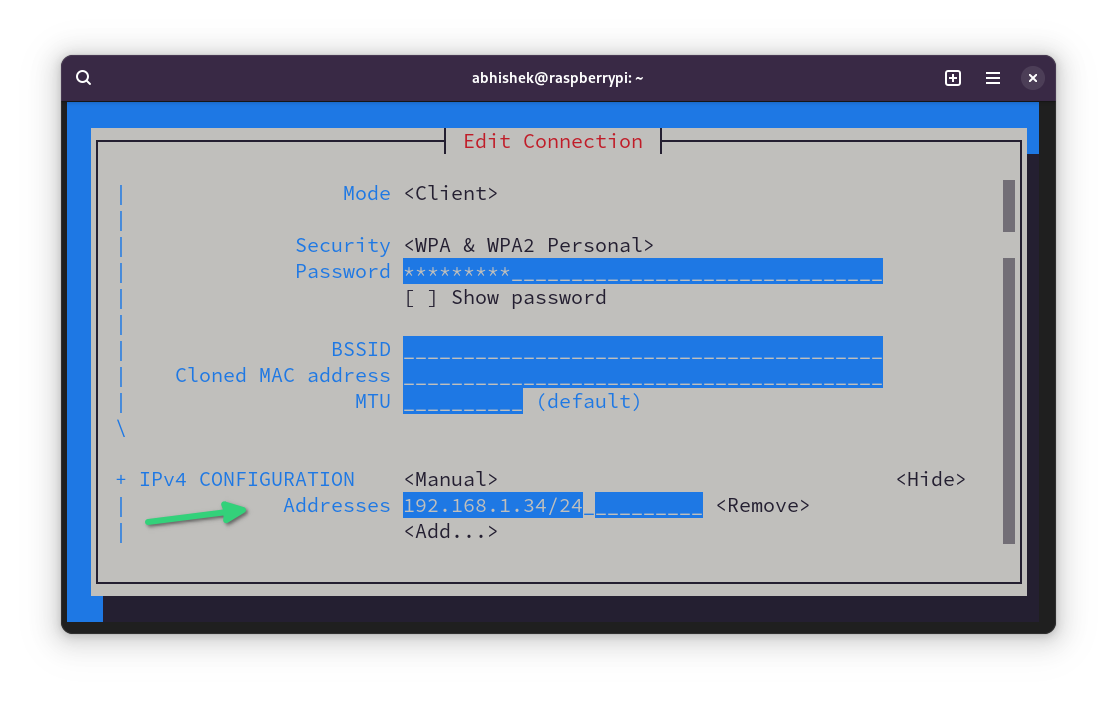
Fill all the details such as IP address with mask, Gateway IP and DNS.
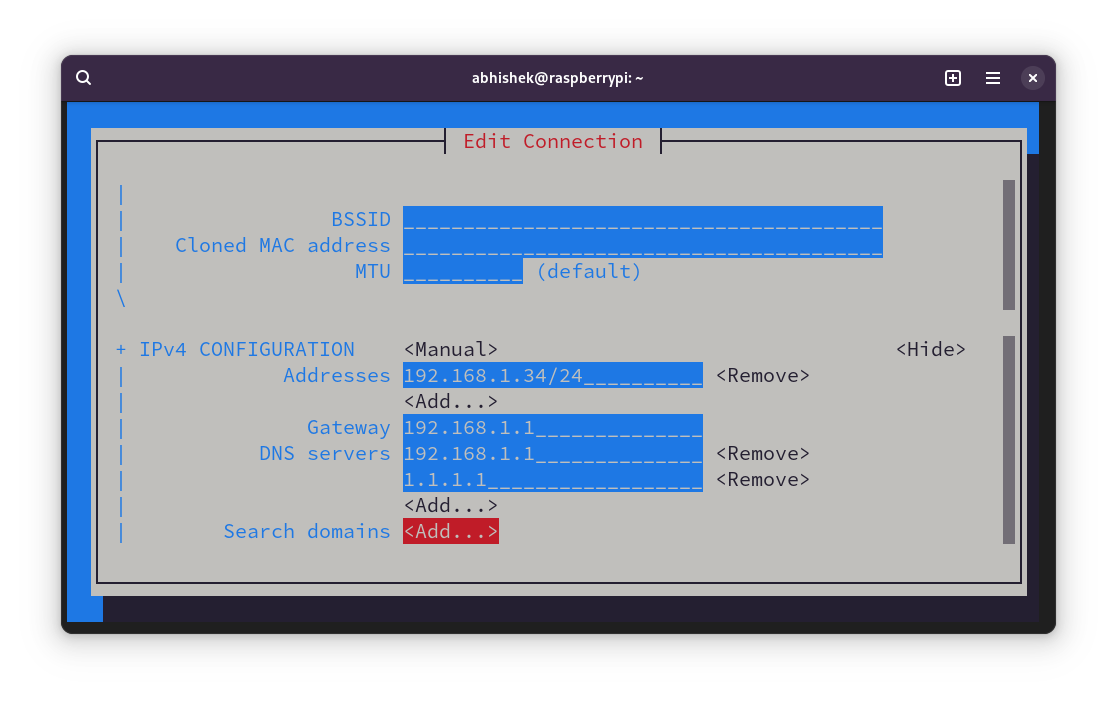
If you notice above, I used the gateway IP in DNS too. I also added 1.1.1.1, DNS of Cloudflare as an alternative.
After filling all the details, scroll down to the bottom, select OK and press enter.
Your changes are saved. You can exit the nmtui interface the same way (press Back and then Quit options).
Restart your Pi for the changes to take effect. You have successfully set up static IP on Raspberry Pi.
Step 4 (GUI Method): Change network configuration to set static IP
The same can be achieved from the graphical interface of Raspberry Pi OS.
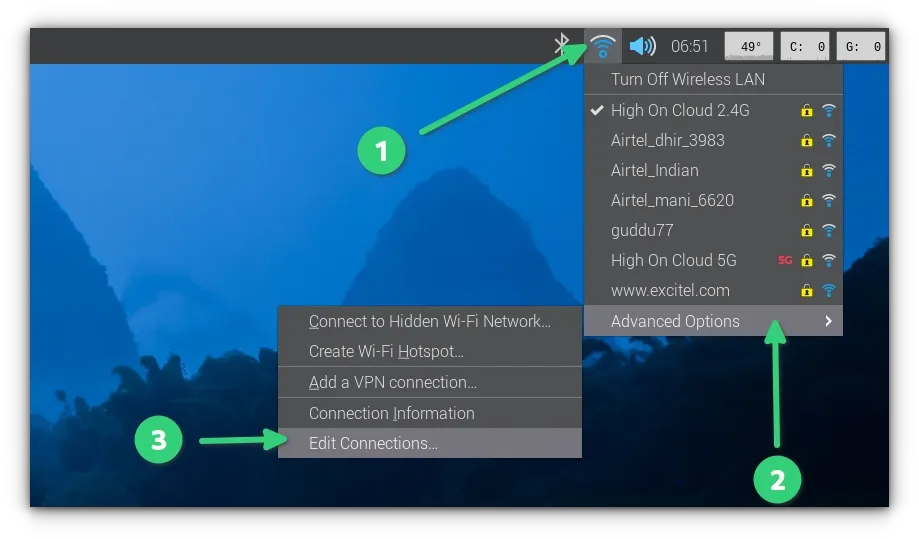
First, click on the network icon and then go to the Advanced options and click Edit connections.
Here you go to IPv4 Settings, set it to manual and then add all the details such as IP address, mask, gateway IP, DNS server etc. You have all the details.
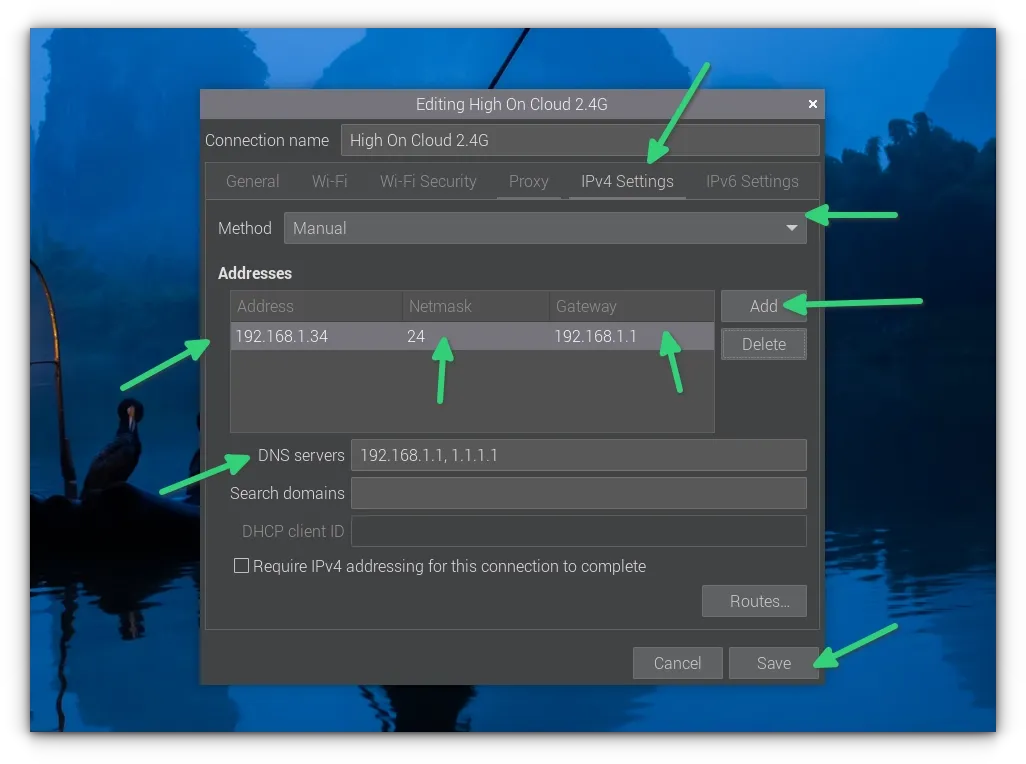
Restart your system and you can see that the static IP is now set on your Pi.
Going back to non static IP
If you don’t want to use static IP anymore on Raspberry Pi, you can easily revert the steps and go back to dynamic IP.
How? Simply edit the network connection in question again. This time, change the IPv4 configuration to ‘automatic’ and save your changes. And that’s it. You don’t have to provide IP address, gateway IP etc anymore.
Conclusion
As I mentioned at the beginning of this tutorial, you should use a static IP from the router end specially if your Pi won’t be easily accessed physically.
But if your device is in your hands all the time, you have the liberty of accessing and changing its configuration.
I hope you find this tutorial on setting a static IP on Raspberry Pi helpful. Please let me know if you have any questions.