
After updating Windows 11/10 you may see The CldFlt service failed to start error message, in the Event Viewer. The CldFlt Service uses the CldFlt.sys file (Windows Cloud Files Mini Filter Driver) which is a Windows core file system driver located in the %WinDir%system32drivers folder and this service starts running automatically with Microsoft OneDrive. Many users reported that they faced this error when they upgraded the system to Windows 11. If you are also facing this error, then this post may help you.
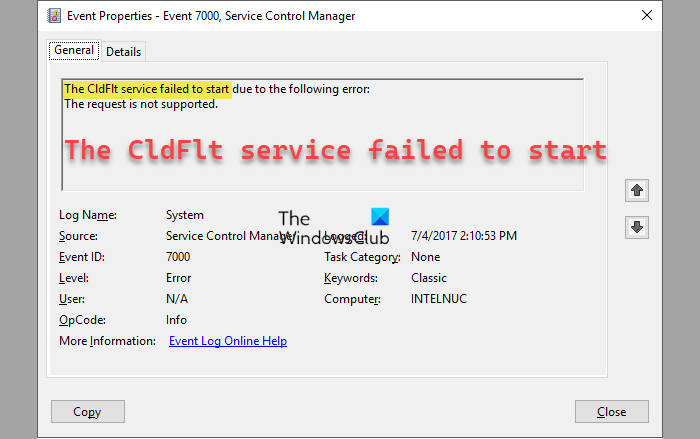
Event ID 7000, The CldFlt service failed to start due to the following error:
The request is not supported
The CldFlt service failed to start in Windows 11/10 [Fixed]
If you want to fix the CldFlt service error on your Windows 11/10. So, follow the below troubleshooting method to fix this issue.
- Change this Registry value
- Run SFC and DISM command
- Uninstall and re-install OneDrive
- Hide the Error Entries from appearing in the Event Viewer
1] Change this Registry value
Windows Registry is the most useful method to resolve this type of issue. But before changing anything in Windows Registry my suggestion is to take a Backup of your Windows registry in order to any damage that happens during the change. After taking a backup of your Windows Registry, follow the below steps to change it.
- Press the Window + R keys together to open the Run command box
- Type regedit in the search box and click on OK to open Registry Editor
- Now, click on Yes to allow this app to make changes to your device
- In the Registry Editor, navigate to the location mentioned below
HKEY_LOCAL_MACHINESYSTEMControlSet001ServicesCldFlt
- On the right side, locate the registry entry Start which is of type REG_DWORD
- Now, double-click on Start to open the Edit Window to change the value of this entry
- In the Edit DWORD Window, change the Value Data from the default value of 2 to 4
- Click on OK to save the change
After completing this process restart your computer and check whether this issue is resolved.
2] Run the SFC and DISM command
If the above method does not fix this issue, then your Windows system files may be corrupt or missing. In this case, you can run the System Files Checker(SFC) command. The SFC command will fix or replace the Windows system files. The DISM command scans the Windows image for any errors and fixes them. Now, follow the below steps to run SFC and DISM command.
- Click the Windows key and type cmd in the search box to open Command Prompt
- Click on the Run as administrator
- Type the SFC command mentioned below
sfc /scannow
- Hit on the Enter key to start the scanning process
- Wait till the scanning process is completed
- After completing the SFC scanning process again open the Command Prompt
- After opening the command prompt, type the DISM scan command as mentioned below
Dism /Online /Cleanup-Image /RestoreHealth
- Hit Enter to start the scanning process
- Wait for the DISM command to scan for any corruption
- It will perform repair operations and record into the log file if any corruptions are found
After completing both the scanning process, check if the CldFlt service error issue is resolved.
3] Uninstall and re-install OneDrive
The CldFlt service error may be caused by the OneDrive installation on your PC. So, you should be uninstalling and re-installing OneDrive to see if it helps to fix this error. Follow the below steps to uninstall and re-installing OneDrive.
- Click on the Window + R keys together to open the Run command box
- Type ms-settings:appsfeatures in the search box and click on OK
- The Apps & features page will be open, in this page you will see the list of the installed applications on your computer
- Look for the Microsoft OneDrive in this list of application
- Click on the three dots associated with the OneDrive and then click on Uninstall
- Click on Uninstall again if you will be asked to uninstall it by confirmation prompt
- Click on Yes when you will see the User Account Control prompt asking for permissions
- Wait till the OneDrive is uninstalled from your computer
- Once the uninstalling of OneDrive has been done, download the OneDrive setup file
- After completing the downloading process open the OneDriveSetup.exe file and follow some onscreen instructions to complete the installation
After Installing OneDrive, check if the CldFlt service error is still present or not.
4] Hide the Error Entries from appearing in the Event Viewer
Follow the below steps to hide the error entries from appearing in the Event Viewer.
- Click on the Windows icon and type registry editor in the search bar
- Click on the Registry Editor to open it
- Once the Registry Editor opens, go to the below path
HKEY_LOCAL_MACHINESYSTEMCurrentControlSetControlWMIAutologgerEventlog-Application{f1ef270a-0d32-4352-dbab41e1d859}
- Look for the entry with the name Enabled on the right side.
- Right-click on the Enabled and then click on the Modify
- In the Edit DWORD Window, change the Value data field from 1 to 0
- Click on OK to save the change
After that, restart your computer and check if the issue is fixed.
How do I know if CldFlt service is installed on my system?
Open an elevated command prompt and execute the following command:
sc qc CldFlt
If it is installed, you will see the details.
How do I disable CldFlt service using Command Prompt?
Open an elevated command prompt and execute the following commands:
sc config CldFlt start= disabled
You will see the confirmation.
What is Windows Stopcode?
The Stop code is also known as a bugs check, it fixes all types of errors a Windows computer encounters. It gives you a great starting point for fixing any Windows 10 error. When your Windows 11/10 suddenly crashes or dead, the stop code gives us detail on why your system is suddenly dead.
How do I run Windows Startup Repair?
Follow the below steps to run Windows Startup Repair.
- Click on the Window key > Power button > Restart
- Once the PC is restarted, it will present a screen with Troubleshoot option
- Click on Advanced options and then click on Startup Repair
- Now, choose an account, you will need an account with Administrator privilege to continue
- Enter the Password and then click Continue
- Wait as the Windows Startup Repair tool runs
- After the Windows Startup Repair tool runs restart your computer