
VirtualBox & NAT network configuration tutorial
Updated: March 4, 2020
Several days ago, I hit an interesting problem slash snag. Well, more sort of an operational
challenge that reinforced my liking for VirtualBox. Namely, I wanted to setup a small private network
with several virtual machines. One machine would be a server, and others would be clients running agent
software and reporting to the server. Sounds simple. Except all my NAT-ed machines were getting the
same IP address: 10.0.2.15.
Indeed, if you’re using the most basic VM setup – your machines use a single NAT adapter, and as it
turns out, each machine gets the exact same IP address, even if they are running in parallel. This
means you can’t really have a network. Well, not this way. But there is a way. We’ve talked about
VirtualBox network & sharing at quite some length in
the past, and I’d like to show you a few more network-related tricks. After me.
Setup NAT network
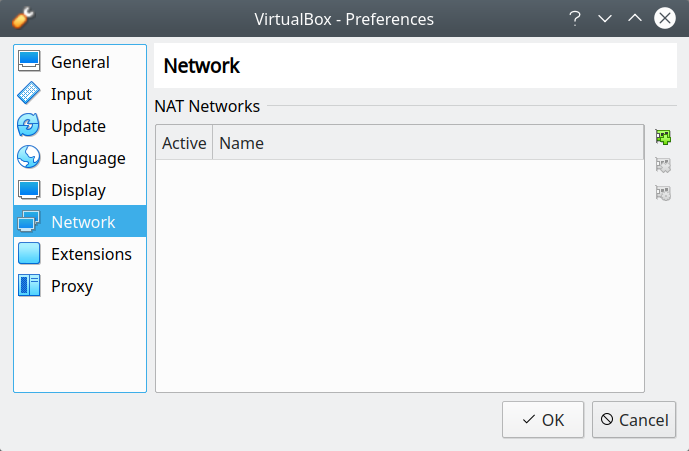
The solution to this issue is to create a NAT network that all your relevant VMs will share. This
needs to be done as a first, separate step through the Preferences menu in the VirtualBox main
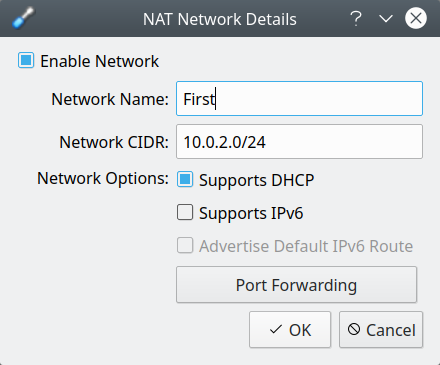
interface. Simply add a network, and then tweak its settings. While the wizard is simple, it’s super
powerful. You can give the network any name you want, and also pretty much any routable range,
including how many hosts you’d like this network to support. You can allow clients to get dynamic IP
addresses or even set them up manually.
But there’s more. You can also use IPv6 – and even configure port forwarding, so if you have
multiple NAT networks, they can talk among each other – or rather, individual hosts will be accessible
from the outside, as I’ve recently shown you in my VirtualBox
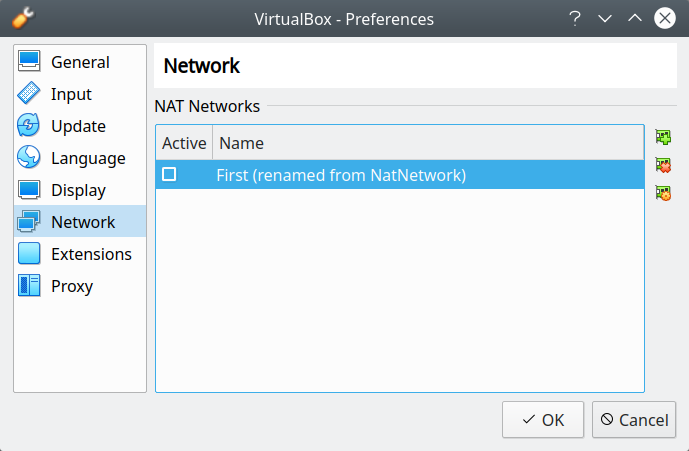
port forwarding tutorial. You can create one
or more networks.
Setup VM & network configuration
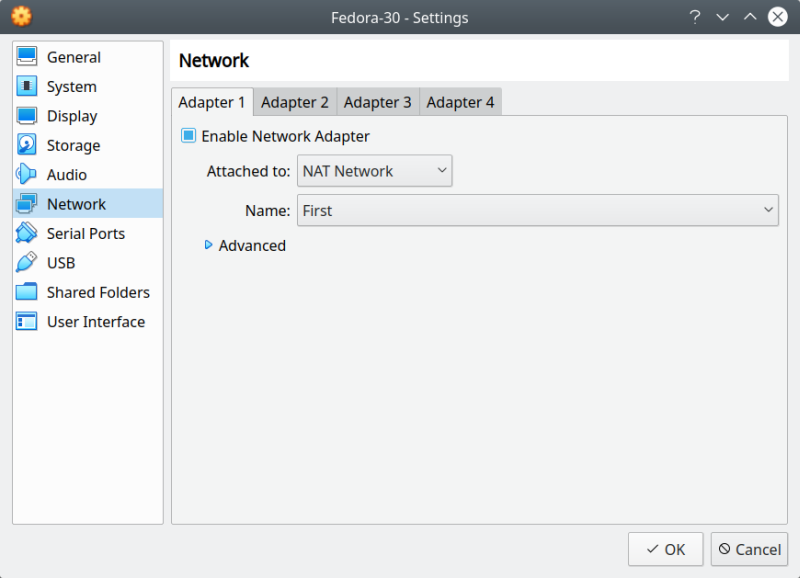
The next step is to associate this network with your virtual machines. For the desired adapter,
under Attached to:, select NAT Network, and then in the second dropdown just below (Name), select the
name of the network you’ve just created. Since each VM can have up to four networks by default (through
the UI), you have a lot of flexibility in setting up complex network configurations.
That’s it. Next time you boot your VMs – and if you’re using DHCP – one by one, they will be
assigned different addresses. I tested, and for instance, in one particular scenario with two machines
running, the first got the standard assignment – 10.0.2.15, but the second one had 10.0.2.4. You can
use nmap to search for hosts on the network, if you need to discover them.
Conclusion
Simple, but hopefully quite useful. I’ve seen a lot of forum posts where baffled VirtualBox users
ask why all their machines have the same addresses. Perhaps it is not instantly clear that each NAT-ed
host lives in its own isolated network environment, and that they don’t automatically share the same
virtual router. This is probably for security reasons, because you may have insecure or noisy VM in the
system. Anyway.
VirtualBox is powerful and flexible, and it has what it takes to generate fairly complex
configurations network-wise. We covered quite some today, including the different options you need to
get your hosts to share the adapter and get assigned IP addresses from the same pool so that they can
talk to each other. Well, that would be all for now. Happy virtualization.