

Group Policy Editor
Several articles on Dave’s Computer Tips have suggested using the Group Policy Editor (GPE). The GPE is a more user-friendly choice than rummaging about in the Registry, where people, especially the uninitiated, are prone to making mistakes that can be the cause of countless migraines.
One problem I personally have with the GPE is making changes and then, not taking notes. This stems from an inherent laziness on my part. I only mention this because a change you make today may not be easily remembered a month from now. The “Voice of Experience” sounds its deafening thunder.
Without third-party software the GPE is only available to Windows 8.1 and Windws 10 Pro/Enterprise users. Windows 10 Home users will need to jump through some hoops by downloading third-party software and will also have to copy some files around to make it work. Today’s Quick Tips article will be devoted to demonstrating a few handy tweaks that can be implemented using the GPE.
How To Run GPE
- Use the Windows Key + R combination to open a Run Box
- Type gpedit.msc and hit Enter
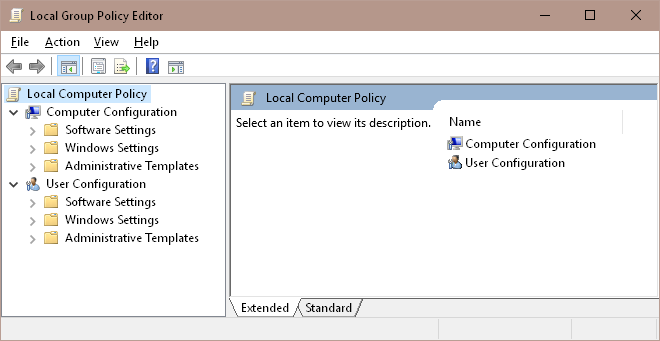
The GPE should open and you’ll be faced with a window which is similar in appearance to the File Explorer. It has a directory of sorts in the left panel, and their contents will be shown to the right, like so:
A Few Tweaks You Might Find Useful
The following tweaks will all be shown to you using this system:
- First, you will be shown a Path to follow down the left-hand side of the GPE
- Once there, you will need to double-click the specific item in the right-hand panel
- This will bring up another window giving you options to change Windows 10’s default behavior
You will better understand what I’m talking about once you have seen the first example.
How To Change Windows 10’s Default Open File Behavior

Windows 10 will display this screen whenever it encounters a new file type for which there is no associated program. In other words, If Windows 10 does not know how to open a particular file, it will ask you what program to use. This is not only a handy feature, but often necessary while you are installing a slew of new programs and utilities on your computer. After a while, though, it can turn into an annoyance. Here’s how to change the way it behaves using the GPE…
Here is the path you should follow to get to the next image:
Computer Configuration > Administrative Templates > Windows Components > File Explorer > Do not show the ‘new application installed’ notification
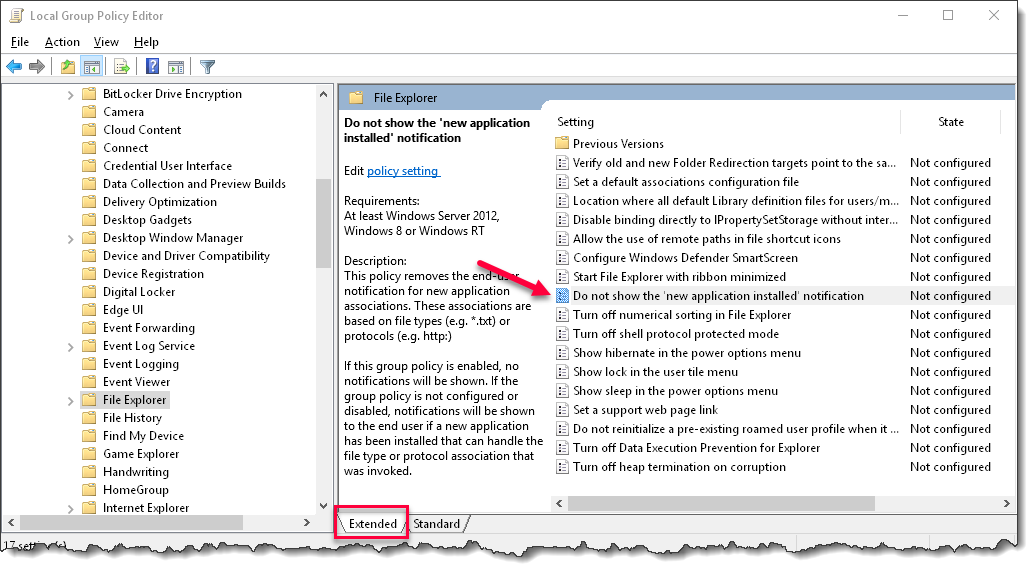
In the right panel, double-click on Do not show the ‘new application installed’ notification. That will open this next window:
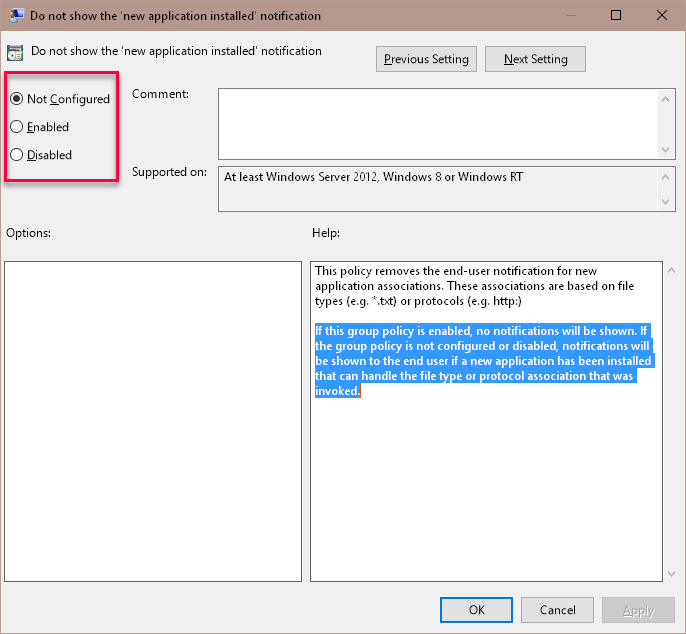
The settings can be changed by ticking one of the indicated Radio Buttons. There is always a helpful explanation in the lower-right panel, as well. Once you are satisfied with your settings, simply click OK to close the window and bring you back to the GPE.
The following tweaks will follow the same pattern, but I won’t bother with all the images involved. It isn’t that difficult and I have faith in your ability to easily handle this on your own.
EnableDisable Hibernation Menu Option
The path: Computer Configuration > Administrative Templates > Windows Components > File Explorer Show hibernate in the power options menu
Using this option will offer a Hibernate option in the Windows Shutdown Menu. If you would like to learn more about the Hibernation system, then please read Windows Hibernation File – Do You Need It?
EnableDisable Microsoft Consumer Experience
I’m not sure why, but flashing tiles in the Start Menu truly rub me the wrong way. Here’s how to get rid of them, and the likes of Candy Crush, too.
The path: Computer Configuration > Administrative Templates > Windows Components > Cloud Content > Turn off Microsoft consumer experiences
It is important that you carefully read the helpful descriptions in the lower-right panel of the GPE. In this case, Enabling the setting turns it off. Microsoft programmers seem to love their double-negatives.