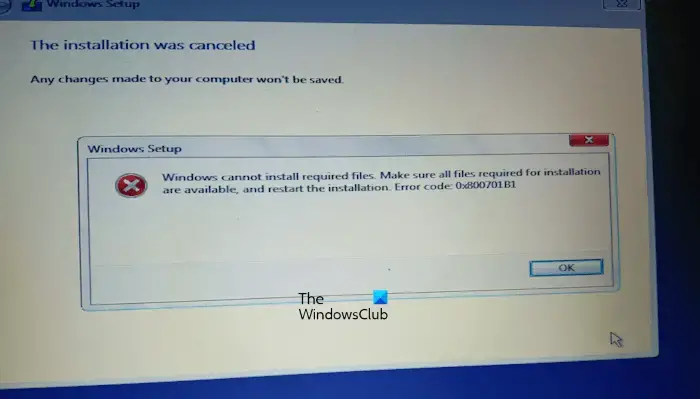
If you see the error message Windows cannot install required files, Error Code 0x800701B1 while installing Windows 11/10 on your system, the solutions provided in this article will help you. This error can occur due to hardware and software issues, like corrupt BCD, faulty disk, etc.

Windows cannot install required files, Error Code 0x800701B1
Use the following solutions to fix the error message Windows cannot install required files during Windows installation, with error codes 0x800701B1, 0x8007025D, 0x80070017, etc. According to some reports, the error was fixed when users switched from CD to a USB flash drive for installing Windows 11/10. If you are also performing a clean installation of Windows 11/10 by using a CD, use a USB flash drive. You can also try inserting your USB flash drive into another USB port and see if it helps.
- Create USB installation media again
- Make sure that your laptop is plugged in and charging
- Delete all the partitions and try again
- Clean your disk using the Command Prompt
- Rebuild BCD
- Hardware fault
Let’s see all these fixes in detail.
1] Create USB installation media again
The error message indicates that there may be an issue with the USB installation media, might be it was not created properly. We suggest you completely format your USB flash drive and then create a USB installation media again. If your computer is unusable as you perform a clean installation of Windows 11/10, you have to use another computer to create a bootable USB flash drive for installing Windows 11/10.
You can use Microsoft Media Creation Tool to create installation media for another PC. Alternatively, there are many third-party tools available online, like Rufus that will help you create a bootable USB flash drive for installing Windows OS.
2] Make sure that your laptop is plugged in and charging
It sounds weird but it actually worked for some users. If you are a laptop user, connect it to the charger and turn on the power supply.
3] Delete all the partitions and try again
When we install Windows OS, it creates partitions on the hard drive on which it is being installed. When the installation fails, we try again. In such a situation, previously created partitions may create a conflict due to which Windows installation errors occur.
We suggest delete all the partitions on your hard drive and install Windows again. Because you are performing a clean installation, you need not worry about any data loss. If you have more than one disk on your system, make sure that you delete the partitions from the correct disk; otherwise, you will lose all your data.
4] Clean your disk using the Command Prompt
If deleting the partitions did not help, you can clean your disk and restart the Windows installation process. To do so, you have to launch the Command Prompt. Insert the bootable USB flash drive and press the Shift + F10 keys on the Windows installation screen. If this does not launch the Command Prompt, follow the steps provided below:
- Click on the Repair your computer link on the Install now screen.
- Click Troubleshoot on the next screen.
- Now, click Advanced options.
- Click Command Prompt.
When the Command Prompt appears on the screen, type the following commands. You need to hit Enter after entering each command.
diskpart
list disk
select disk #
clean
In the above command, replace # with the drive letter. If you select the wrong hard drive, you will lose all your data. After performing the above steps, when you install Windows, you will see the Unallocated space for the drive you have formatted using the Diskpart utility. Select that Unallocated space and then click Next. Follow the on-screen instructions to install Windows.
For some users, converting the hard drive partition style from GPT to MBR worked. You can also do this. After cleaning the disk, convert your hard drive to MBR by typing the following command:
convert mbr
5] Rebuild BCD
Corrupted BCD can also cause installation errors and you may see the error messages like this: Windows cannot install required files. The corrupted BCD can be fixed by rebuilding it. Execute the command to rebuild BCD. To rebuild BCD, you have to open Command Prompt. Follow the same method explained above to open Command Prompt while installing Windows.
6] Hardware fault
If none of the above solutions fixes your problem, there might be a hardware fault that is triggering this error and preventing you from installing Windows. Your hard disk might have been damaged. However, in some cases, this error can also occur due to faulty RAM. Some users found one RAM stick damaged. When they removed that faulty RAM stick, the error was fixed.
If you have more than one hard disk on your system, say, one is SSD and another is HDD, you can do this. Install Windows on your HDD. If Windows gets installed on the HDD without any error, your SSD has been damaged. Install a new SSD and install Windows on it.
How do I fix 0x8007025D during Windows installation?
You can see the error code 0x8007025D during Windows 11/10 installation with the error message:
Windows cannot install required files. Make sure all files required for installation are available, and restart the installation. Error code: 0x8007025D
To fix this error, create a bootable USB flash drive with Windows ISO again. In some cases, faulty RAM can also cause this error.
How to fix Windows Stuck at getting files ready for installation
Windows installation is faster on SSD as compared to HDD. If Windows installation gets stuck at getting files ready, disconnect all peripherals connected to your PC and see if it helps. If the installation media is not created properly, it may also cause such types of issues. Open a working computer and create a bootable USB flash drive again.
I hope this helps.
Read next: Error 0x80070001, Windows cannot install required files.
