
The BSoD error DRIVER VERIFIER DMA VIOLATION on Windows 11 shuts down your system and you lose any unsaved data. It’s caused by corrupt drivers and system files, and hardware issues. I’ve explained the causes and solutions below, so let’s jump right in!
Solution 1: Disable Driver Verifier
You can simply disable the Driver Verifier tool and see if this resolves the issue.
- Search for Verifier in the Windows Search bar.
- Click on Run as administrator in the right pane.
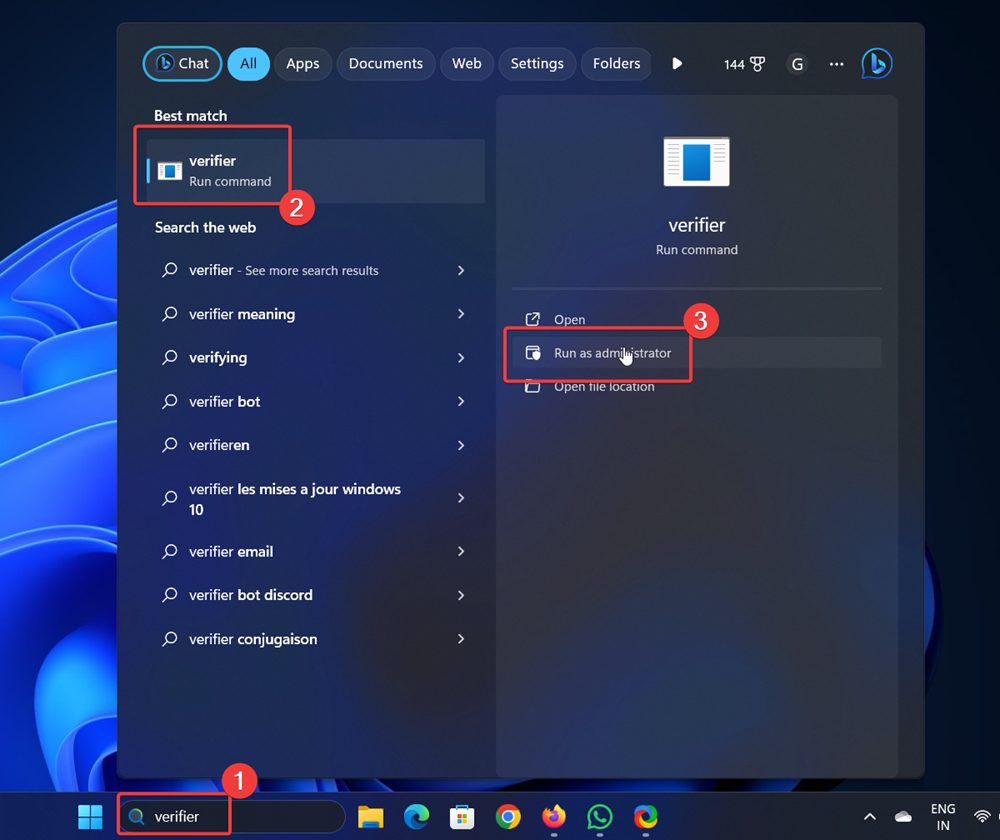
- If you encounter an administrator prompt, click on Yes.
- Check the radio button at Delete existing settings.
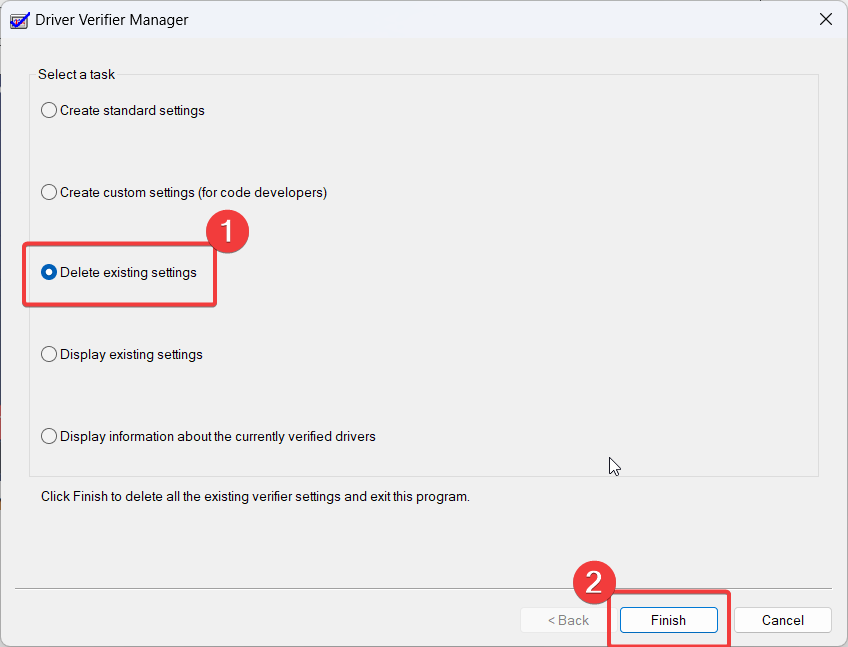
- Click on Finish.
Solution 2: Update Windows with Optional Updates
The primary cause of the issue is missing, corrupt, or inconsistent drivers. While you can update drivers individually, the quickest method to update all drivers at once is to install Optional updates.
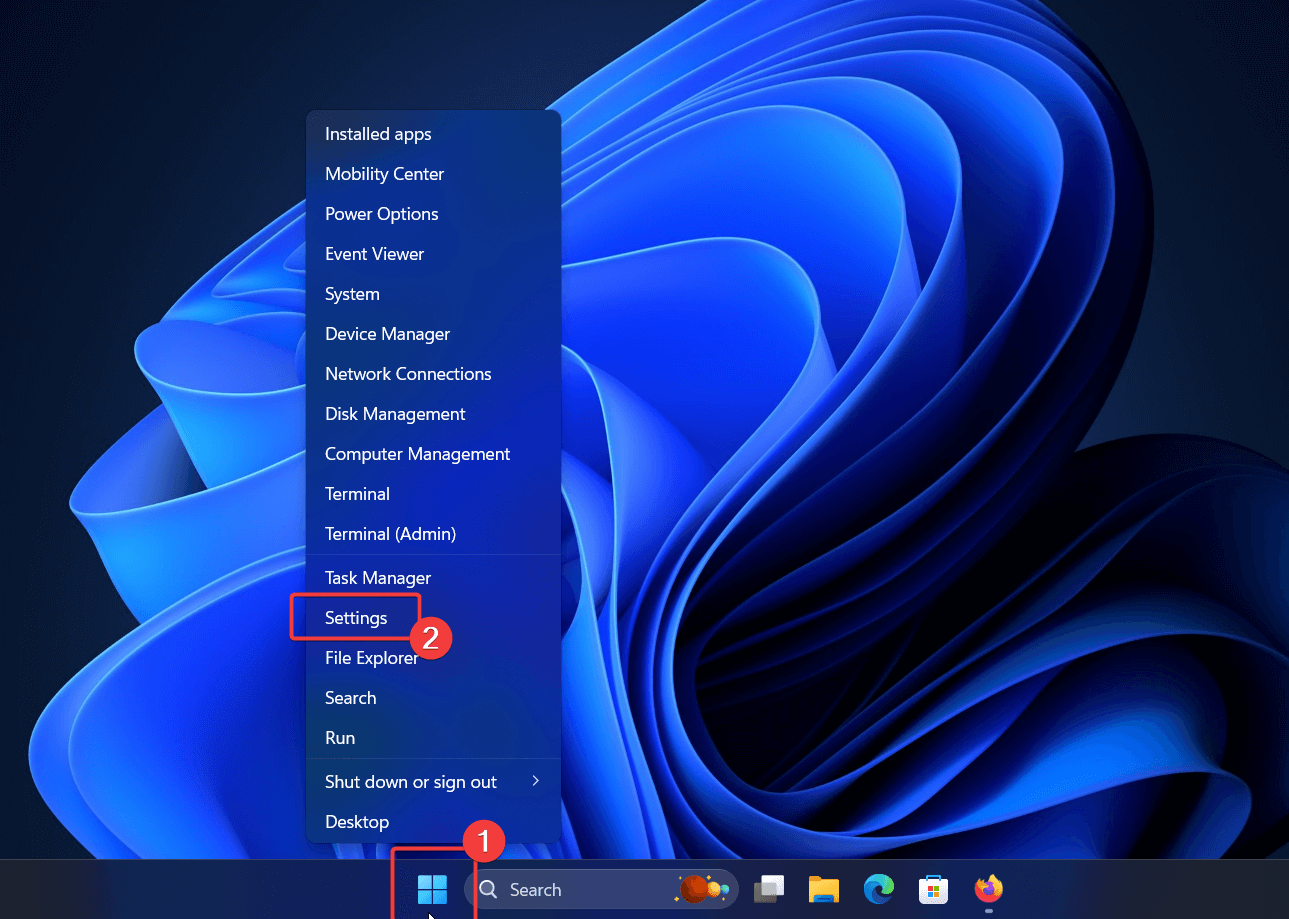
- Right-click on the Start button and select Settings from the menu.
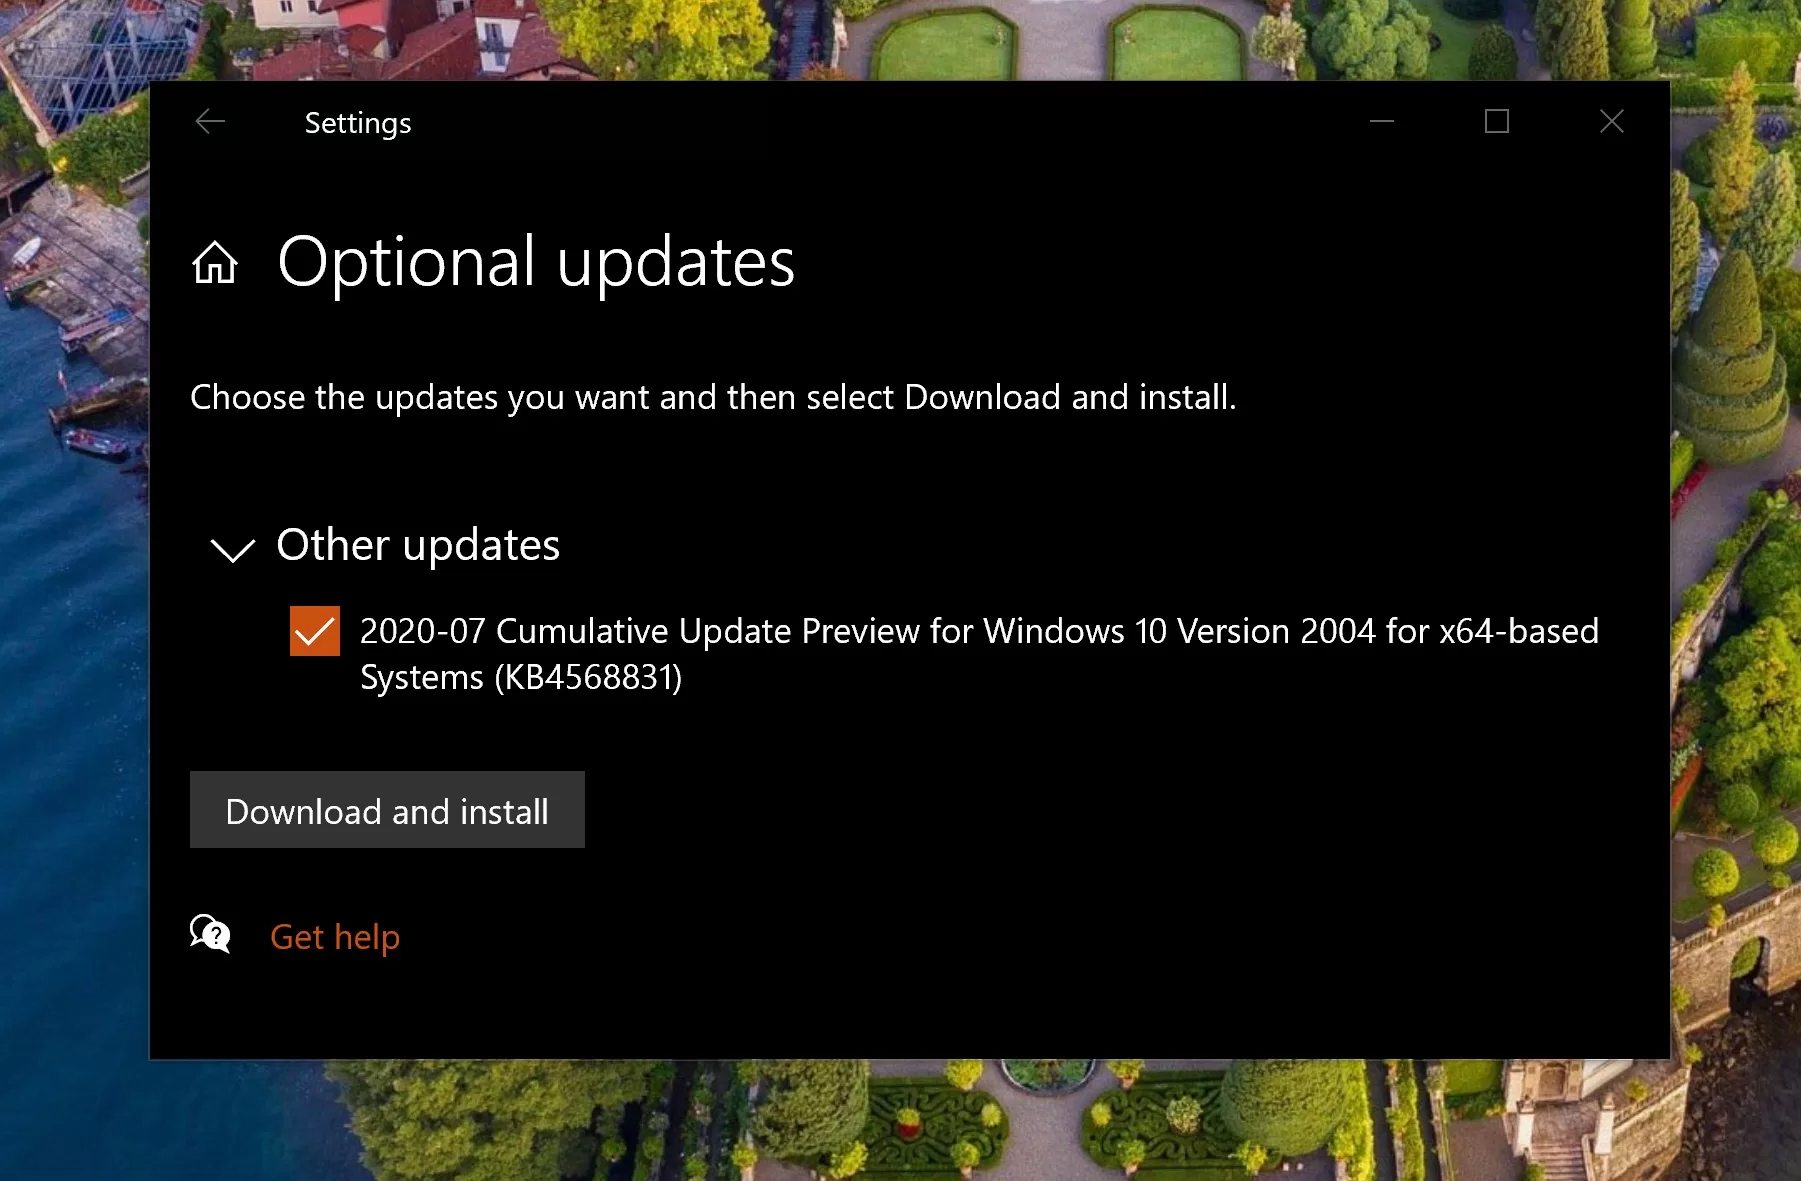
- Go to Windows Update >> Advanced options >> Optional updates.
- Install any available Optional update.
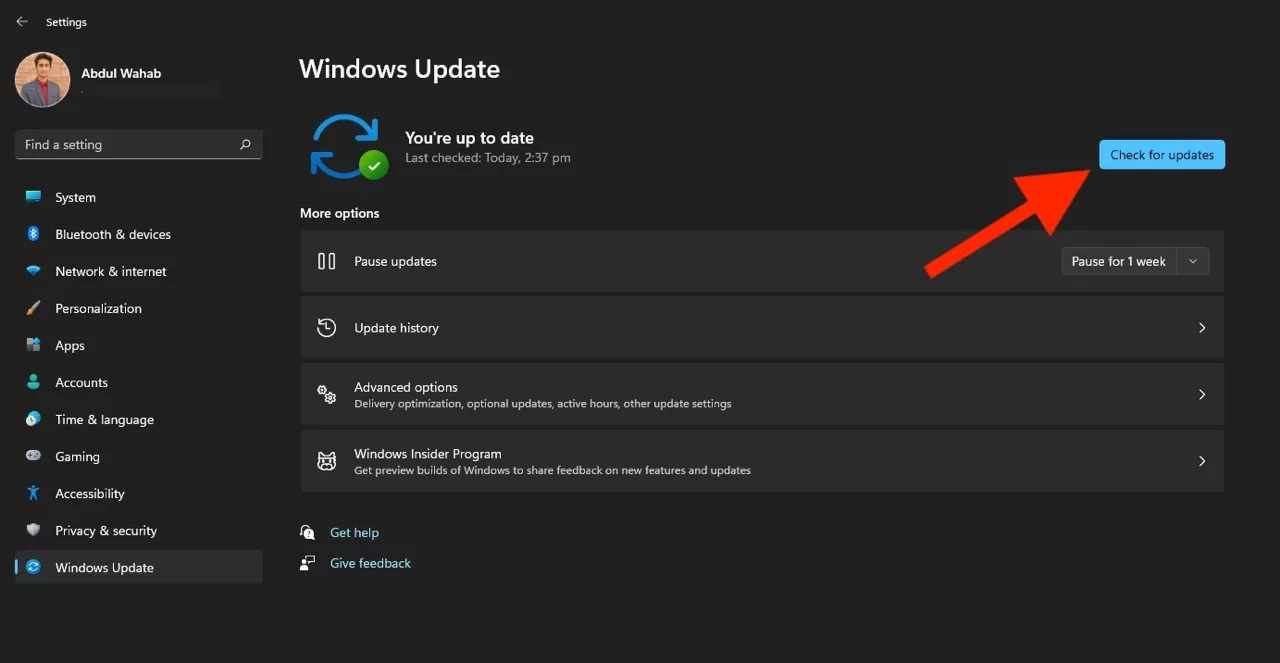
- Now, return to the Windows Update page and click on Check for Updates.
Solution 3: Run SFC and DISM Scan
The second cause is missing or corrupt system files. The SFC Scan checks for missing and corrupt system files. Then it replaces those files if possible. The DISM Scan is similar. It repairs the system image.
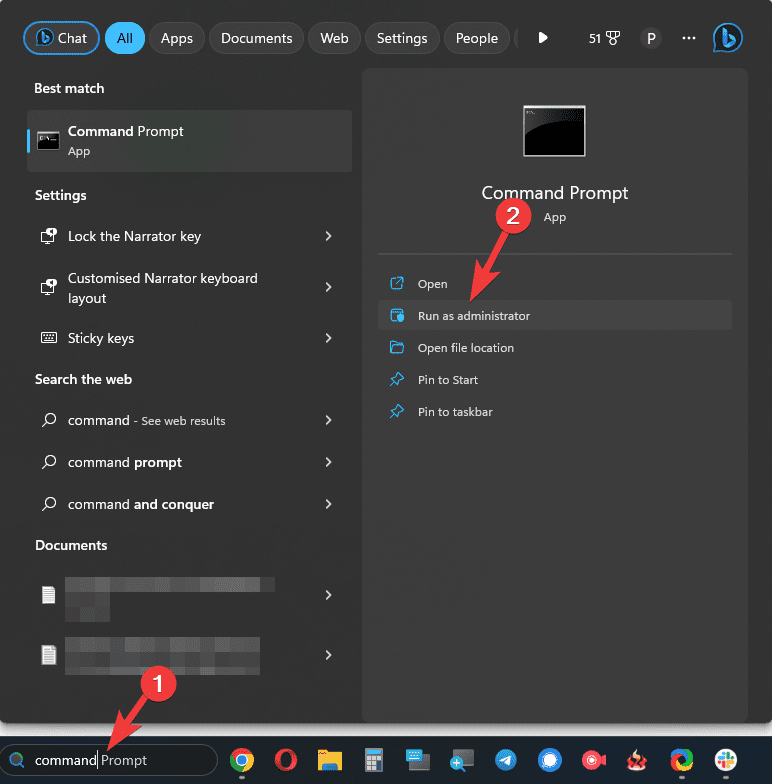
- Search for Command Prompt in the Windows Search bar.
- Select Run as administrator in the right pane to open the elevated Command Prompt window.
- Now, type the following commands to run the SFC and DISM Scans:
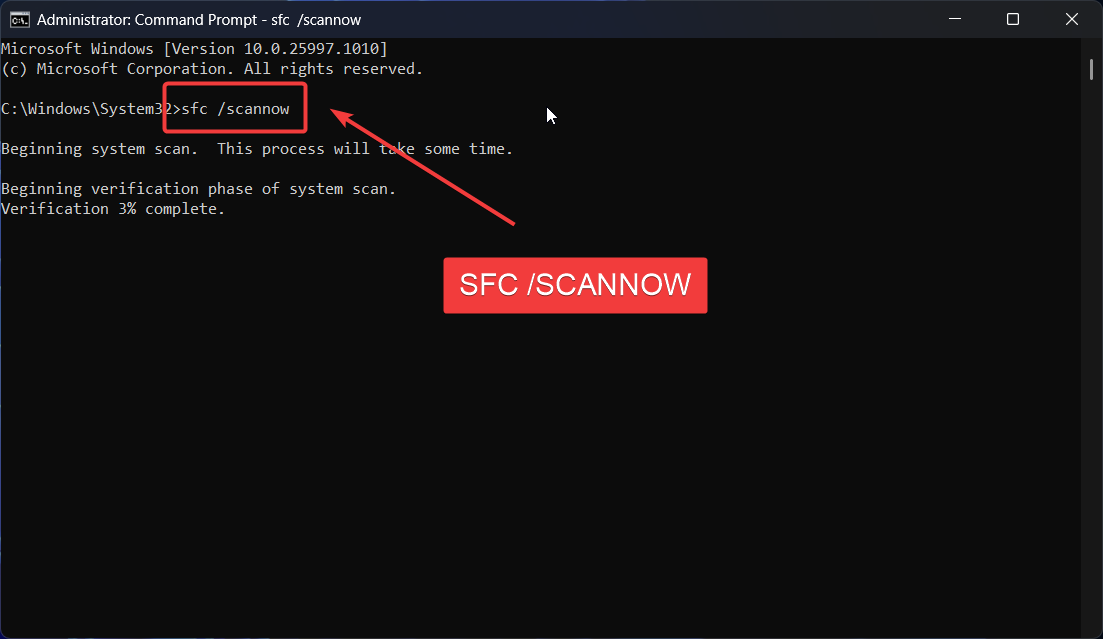
SFC /SCANNOW DISM /Online /Cleanup-Image /CheckHealth DISM /Online /Cleanup-Image /ScanHealth DISM /Online /Cleanup-Image /RestoreHealth
Solution 4: Check for Faulty Hardware
A lot of hardware products like printers and scanners push their own drivers to the system. They can interfere with existing drivers, thus causing BSoDs. To isolate this cause, disconnect all peripherals from your system. Then reconnect them one by one to detect the culprit.
Solution 5: Update the BiOS
If the BiOS is obsolete, BSoDs like DRIVER VERIFIER DMA VIOLATION on Windows 11 may occur. To fix this problem, you can update the BiOS.
For the exact procedure, you’ll have to contact your motherboard’s manufacturer. Usually, the BiOS is available on the manufacturer’s website. You can download and install it.
Solution 6: Run a CHKDSK Scan
HDD hard drive users can fix bad sectors with a CHKDSK Scan.
- Open the elevated Command Prompt window as explained in solution 2.
- Type the following command and hit Enter: CHKDSK /r /f
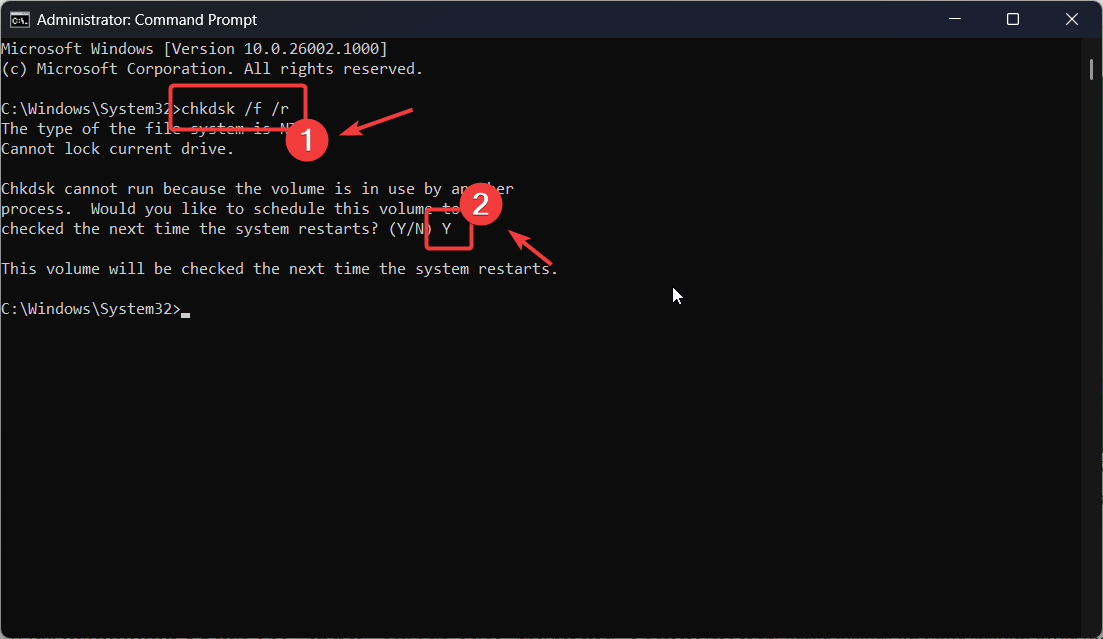
- Type Y and hit Enter.
- To complete the scan, reboot your system. The scan will take quite some time.
Solution 7: Use System Restore
If all other solutions fail, you can consider reverting your system to a previously created restore point.
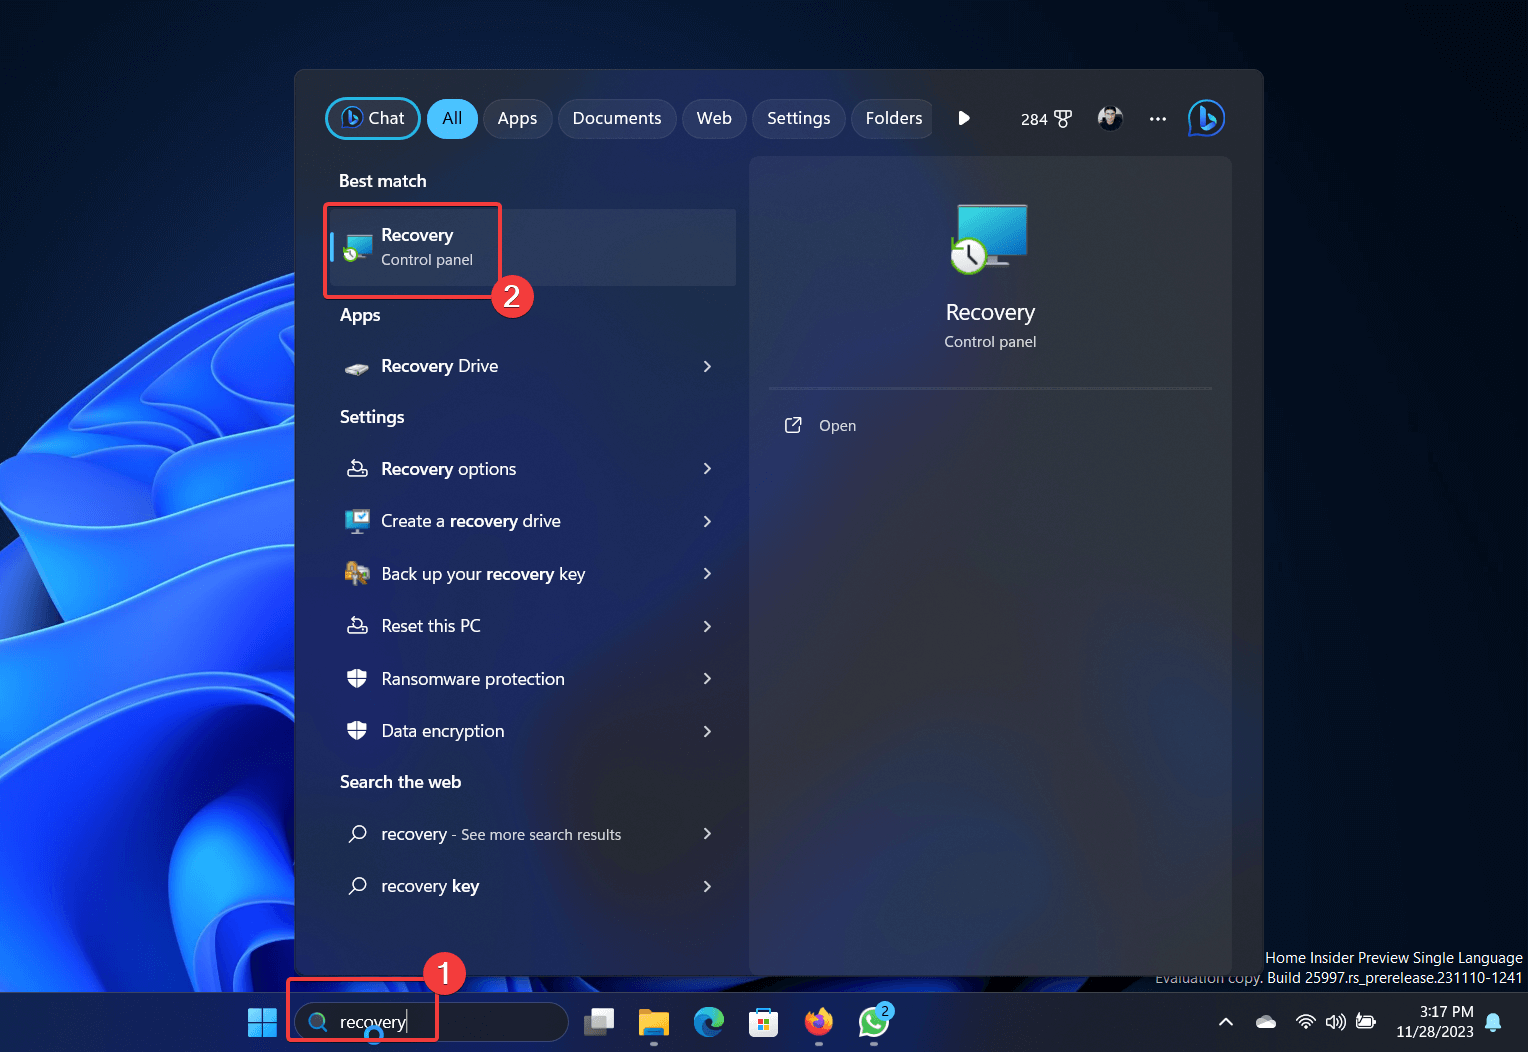
- Search for Recovery in the Windows Search bar.
- Open the Recovery application.
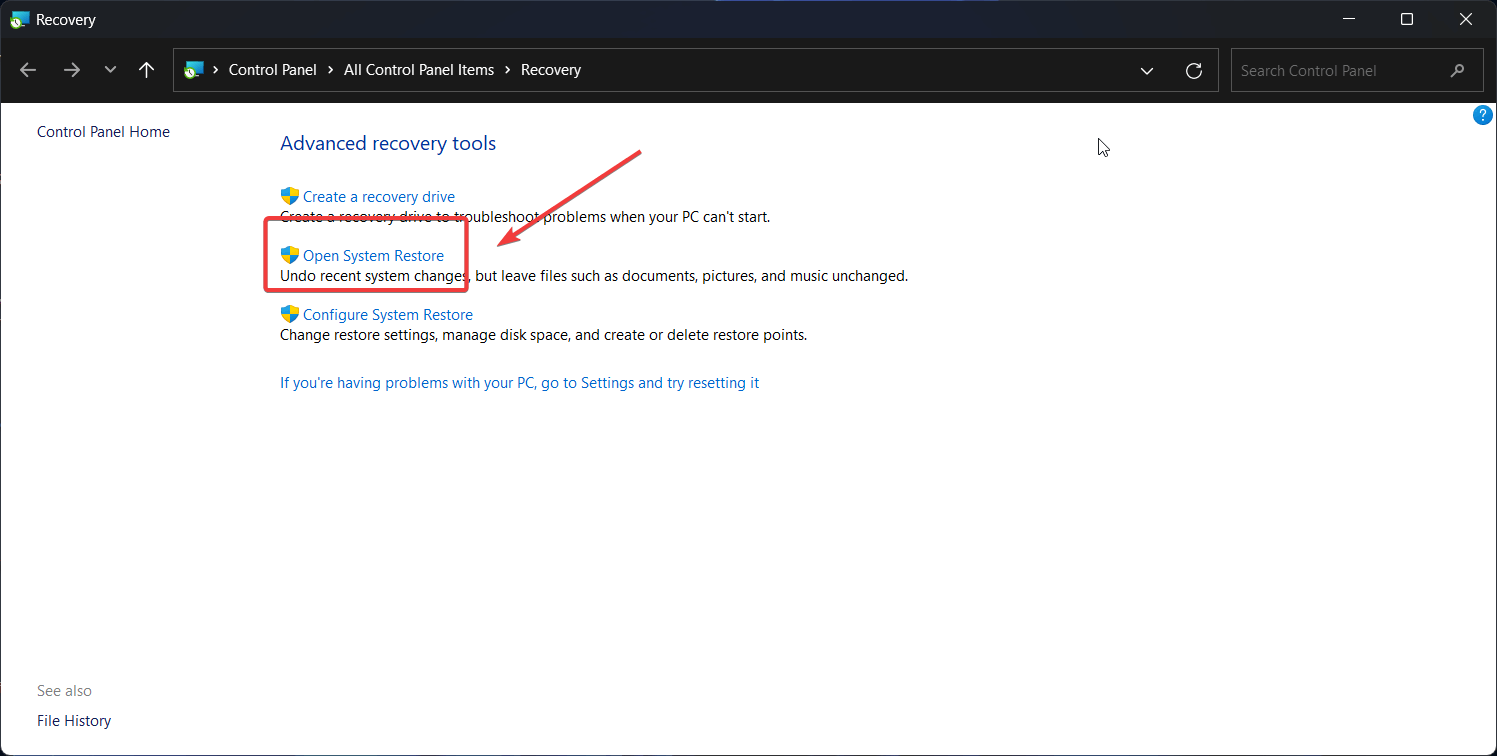
- Select Open System Restore.
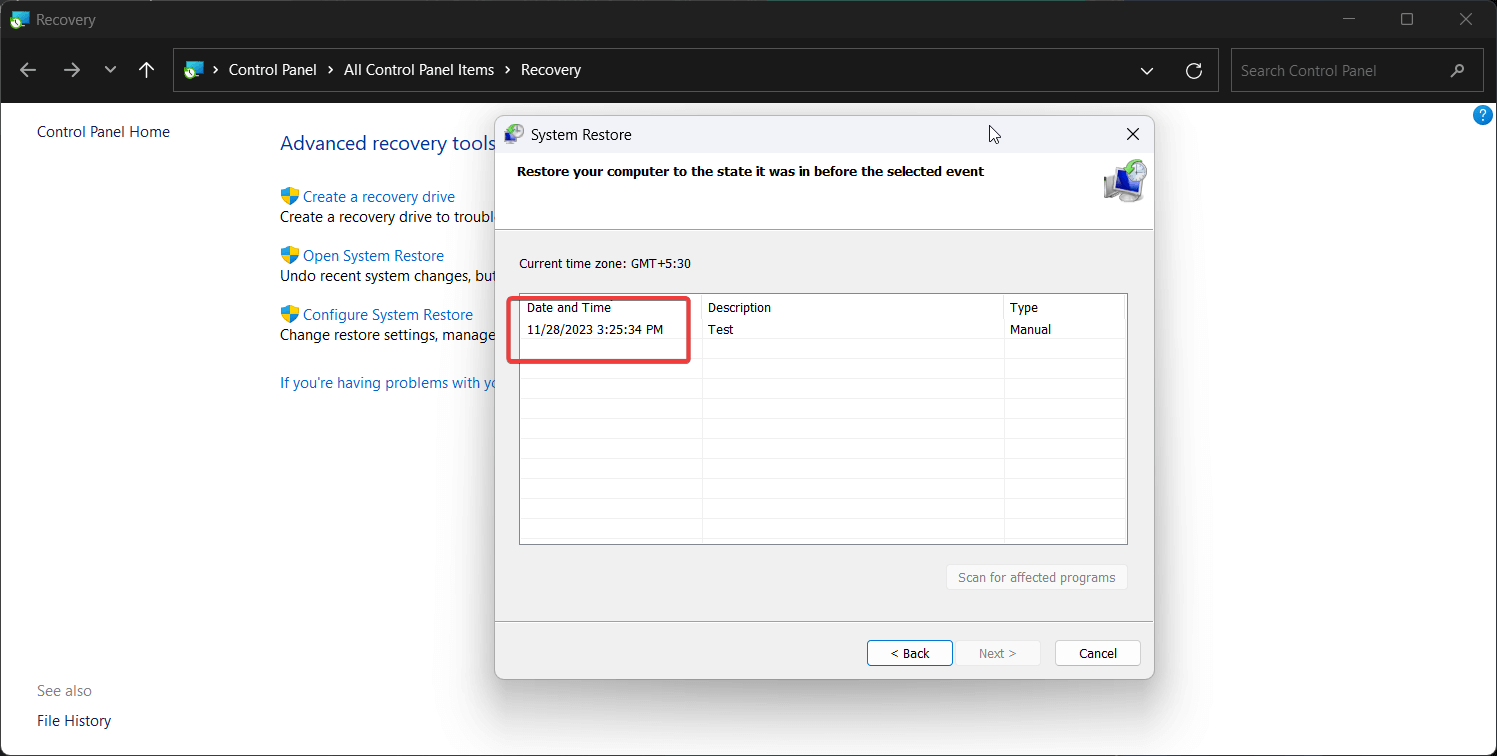
- Select the Restore Point and click on Next.
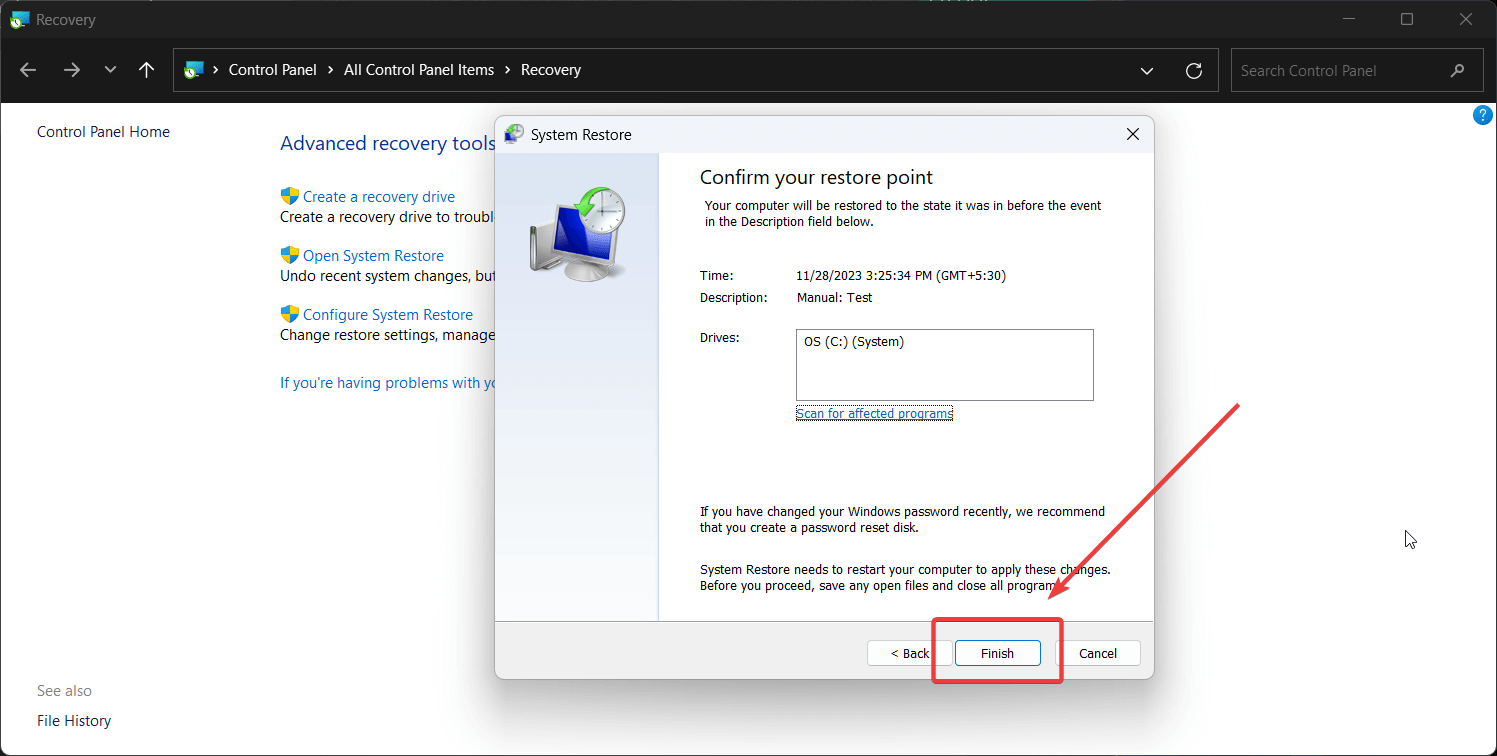
- Select Finish.
Fixing DRIVER VERIFIER DMA VIOLATION Windows 11
The DRIVER VERIFIER DMA VIOLATION error on Windows 11 may seem difficult to resolve, but disabling the Driver Verifier tool will surely resolve the problem. If this doesn’t help, try the other solutions in order.