
The Windows operating system uses a cache for DNS entries. DNS (Domain Name System) is a core technology of the Internet that is being used for communication. In particular, it is used to lookup IP addresses of domain names.
When users type a domain name in the browser, one of the first tasks that is executed when the site is loaded is to look up its IP address. The process requires access to DNS servers. Often, DNS servers of the Internet Service Provider are used automatically, but administrators may switch to other DNS servers, as these may be faster or offer better privacy.
Switching DNS providers may also help bypass Internet censorship, if DNS is used to block access to certain sites.
Windows uses the DNS resolver cache to speed up lookups. Each DNS lookup is added to the cache to speed up consecutive visits to the domains. Sometimes, entries may become old and may point to the wrong IP address. Our guide on fixing resolving host issues in browsers is still valid up to this day. Flushing the cache may help with that, as it removes all cached items to start from scratch.
Tip: you may use the free software DNSLookupView to log all DNS activity on Windows.
Display all cached DNS entries
The list of cached entries can be useful for a number of purposes. Webmasters and developers may check if the correct IP address is assigned to a property, and users may be interested in seeing all entries, e.g., to find out which domains have been accessed during a session.
- Open the run box with the shortcut Windows-R.
- Type cmd.exe and hit the Enter-key.
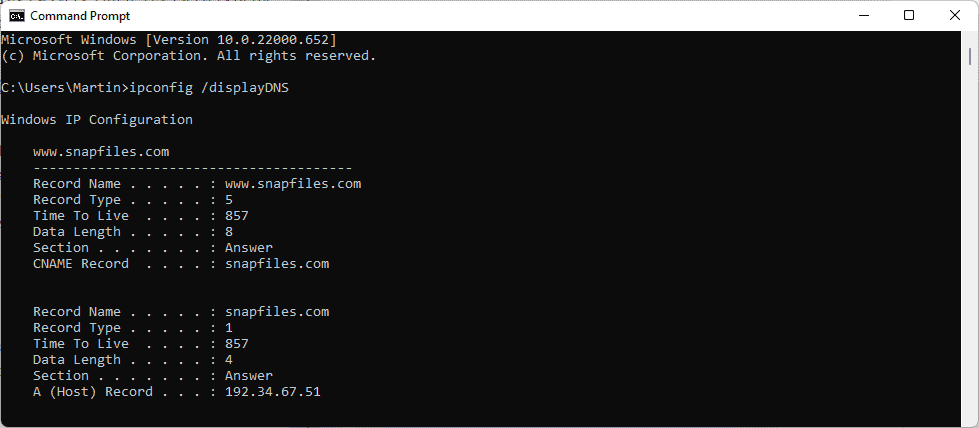
- Type ipconfig /displayDNS to run the command.
Windows returns all cached DNS entries in a long list. You may also redirect the output to a plain text file by running the command ipconfig /displayDNS > %USERPROFILE%Desktopdns.txt. This saves the output to the file dns.txt on the desktop.
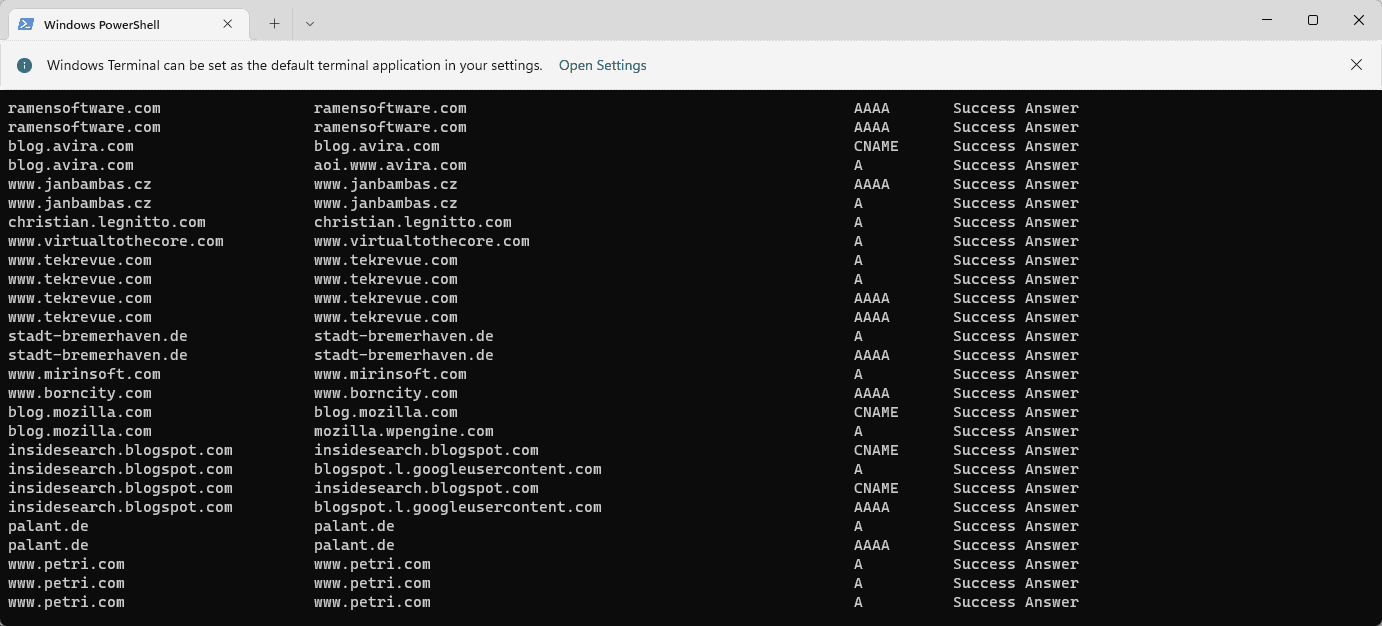
The very same command can also be run using PowerShell:
- Open Start, type PowerShell and select the result. If you have Terminal installed, type Terminal instead and select that result.
- Run the command powershell “Get-DnsClientCache | Format-Table -AutoSize”.
The output uses better formatting. You may redirect the output to a text file as well using the command powershell “Get-DnsClientCache | Format-Table -AutoSize” >%USERPROFILE%DesktopDNS.txt.
To flush the DNS cache, run the command ipconfig /flushdns. Check out this guide if you are getting the error Could not flush the DNS Resolver.
(via Eleven Forum)