
Every major release of Windows comes in a few different editions, or SKUs, which have different features. The upcoming Windows 11 is no different, and we already know it’ll come in editions like Home, Pro, and more. One of the big features that’s usually exclusive to Pro editions of Windows is Hyper-V, but with some tinkering, you can actually get it on Home editions. If you’re interested, here’s how to install Hyper-V on Windows 11 Home.
What is Hyper-V?
Hyper-V is Microsoft’s hypervisor software, which allows you to create and run virtual machines on your PC. Virtual machines (VMs) let you create isolated instances of an operating system that doesn’t affect your host PC. There are a few options for virtualization software out there, but Hyper-V is native to Windows, and it’s ideal if you’re managing Windows VMs.
Hyper-V can be useful for testing unstable or dangerous apps, or if you need a specific feature from a specific operating system. For example, you can install Ubuntu if there’s something you need from Linux but you prefer Windows as your main operating system.
Hyper-V was first implemented with Windows Server 2008, and it’s been part of Windows ever since. For regular Windows, it’s only available in Pro, Enterprise, and Education editions of the OS — officially, that is. Even in those editions, it’s usually an optional feature, so you have to go into the Settings app to install it.
On Windows 11, you can install Hyper-V by going to Apps > Optional features. Scroll to the bottom of the page and click More Windows features, then find Hyper-V and install it.
How to install Hyper-V on Windows 11 Home
You might think it’s complicated to get Hyper-V running on Home editions of Windows, but it’s surprisingly simple. Here’s what you need to do:
- Open Notepad (or another plain text editor) to create a text file.
- Paste the following content into the file:
pushd "%~dp0"
dir /b %SystemRoot%servicingPackages*Hyper-V*.mum >hv.txt
for /f %%i in ('findstr /i . hv.txt 2^>nul') do dism /online /norestart /add-package:"%SystemRoot%servicingPackages%%i"
del hv.txt
Dism /online /enable-feature /featurename:Microsoft-Hyper-V -All /LimitAccess /ALL
pause
- Save the file with the name hv.bat. You can save it wherever you prefer.
- Once you’ve saved it, right-click the file and choose Run as administrator.
- Let the process run; it may take a while. Once it completes, you’ll have to restart your computer.
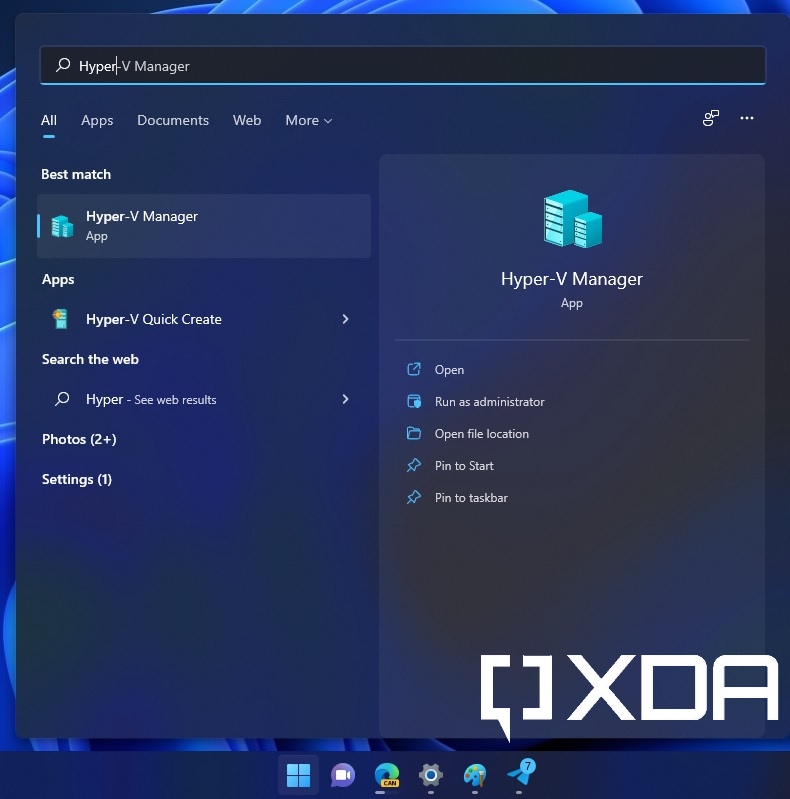
- Hyper-V should automatically be installed and you can find it by searching in the Start menu. It’ll be called Hyper-V Manager.
It’s also available in Windows Tools. If it doesn’t show up, try the following:
- Open the Settings app and go to Apps > Optional features.
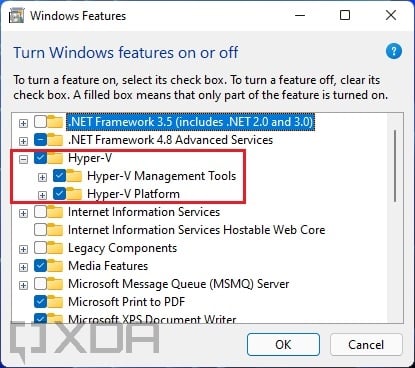
- Scroll to the bottom and click More Windows features.
- Find Hyper-V on the list and enable it. You may have to restart afterwards.
- You should now be able to use Hyper-V to create and manage virtual machines.
That’s about all you need to know to install Hyper-V on Windows 11 Home. This guide also works for Windows 10. Unfortunately, installing Hyper-V doesn’t enable Windows Sandbox, which is another cool virtualization feature of Windows. Windows Sandbox creates a clean copy of your current Windows version so you can test software on it. It has a slightly different use case since it only duplicates your current Windows version, and not any OS you want. Plus, Windows Sandbox is reset every time you close it. It’s really just meant for quickly testing a specific app or setting without damaging your PC.
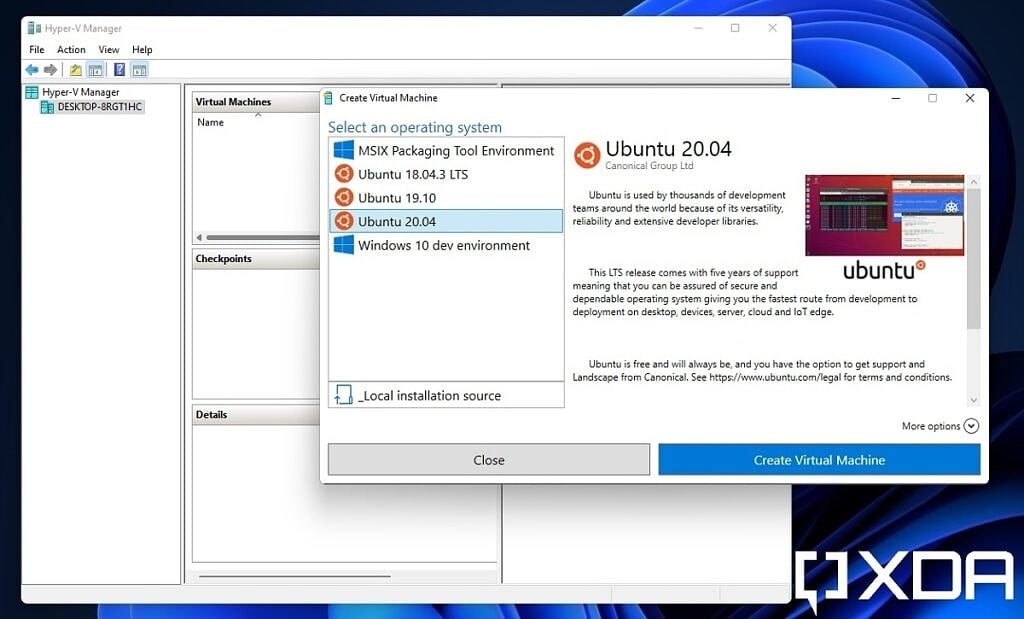
Using Hyper-V, you can create virtual machines using your own ISO files, or you can choose one of the options provided by Microsoft. The company actually offers the ability to create an Ubuntu virtual machine right out of the box. Virtual machines are persistent unless you choose to delete them, so there are certainly different applications for them compared to Windows Sandbox.
Want to get Windows 11 when it’s officially released? Make sure you have a PC that’s compatible with the upgrade. And keep an eye on our Windows 11 update tracker if you want to get the latest updates.
The post How to install Hyper-V on Windows 11 Home appeared first on xda-developers.