
Ubuntu is a well-known Linux distribution that enjoys great popularity. Regardless of the operating system you use, chances are that you have heard about Ubuntu and its features from your acquaintances. In this post, we will guide you on how to install Ubuntu on VMWare Workstation.
Install Ubuntu in VMWare Workstation
If you want to install Ubuntu in VMWare Workstation, follow the steps mentioned below.
- Meet all the prerequisites
- Enable Virtualization from BIOS
- Download VMWare Workstation and Ubuntu
- Create a Virtual Machine
- Install Ubuntu
Let us talk about them in detail.
1] Meet all the prerequisites
To run Ubuntu in a VMware virtual machine, you need a computer that supports virtualization, the latest version of VMware Workstation Player, a four-core processor, 4GB to 8GB of RAM, and at least 20GB of free disk space on the host system. Also, check your system’s performance tab to see if virtualization is active. If not, enable it from BIOS. Finally, download the Ubuntu ISO image, ensuring that you get the LTS version, we will see how to do all those hereinafter.
2] Enable Virtualization from BIOS
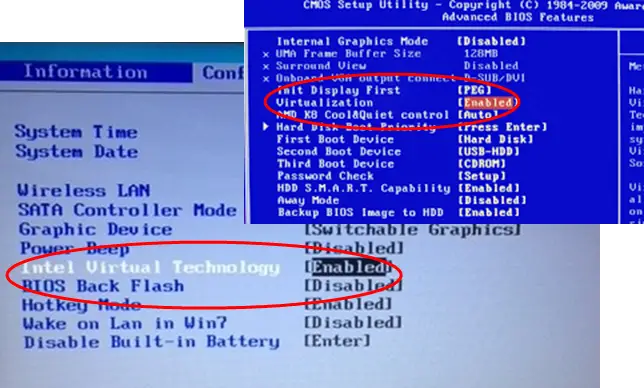
Hardware Virtualization allows you to run virtual machines on your computer. In order to install Ubuntu, we are supposed to enable it from BIOS. You need to follow the steps mentioned below to do the same.
- First of all, boot into BIOS firmware.
- Now, you need to go to Advanced Settings and look for Virtualization.
- You may see SVM, Intel VT-x, Intel Virtualization Technology, or AMD-V option there, just enable it.
- Finally, save and exit from the BIOS.
Once your system restarts, launch Task Manager and switch to the Performance tab. Now, it will show the Virtualization feature as enabled.
3] Download VMware Workstation and Ubuntu
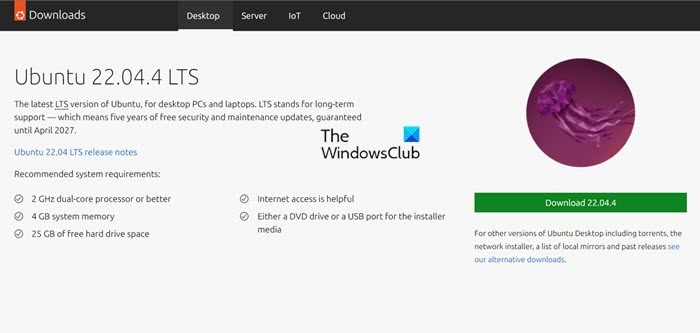
Next up, we need to download the two software required in this installation process. You can install the VMWare Workstation from vmware.com and Ubuntu distros from ubuntu.com. You can install the latest version of Ubuntu or even an older one, or ask your IT admin to give you a version you a preferred version. Once you have downloaded both tools, go ahead and install VMware Workstation from the Download folder.
4] Create your Virtual Machine
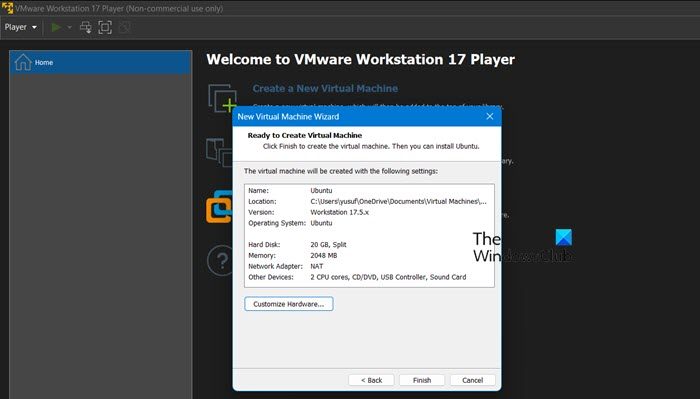
We first need to create an environment on top of which we are going to install Ubuntu. To create one, follow the steps mentioned below.
- Launch VMWare Workstation Player on your computer.
- Now, click on the Create a New Virtual Machine option to get started.
- Now, select the option that says “I will install the operating system later” and then click Next.
- Under the Guest Operation system, select Linux, and under Version, select Ubuntu and then click on Next.
- You are required to give it a name and select a location.
- Make sure to pick the size of the virtual disk such that it can accommodate the operating system, our recommendation is for you to go for 20GB, as you can increase the size when needed, select Split virtual disk into multiple files, and then click on Next.
- You will get a summary of your machine, if you are satisfied with everything click on Finish, if not, click on Customize Hardware and then make the necessary changes.
Now that we have created an environment, let us move to the next step and install the operating system.
5] Install Ubuntu

Finally, we will proceed with the installation of the Ubuntu operating system on our machine. To do the same, follow the steps mentioned below.
- Select the newly created virtual machine and select Edit virtual machine.
- Now, go to CD/DVD SATA, select Use ISO image file, click on Browse, navigate to the location where your file is stored, and select the ISO file for Ubuntu.
- Close the settings window, select Ubuntu VM, and click on Start virtual machine.
- When your machine boots up, you will have to select Try or Install Ubuntu and then follow the on-screen instructions to complete the installation.
- Once it’s completed, you will be asked to enter your location and create a local account; After doing that, click on Continue.
This way you will be able to install Ubuntu on your computer with ease.
Read: How to run Bash on Ubuntu on Windows 11
How to install Ubuntu on a VMware workstation player?
As Ubuntu is one of the most commonly used Linux distros, installing it on a virtual machine is not too difficult. All you need to do is create a machine using VMware Workstation Player and then install your ISO on top of it. Follow the aforementioned steps to do the same.
Read: How to install Linux Ubuntu on Hyper-V in Windows 11?
How do I install Ubuntu 22.04 LTS on VMware workstation?
The process to install Ubuntu 22.04 LTS will be the same as that of any other Ubuntu version, however, you just need to make sure that you are installing the required version from their official website. Once you have the correct ISO file, follow the steps mentioned earlier to install it on your computer.
Also Read: How to install Fedora on Oracle VM VirtualBox.