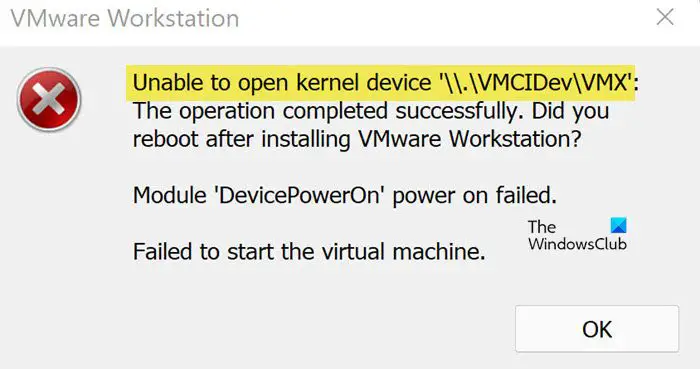
Virtual machine software called VMware Workstation runs various operating systems on a single host computer. Every virtual machine in VMware can run a single instance of any operating system like Microsoft, Linux, etc, at the same time. However, it is not free from errors. When launching VMWare Workstation, we may see an Unable to open kernel device ‘.VMCIDevVMX’ error due to misconfigured VMX file or corrupted VMware Workstation program. In this article, we will discuss the matter in detail and find solutions to resolve the said error.
Unable to open kernel device ‘. VMCIDevVMX’: The operation completed successfully. Did you reboot after installing VMware Workstation?
Module ‘DevicePowerOn’ power on failed.
Failed to start the virtual machine.

Fix Unable to open kernel device .vmcidevvmx error in VMware workstation
To fix Failed to start the virtual machine., Module DevicePowerOn power on failed, Unable to open kernel device .vmcidevvmx error you may execute the following solutions:
- Restart your computer
- Edit VMX File
- Repair VMware Workstation
- Uninstall VMware Workstation
Let’s get started.
1] Restart your computer
If you have read the error message, one thing is clear; it is asking you to restart the computer. This usually happens when you install VMware for the first time, as there are some adjustments that need to make by the computer once the installation process is over or after creating a new VM.
Regardless, before going to the major troubleshooting solutions, restart your computer and then open the VMWare Workstation. Hopefully, Windows will make the required changes and resolve the issue.
2] Edit VMX File
In a VMware workstation, the vmx file is a configuration file that is created by VMware workstation software. It keeps virtual machine settings in plain text such as the virtual machine’s memory, hard disk, and processor limit settings. To resolve this issue, we should make some changes in the vmx file.
Let’s start to modify the vmx file.
- Locate the folder where VMware has been installed.
- Now search the VMX file of the Virtual machine in that folder. It may or may not end with VMX, so, look for a file with three white pages as its icon.
- Right-click on the virtual machine vmx file and select open with Notepad.
- Search for the line with vmci0.present.
- Change the value from “TRUE” to “FALSE”.
- Save the notepad file and close the file.
- Finally, Restart the computer.
Hopefully, after modifying the vmx file, the said error will be resolved.
3] Repair VMware Workstation
You may encounter the said error if VMware Workstation is corrupted. We can pretty easily repair the file by reinstalling the app itself, however, it is an extreme solution as it is quite long, that is VMWare Workstation has a feature to repair the program. To repair VMware Workstation, follow the prescribed steps to do the same.
- Open Settings by Win + I.
- Go to Apps > Installed apps or Apps & Features.
- Search for VMware Workstation.
- Windows 11: Click on the three vertical dots and click on Modify/Change.
- Windows 10: Select the app and then click on Modify/Change.
- Follow the on-screen instructions to repair the VMWare Workstation.
Once the program is repaired, don’t just launch it; first reboot your computer and then launch the VMware Workstation.
Read: Fix VMware Workstation Unrecoverable Error (vcpu-0)
4] Uninstall VMware Workstation
As we mentioned earlier, if we get this error, there is a high chance that our VMware program is corrupted. You can run the repair utility present inside the program and if that doesn’t work, your last resort is to reinstall it. So, go ahead and uninstall VMware Workstation using the following steps.
- Open Settings by Win + I.
- Go to Apps > Installed apps or Apps & Features.
- Search for VMware Workstation.
- Windows 11: Click on the three vertical dots and click on Uninstall.
- Windows 10: Select the app and then click on Uninstall.
- Click on the Uninstall button to confirm your actions.
After uninstalling the app, go to kb.vmware.com, download the installation package and install it. Hopefully, this will do the trick for you.
Hopefully, you will be able to resolve the issue using the solutions mentioned in this article.
Why is my Virtual Machine not opening?
Our Virtual Machine may fail to work if you have allocated less memory than what is required by the VM. This statement goes for both Primary Memory, which is your RAM, and Secondary Memory, which is your Hard Drive. So, when creating a VM, allocate more space it to it, or if you have already created go to its settings and make the required adjustments.
