
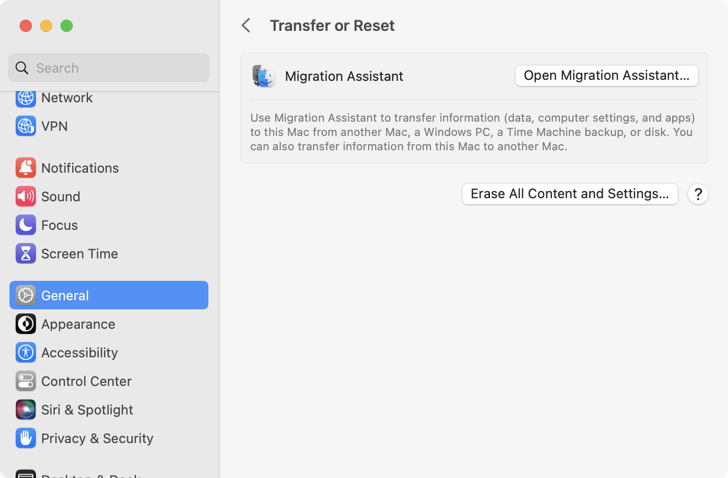
To wipe a modern Mac with Apple Silicon or T2 Security Chip, open System Settings > General > Transfer or Reset and click “Erase All Content and Settings” to open the Erase Assistant.
Alternatively (and for older Mac models), reboot in Recovery Mode either by holding the power button down on boot or holding Command+R when your Mac starts up. From here, you can erase your drive with Disk Utility, and then choose “Reinstall macOS” to begin the reinstallation process.
Is it time to sell or give away your old Mac? Or do you just want a fresh start to clean up your machine? Here’s how to securely delete all of your files, then install a fresh version of macOS.
If you’re selling or giving away your computer, this is the only way to make sure whoever ends up with your Mac can’t access to your files.
Before You Begin: Back Up Your Files
When you reset your Mac or reinstall macOS, you will lose your files as well. It’s not enough to rely on iCloud for backup duty, so make sure you back up everything you want to keep. The easiest way to do this is using Time Machine, Apple’s built-in backup service.
Connect an external drive that’s at least the size of your Mac’s internal drive (ideally twice the size, for archival purposes) and then launch Time Machine (you’ll find it under System Settings > General > Time Machine). Nominate the drive as your backup location, but be aware that everything on the drive will be lost when you do this.
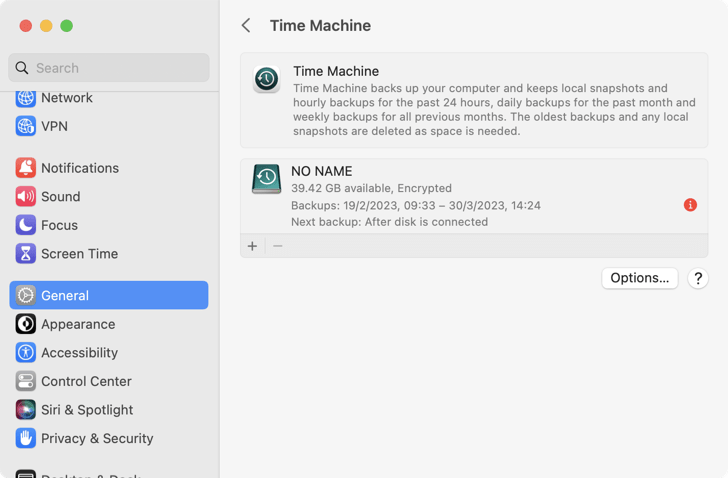
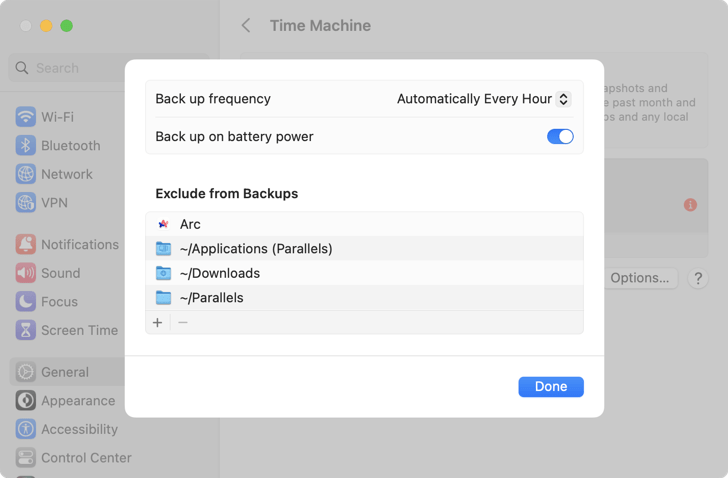
Now, you just have to wait for your backup to complete. You can exclude locations from your backup (like your Downloads folder) by clicking on “Options…” under Time Machine preferences.
You’ll be able to restore your files using the “Restore from Time Machine backup” option that appears when you boot your freshly wiped Mac for the first time. Alternatively, you can restore your files to a new Mac using this method if you are upgrading or moving to a different machine.
Option 1: Factory Reset Your Mac
There are two ways of wiping your Mac so that it’s ready for a new owner (or simply because you want a fresh start). The easiest way is to use the Erase Assistant that Apple added to macOS in the 2021 update.
This option isn’t available on all Mac models, so your Mac will have to satisfy a few requirements in order to have access to it. To start, you’ll need to be running macOS 12.0 Monterey or later. You’ll also need a Mac with an Apple Silicon (like an M1 or M2) processor, or an Intel Mac with Apple’s T2 security chip.
You can find out if you have an Apple Silicon or Intel Mac using the Apple menu. To access the Erase Assistant on macOS 13 Ventura or later, navigate to System Settings > General > Transfer or Reset and click on the “Erase All Content and Settings…” button.
On macOS 12 Monterey, you’ll need to open System Preferences, and then, at the top of the screen, click on System Preferences > Erase All Content and Settings… in the menu bar. Enter your admin password to proceed, and then the Erase Assistant will open.
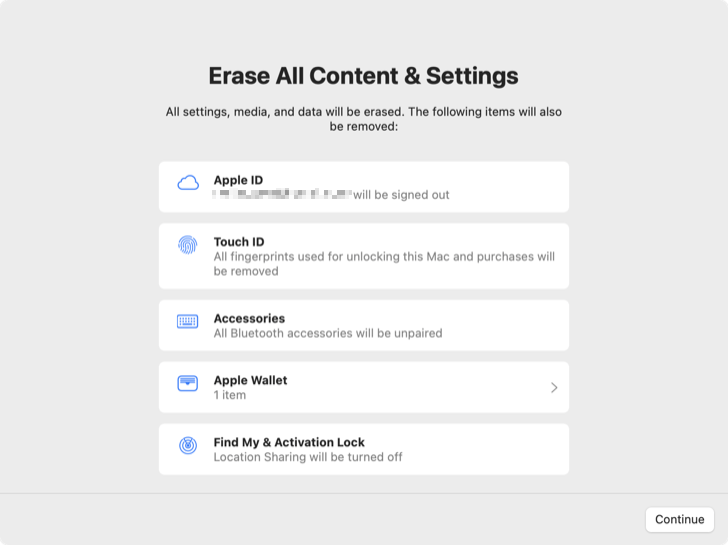
Erase Assistant will remind you to back up your files, then you’ll see a list of items that will be removed as part of the reset procedure. Hit “Continue” and enter your Apple ID password to remove your device from Find My (and disable Activation Lock). macOS will give you one more warning, then you’ll need to click “Erase All Content & Settings” to confirm your choice.
When your Mac eventually reboots, it will be free of user data and ready for the next owner to use.
Option 2: Wipe and Reinstall macOS from Scratch
If you don’t have the option of using the Erase Assistant, or you have a particular version of macOS that you want to install, you’ll have to do things the old-fashioned way by booting into Recovery Mode (or booting from a USB drive), erasing your drive
Step One: Boot From Recovery Mode or an Installer
Your Mac’s Recovery Mode is a treasure trove of useful tools, and it’s the easiest way to wipe your computer and start from scratch. If you have a newer Mac with an Apple Silicon chip, shut down your machine, then start it up and keep the power button held down. For Mac models with an Intel processor, you’ll need to reboot and start your Mac up while holding Command+R. Your Mac will boot into the recovery partition.
If you’re using an older Mac (from 2010 or earlier), there’s a chance that you can’t use Recovery Mode. On those devices, hold “Option” while turning your computer on, then select the recovery partition instead.
If neither of these options work, don’t panic! You’ve got a couple of options yet. You can access recovery without a partition using Network Recovery: hold Command+Shift+R while turning on your Mac and it will download the Recovery features for you. Failing that, you can create a bootable USB installer, and boot from that by holding “Option” while turning on your Mac.
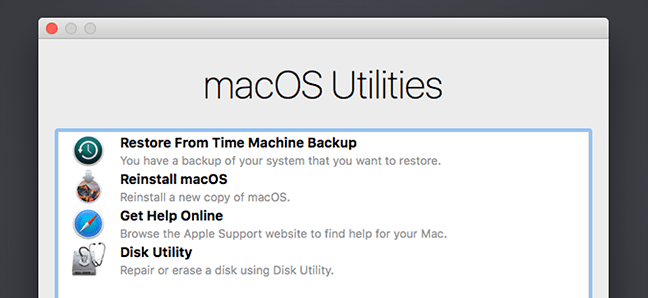
Once you’ve managed to open up the Recovery Mode in some fashion, we can move on to wiping your drive securely.
Step Two: Securely Wipe Your Hard Drive (Optional)
If you want to re-install your operating system, but leave your files in place, you can skip this step. Your user accounts and files will stay exactly where they are, and only your operating system will be overwritten. You should still back up files before you do this, just in case, but otherwise, you’re ready for step three.
If you want a truly clean installation, you’ll need to wipe your hard drive. This is important if you’re going to be selling or donating your Mac. Doing this in Recovery Mode isn’t really different from formatting any external drive within macOS.
To get started, click the Disk Utility option.
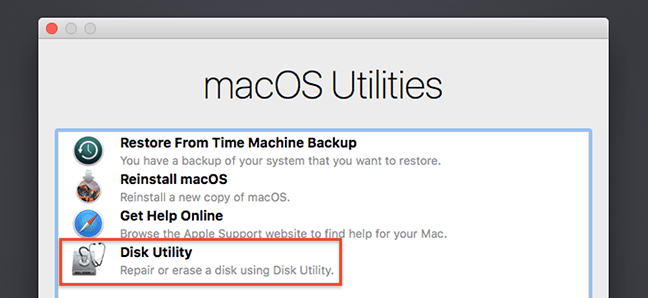
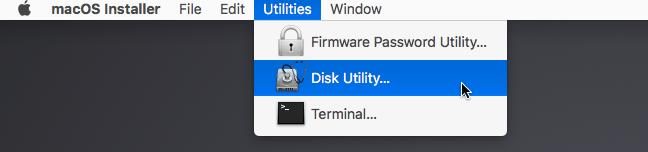
Depending on how you started Recovery Mode, you may be presented with the option to start Disk Utility right away, as seen above. If not, you can find Disk Utility in the menu bar: click “Utilities,” then select “Disk Utility.”
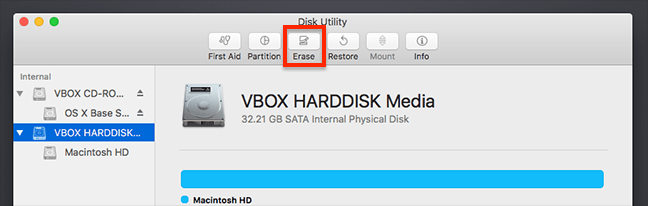
You’ll now see your list of hard drives. Click your primary drive, then click “Erase.”
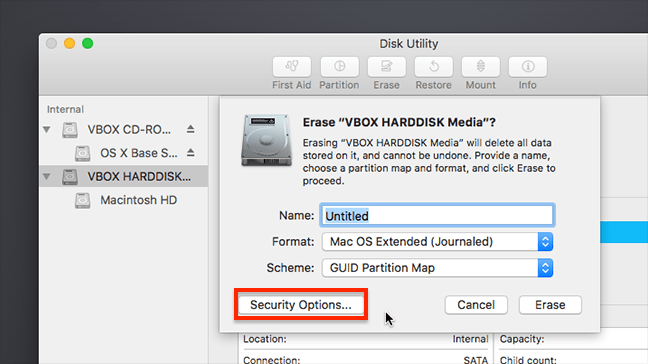
If you’re wiping a mechanical drive, click “Security Options” in the window that pops up. If your Mac has a solid state drive (like most models made in the last decade do), you can skip this part. SSDs securely erase files thanks to TRIM.
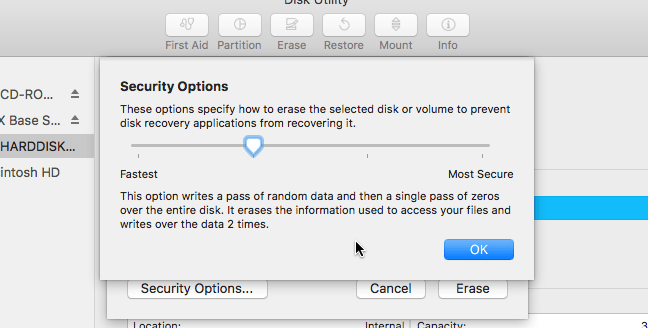
For mechanical hard drives, move the dial up to randomly write data over your entire drive. We’ve argued you only need to write over a drive once to securely wipe it, but if you’re paranoid, you can also wipe it three or five times. Click “OK” once you’ve decided.
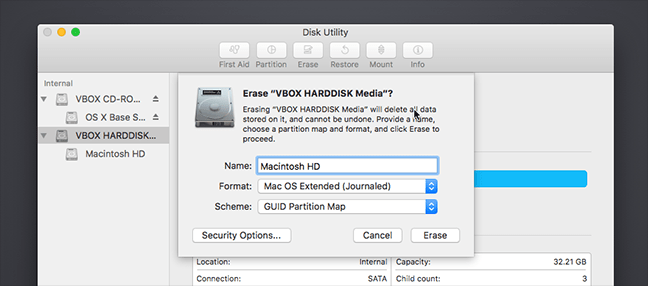
Now it’s time to give your drive a name (I recommend “Macintosh HD”, just for consistency’s sake), then click “Erase” to start erasing the drive.
For most users with an SSD, this process should be over very quickly. If you have an old hard drive, it might take a while. If you choose three or five passes, you might want to leave this running overnight.
Step Three: Reinstall macOS
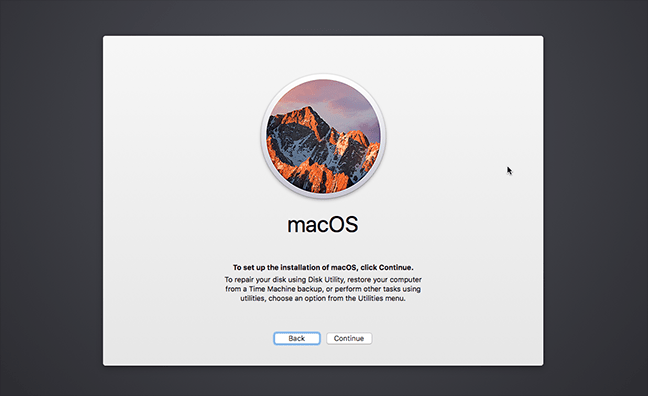
With your drive wiped clean, you are now ready to reinstall macOS. If you booted from a functioning recovery partition, click the “Reinstall macOS” button to get started. The installation process will begin.
If you booted from a USB disk, click “Continue” to advance to the installer.
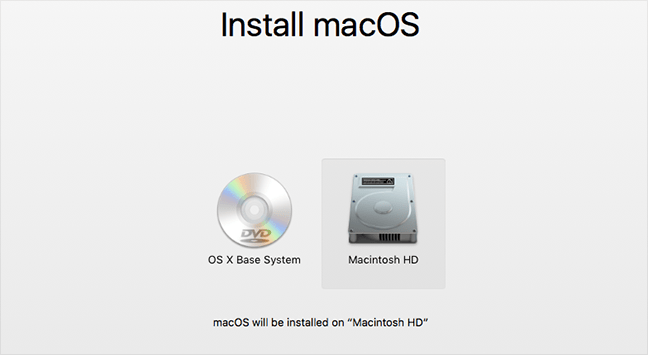
You’ll be asked which hard drive you want to install to. Choose the Macintosh HD you named earlier.
Just like that, macOS will begin installing.
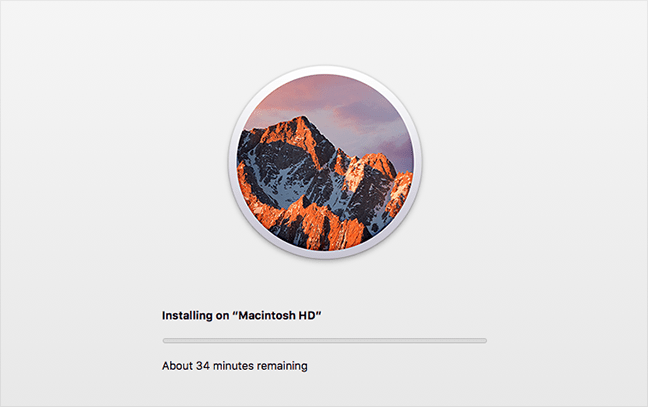
This might take a while. Eventually, your Mac will restart and ask you to create an account. If you’re giving your Mac away or selling it, we recommend that you simply shut down at this point. The person you’ve giving your Mac to can create their own account when they start up the Mac.
Enjoy Your Squeaky Clean Mac
Whichever method you chose, your Mac should now be clean as a whistle. You can start restoring your files using Time Machine if you want, or list your Mac for sale online.
Alternatively, if your Mac is old and you’re wondering what to do with it, you could turn it into a Plex server or use Plex alternative Jellyfin instead. If you’re up for a bit of a challenge and like pushing boundaries, consider installing an unsupported (newer) version of macOS on your old Mac.