
There are lots of reasons why you might find that your Mac won’t turn on, or your MacBook won’t start up, but you probably just want to get it working again. We’ll run through the various checks and changes to make to get your Mac to boot up to you can start using it again.
Read on for some simple tips that should get your Mac working, from the obvious stuff like checking the power connection, to performing a power cycle, starting in Recovery mode, and checking the file system. And if your Mac really is dead, we’ll also tell you where to turn next.
The fixes in this article apply to most recent versions of macOS. The menus and interfaces may look slightly different depending on which OS you are running, but their functions are in essence the same. Similarly, if you have an M1 Mac there are some changes to the way you perform certain functions – like starting up the computer in Safe mode or Recovery, we’ll detail these below.

1. Check your Mac turns on
First, let’s find out if the problem is that your Mac won’t start up, or that it won’t turn on – those might sound like the same thing, but there’s actually a big difference.
Press the Power button on your Mac. If you don’t hear a startup chime, you don’t hear any fan or drive noise, and there are no images, video, or visuals of any sort on your display, then your Mac isn’t turning on at all. You’re not even getting to the point where it refuses to start up.
A Mac that doesn’t turn on calls for a different approach to one that doesn’t start up. If your computer doesn’t turn on then you need to do the following:
i) Check your power connection
Don’t be the cliché: check that the power is on and the Mac is plugged in correctly. Or if it’s a laptop, be sure that the battery isn’t dead – and if it needs charging give it a while to attempt to charge before concluding that it isn’t going to work. If your MacBook won’t charge read this.
ii) Try a different power cable or adapter
It may be that the fault resides with the power cable. If you’ve got a friend with a Mac power cable that fits your machine, try it to see if that solves the problem. If it does, it could be a simple fix that involves finding a secondhand power cable on eBay (although we advise against buying third-party power cables that aren’t made by Apple, as they are much more likely to be faulty and possibly dangerous).
If you recently had a power cut, that could be responsible: your power adaptor could have been damaged in a power surge and you may need a new one.
Finally, it’s possible that the cable is loose, and pulling it out and plugging it in again will solve the problem. But we doubt it will be that easy.
Apple sells various cables for charging Apple Macs and laptops. You should find the one you need here: Apple power adaptors. Also read: Which MacBook charger do I need?
iii) Disconnect all accessories
Unplug all the accessories (such as printers and USB hubs) attached to your Mac. It could be that one of your peripherals is causing problems with the startup sequence.
If you recently installed new RAM or a new hard drive, make sure they are correctly installed and compatible. (If possible, reinstall the old memory or hard drive and see if that helps.)
If none of those steps work then it’s time to move onto the next stage.
2. Perform a Power Cycle
If you aren’t hearing any signs of life, you could perform a power cycle, which involves forcing your Mac to restart after killing the power to it.
- On a MacBook you need to hold down the power key for ten seconds. You’ll usually hear a squeak as the Mac’s power is forcibly cut. Hopefully after waiting ten seconds and restarting, all will be well.
- If your Mac is a desktop you will need to unplug it and leave it unplugged for at least ten seconds before plugging it back in and attempting to restart.
- For M1 Macs if you press and hold the Power button you would eventually see Loading startup options – assuming the Mac was working properly. If pressing and holding the power button does allow you to access the startup options then you can run through those options below to get your Mac up and running. We discuss this below. We also discuss how to revive your M1 Mac using a second Mac and the Configurator app below.
If performing a power cycle on your Mac doesn’t help, or if pressing the Power button on the M1 Mac doesn’t open the start up options, there are a few other simple things to try out before moving on to the more complicated steps.
3. Check your display
If you’re using a desktop Mac such as a Mac Pro or Mac mini this could apply to you. If you don’t have a separate display plugged in you can skip this step.
You could have a problem with the display you have plugged in, rather than the Mac itself. Have a listen to your Mac to see if it’s making any sounds during boot-up.
It is possible that your Mac does turn on, but doesn’t boot up because it can’t access the display – if that’s the case you are most likely having trouble with the display hardware (rather than a broader startup issue).
If you think it’s a problem with your monitor, then take a look at this Apple Support document for advice on troubleshooting a display. If your display isn’t working the advice is to:
- Check the power supply to the Mac (and the power to the display if using a separate unit).
- Confirm that all cables are connected securely.
- Remove all display extenders and switches, and any other devices between the Mac and monitor.
- Unplug the video cable (if using a separate monitor) and plug it back in.
- If using more than one monitor in a ‘daisy chain’, unplug all monitors and test using just one.
- If possible, try to use a different display, or a different adapter (use DVI instead of VGA, for example).
- Apple also advises adjusting the screen resolution in System Preferences.
4. Boot up your Mac in Safe Boot
Safe Boot limits what checks and functionality your Mac focuses on during startup, and performs certain diagnostics. It’s rare, but sometimes you can get your unhappy Mac to start up successfully with a Safe Boot, and then restart it normally, and everything returns to hunky-doriness. If you want more help with this step read: How to start a Mac in Safe Mode.
- To enter Safe Mode on an Intel-powered Mac: Start your Mac up while holding down the Shift key. Safe Boot can take a while to start (if it does work at all).
- To enter Safe Mode on an M1-powered Mac: Press and continue to hold the power button until you see the startup options appear on the screen. Choose the startup disk. Now press and hold Shift and then click Continue in Safe Mode. Then release the Shift key. You will see the words Safe Mode in menu at the top right of your screen.
- To get more feedback about what’s happening, you could start up an Intel-powered Mac while holding down Shift, Command and V: that enters both Safe Boot and something called Verbose Mode, which spits out some messages about what Safe Boot is actually trying to do as it goes.
Now you are in safe mode we will discuss how to use Safe Mode to fix your Mac start up issues.
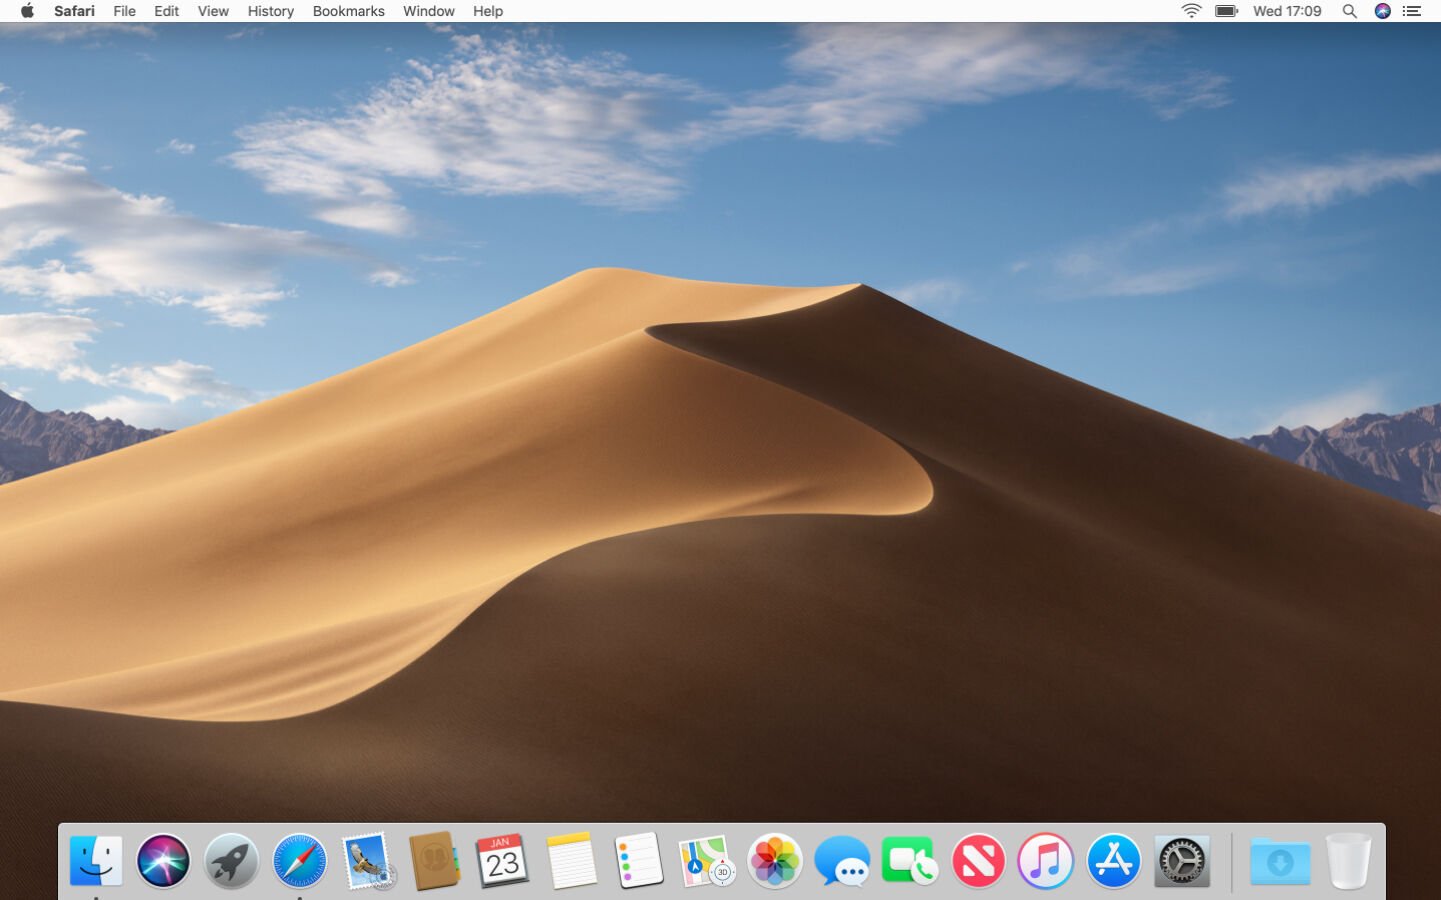
While you are Safe Mode the interface will look very slightly different, with blocks of colour rather than transparency. The biggest giveaway is the Dock at the bottom of the screen, such as in the image below, for example.
Once in Safe Mode you may be able to run certain checks (we’ll run through these below) and make changes that could fix your Mac. For example you could reinstall macOS or update other software.
If you find you can start up in Safe Mode it is probable that the issue is related to one of your startup items, in which case you should go to: System Preferences > Users & Groups and remove all the items (click on -). You could use trial and error to work out which startup item is causing the problem.
5. Reset the PRAM / NVRAM
In the PowerPC days, we talked about resetting the PRAM. On Intel Macs, the term is resetting the NVRAM. The NVRAM in M1 Macs is reset automatically, but there is a way to reset NVRAM on the M1 Mac – we discuss that here: How to reset NVRAM on an M1 or Intel Mac.
The name refers to special memory sections on your Mac that store data that persists even when the Mac is shut off, such as volume settings and screen resolution.
Resetting that data isn’t harmful, but quite frankly it’s also rarely genuinely useful. But it can’t hurt.
You might need to grow an extra finger or two for this one, or have a friend help you out. Here’s how to reset the PRAM/NVRAM on your Intel-powered Mac:
- Hold down all of these keys: Command, Option (Alt), P and R, and turn on the Mac (it’s the same keys to reset the PRAM).
- Keep holding the keys down until you hear the Mac restart again.
- Listen for a second reboot, and then release the keys.
On M1 Mac resetting the NVRAM means using Terminal, the method is discussed in the article linked above.
In some cases, after performing this step, your Mac will restart normally. In other cases, you might instead see a progress bar on startup. If the progress bar fills up and then the Mac starts up, you’re probably good to go. In some cases we’ve seen, however, the Mac shuts down at around the halfway point in the progress bar.
6. Reset the SMC
In some situations, you may need to reset your Mac’s SMC (System Management Controller). This is largely a last-ditch attempt to fix the current version of macOS before attempting to recover the data and moving on to reinstalling the OS.
SMC is absent from the M1 Mac so you can’t reset it. However you can change the settings that the SMC used to look after. We discuss how to do this here: How to reset a Mac’s SMC.
Here’s what to do if you want to reset the SMC (Intel Macs):
On a Mac laptop:
- Shut down the MacBook.
- Unplug and then reconnect the power cable.
- Press Shift + Ctrl + Option/Alt keys and the power button at the same time.
- Now release all those keys and the power button at the same time.
- You may see the light on the power cable flicker.
- Restart your MacBook.
On a Mac desktop:
- Shut down the Mac.
- Unplug it.
- Press the power button for 5 seconds.
- Plug the Mac back in.
- Turn on your Mac.

7. Run Disk Utility in Recovery Mode
If your Mac is booting but the operating system isn’t loading up, you may have a corrupted drive. Luckily it is possible to fix this in Recovery Mode. We have a detailed tutorial on using Recovery Mode here, but we’ll run thorough the basics below.
Yet again, accessing Recovery Mode is a little different on an M1 Mac (read about All the new ways of doing things on M1 Macs).
The first step is to run Disk Utility. On a Mac running Mountain Lion or later, which will be the vast majority of Macs, you can run Disk Utility by booting into Recovery Mode.
- On an Intel Mac you need to make sure the Mac is turned off. If it’s not responsive because it’s stuck on a grey, blue or white screen, just hold down the Mac’s power button for several seconds until it gives up and shuts off. (Here’s what to do to fix a Blue Screen of Death on a Mac.) Hold down the Command and R keys, and power the Mac back up again. Keep pressing Cmd + R while your Mac is booting up until you see the Apple logo.
- On an M1 Mac press and hold the Power button until the Mac starts up and eventually shows the start up options. Select Options > Continue to enter Recovery.
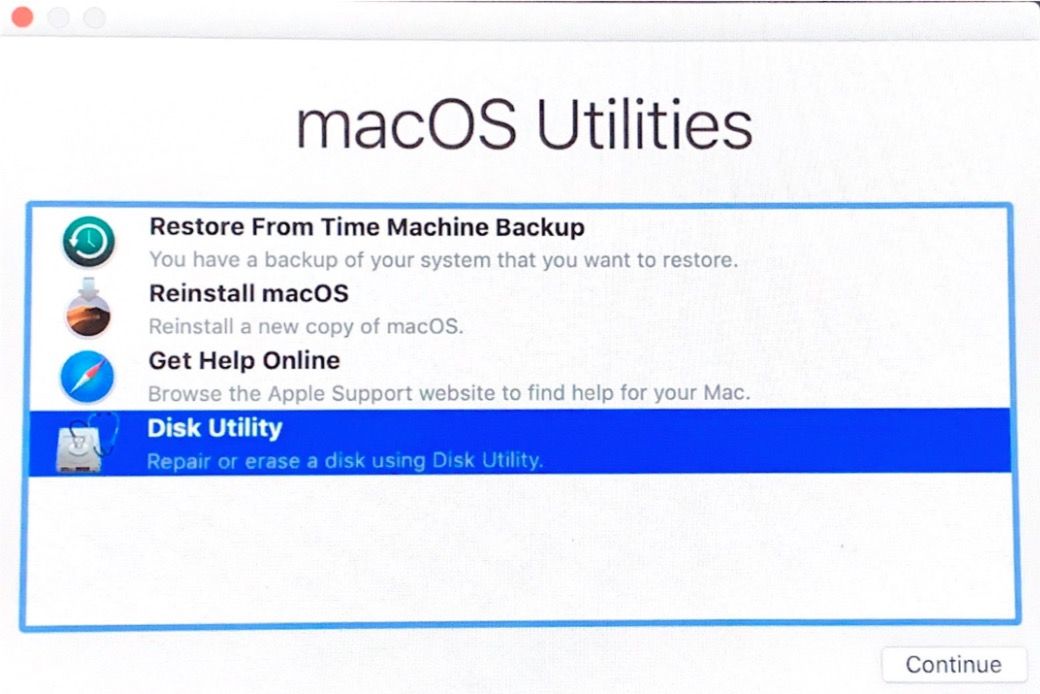
Now you are in Recovery mode here’s what to do:
- Once your Mac starts in Recovery Mode you will gain access to Utilities. Click on the Disk Utility option.
- Locate your Mac’s drive – probably Macintosh HD, select it.
- Click First Aid.
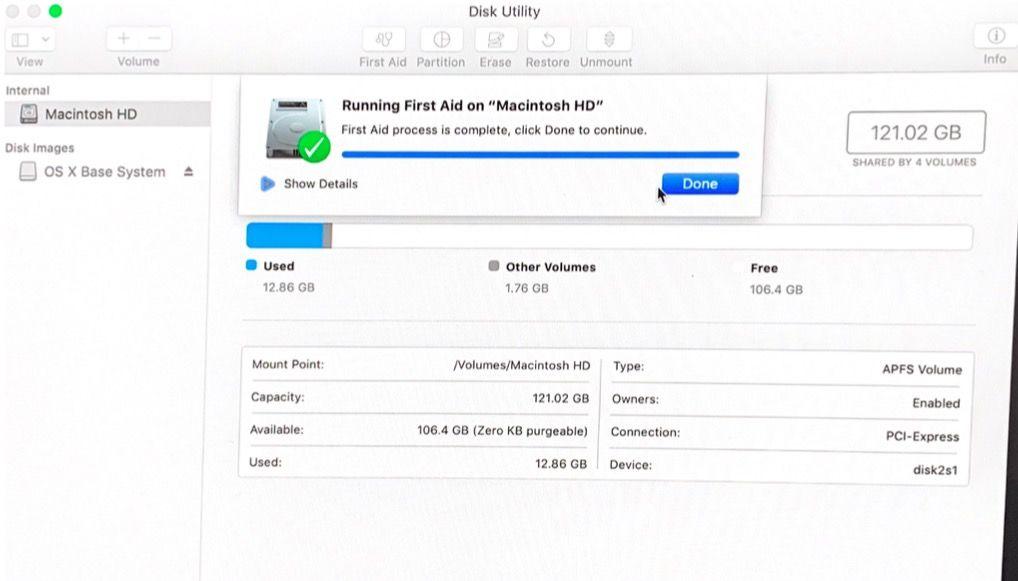
- If there are errors with your disk, Disk Utility should find them and will either repair them automatically, or will ask if you would like to repair them. Click Repair Disk if this is the case.
In Recovery Mode you can also do the following:
- Restore from a Time Machine backup.
- Get help online.
- Install or reinstall macOS (we discuss this below).
8. Revive a M1 Mac
If you have an M1 Mac and you still haven’t been able to revive it, the next option to try is to use a second Mac running Apple’s Configurator 2 to update the firmware.
You will need a second Mac, a USB to USB cable, a web connection and Apple’s Configurator 2 software.
- Connect the two Macs with a USB-C to USB-C or USB-C to USB-A cable.
- Open Configurator 2 software on the working Mac.
- Now on the non-working Mac press and hold the power button while also pressing the following key combination: Right shift, Left Option/Alt, Left Control. You will need someone to help you unless you have gigantic hands because you also need to be pressing the Power Button at the same time.
- After about 10 seconds let go of the keys, but keep pressing the Power button. Hopefully the M1 Mac will appear in the Configurator app on your second Mac by this point (the M1 Mac still won’t show any screen activity though).
The process is a little different for the M1 Mac mini.
- In this case you need to unplug it and wait for about 10 seconds.
- Press and hold the power button.
- Plug it in again, while still holding the power button.
- Release the power button.
How to use the Configurator software to revive an M1 Mac.
- The M1 Mac should be showing in the Configurator software on the other Mac. Select the M1 Mac you want to revive.
- Click on Actions > Advanced.
- Select Revive Device.
- This will revive the firmware on the M1 Mac.
9. Check the file system
This step is actually kind of fun – at least when it’s not your Mac that’s under the weather. It’s fun because it feels so geeky.
Before you get too excited though, this isn’t an option for M1 Macs.
- Shut the Mac off, and start it up again while holding Cmd + S to launch in Single User Mode. You can release the keys when the intimidating black screen with messages in white text appears.
- Wait until the command-line prompt appears, when all the text is done scrolling past. Then type fsck -fy and hit Return. And wait. Possibly for several long minutes.
- Eventually, after five different checks that take varying amounts of time, you should get to one of two messages: “The volume [your Mac’s name] appears to be OK” or “FILE SYSTEM WAS MODIFIED.”
- If you encounter the first message, type reboot and press Return.
- If you see the latter message, you need to run fsck -fy all over again. You can retype the command and hit Return, or press the Up arrow once and then press Return.
If this doesn’t work, and your Mac still doesn’t start up, then move on to the next step.
10. Use Target disk mode to copy files
This step should be taken prior to reinstalling macOS and it depends on your backup situation. You do make regular backups, or at least sync important documents, music and photos to the cloud, right?
If you’re not sweating at the moment, and are confident in your Time Machine or other backup solution, then skip to Step 11 below. But if you wish you’d backed up your Mac then now is the time to see what you can salvage from the machine.
For this, you’ll need a second Mac. If you haven’t got one then ask a friend. Follow these steps to use Target Disk Mode:
- Connect both Macs together using an Apple Thunderbolt cable (£39 from Apple). If you have an older Mac this same process works with FireWire cables.
- Switch off your Mac.
- Start up your Mac while holding down the T button on the keyboard.
- Keep holding the T button down as you hear the startup chime and keep it pressed until the Thunderbolt icon appears on your screen.
This places your Mac in Target disk mode. In Target Disk mode your Mac acts like an external drive. You should now hopefully see the hard drive for your faulty Mac on your second Mac’s Finder.
You should be able to grab the files you need from your unresponsive Mac, or even clone the entire hard drive to another external drive.
11. Reinstall macOS
This is pretty drastic, but if you have tried everything else, then reinstalling the operating system could remove the issue that is stopping the Mac from starting properly.
Remember macOS Recovery from the step above? You can use it to reinstall macOS too.
- Boot into Recovery mode as above (hold the Command and R keys while you start up, or press and hold the power button if you are on an M1 Mac).
- Once in Recovery click to install the latest OS and follow the onscreen prompts.
Our article on resetting a Mac to factory settings has more information on wiping a Mac and reinstalling macOS.
12. Make a Genius Bar appointment
If you’ve made it this far and your Mac still doesn’t work, you’ll need to take it to an Apple Genius Bar to see if they can help you fix it (or arrange for a repair under warranty). Hopefully you have got enough data from your Mac so as to be able to back up, or continue working on a new Mac.