
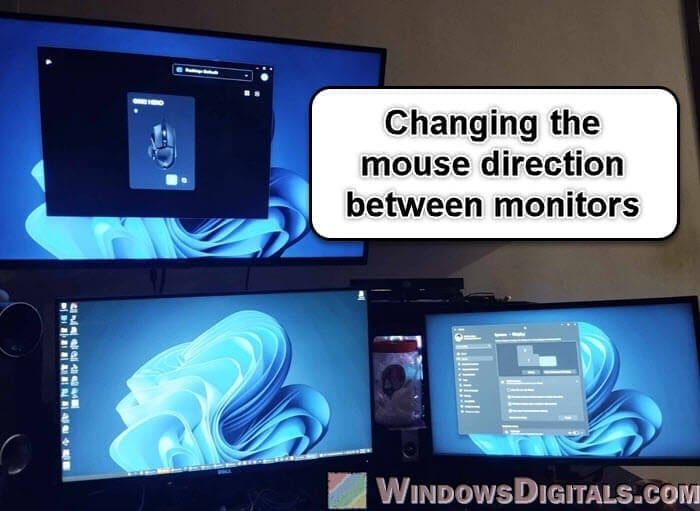
As more professionals and gamers opt for dual or triple monitor setups, understanding how to manage mouse movement or direction between these displays is important for smooth transitions between the screens. If you’re using Windows 11 or Windows 10, they provide a range of options to help you tailor your display arrangement to match your actual desk setup. In this article, we will show you how you can rearrange and position your monitors for optimal use and what to do if you encounter issues during the process.
Also see: How to Change Monitor Position in Windows 11
Rearranging monitors to change mouse direction via Windows 11 display settings
The first and most straightforward method to change mouse movement between monitors is by rearranging and positioning the monitors through Windows 11 display settings. This approach allows you to align the digital representation of your monitors with their physical arrangement on your desk. Here’s how you can do it:
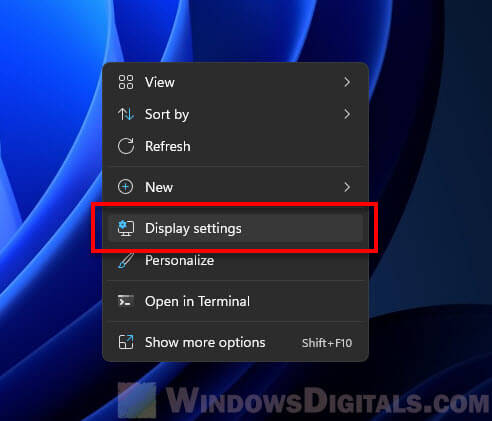
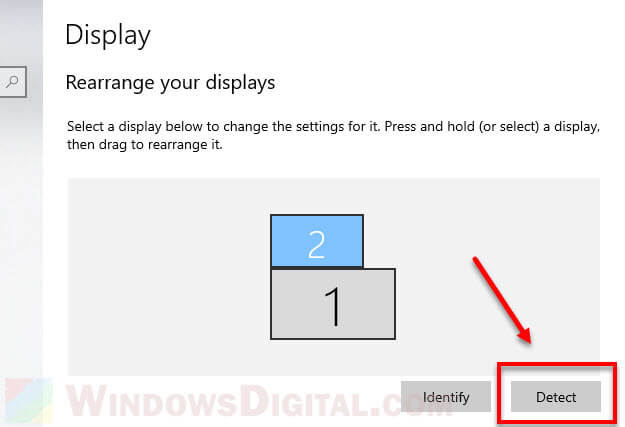
- Right-click on your desktop and select “Display settings” from the context menu. This action opens the Display section of the Windows Settings app, where you can see a visual representation of your monitors.
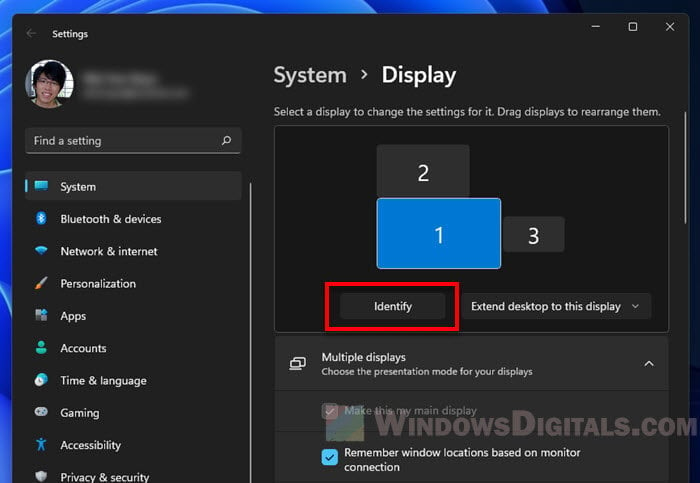
- Click the “Identify” button to display a number on each screen. These numbers help you recognize which digital monitor corresponds to which physical screen.
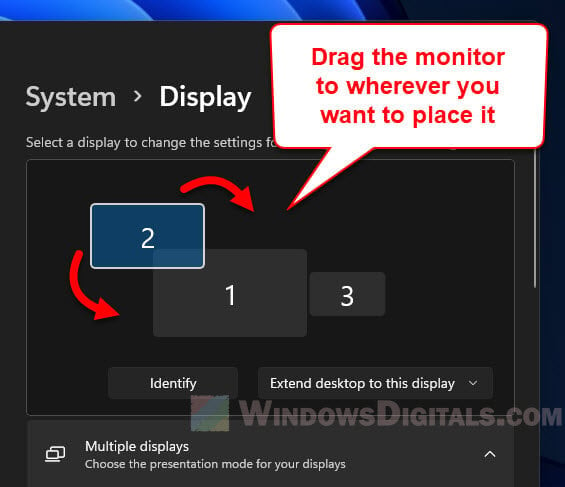
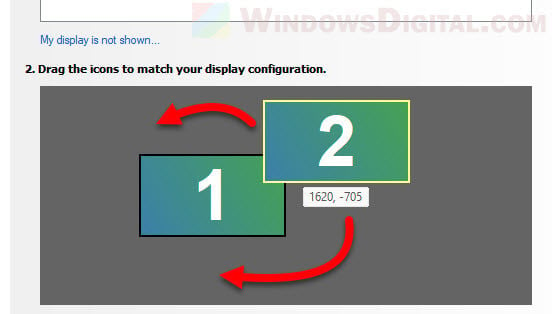
- Click and drag the monitor icons to rearrange them according to their actual physical setup. For instance, if you have Monitor 2 to the right of Monitor 1 in real life, ensure Monitor 2 is positioned to the right of Monitor 1 in the settings.
- Pay close attention to the alignment of the monitors’ edges. Precise edge alignment ensures a smoother transition of the cursor from one screen to another. If one monitor is significantly higher than another, you’ll want to mimic this in the Settings to prevent the mouse from jumping awkwardly between screens.
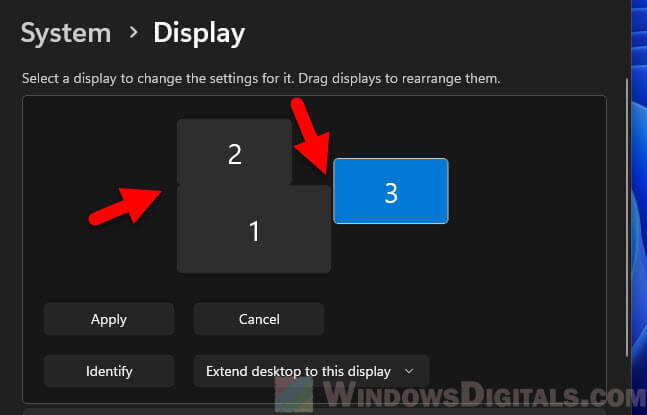
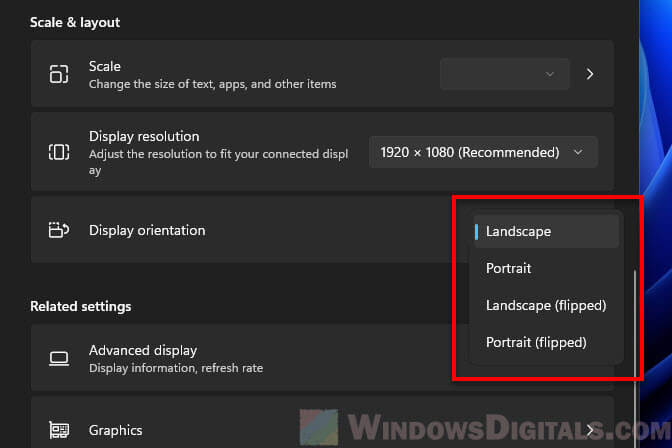
- If your monitors are of different sizes or if you use them in varied orientations (e.g., one in landscape and another in portrait mode), you can also adjust these settings to match their real-world configuration. Click on a monitor icon and then use the orientation drop-down menu and the layout to fine-tune its position relative to the other monitors.
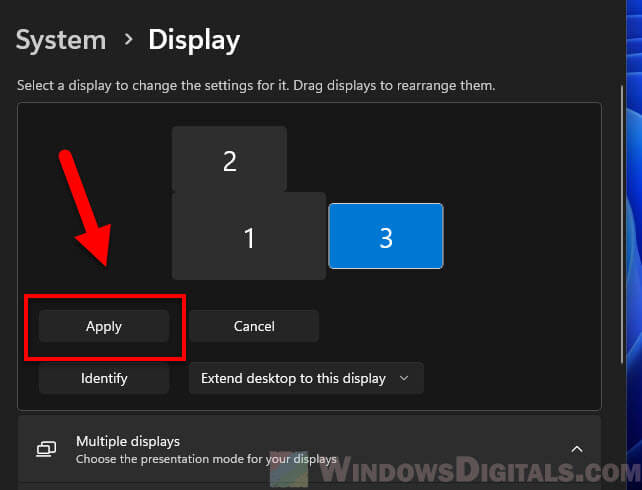
- Once you’re satisfied with the arrangement, click “Apply” to save your settings. You might need to confirm your choice if Windows asks you to keep or revert the changes, especially if you’ve made significant adjustments to the display configuration.
When you correctly match the layout of your virtual displays to how your monitors are set up on your desk, it means the mouse cursor moves smoothly between screens, just like in real life. This matching is essential for keeping your workflow smooth and easy, as it makes it simpler to use your displays without needing to constantly adapt to a mismatched setup.
Suggested read: Is it bad to have monitors with different refresh rates?
Using NVIDIA Control Panel for advanced configuration
For users with NVIDIA graphics cards who find that the standard Windows 11 settings do not offer the control needed for precise monitor arrangement, the NVIDIA Control Panel presents an alternative solution. This utility provides additional flexibility, especially for complex setups or when dealing with issues not resolved by Windows settings. Here’s how to adjust your monitor configuration using the NVIDIA Control Panel:
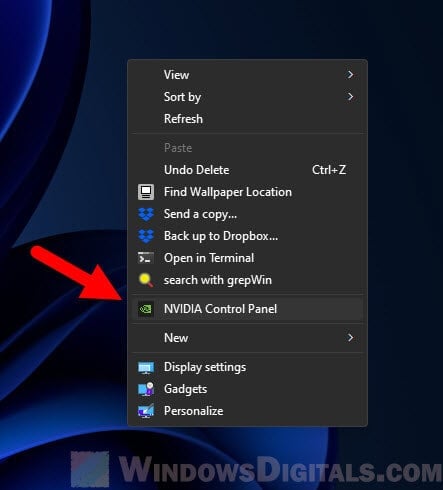
- Right-click on your desktop and select “NVIDIA Control Panel” from the context menu. If it’s not available, ensure your NVIDIA drivers are up to date and the software is installed on your system.
- Within the NVIDIA Control Panel, look for the “Display” section, then click on “Set up multiple displays“. This section shows all connected monitors that your NVIDIA graphics card detects.
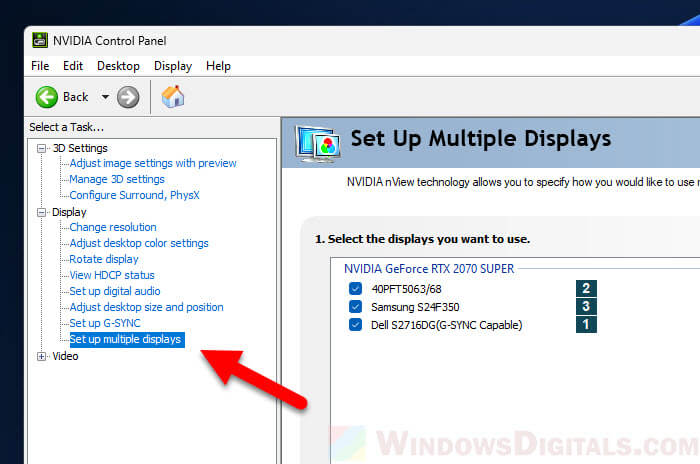
- Similar to the Windows Display settings, you can click and drag your monitor icons within the NVIDIA Control Panel to rearrange them according to their physical placement. This step is particularly useful if Windows settings did not accurately reflect your setup or if you need more detailed control over positioning.
- The NVIDIA Control Panel often allows for more nuanced adjustments such as exact positioning, specific resolutions, and refresh rates for each monitor. These settings can be crucial for gaming setups or professional workflows that require detailed configuration.
- After rearranging and adjusting your monitors, click “Apply” to save your configuration. The NVIDIA Control Panel may ask you to confirm your changes, ensuring that everything is set up as intended before finalizing.
Using the NVIDIA Control Panel to adjust your monitor setup can be particularly beneficial for users who require precise control over their display configurations. It’s an excellent alternative when Windows settings fall short, providing extra choices to guarantee smooth mouse movement across several monitors.
Pro tip: Using MacBook or iPad as Second Monitor for Windows PC
Manually adjusting the monitor placement as a last resort
When software solutions like Windows Display settings or the NVIDIA Control Panel don’t resolve issues with mouse movement between monitors, you may need to physically shift your monitors to improve the cursor transition, although this isn’t always practical.
Physically moving monitors is less convenient and may not be feasible for everyone, especially those with fixed or wall-mounted setups. Moreover, desk space and monitor size can limit how you position your monitors, making it challenging to achieve the desired arrangement.
Useful guide: Using Onboard Graphics And Graphics Card Simultaneously
Some tips for manual adjustment of your monitors:
- Determine how your mouse movement does not align with your expectations. Is the cursor appearing on the opposite side of where you anticipate? Does movement between monitors require an unnatural direction change?
- Shift your monitors physically to better align with how your operating system perceives their arrangement. For instance, if your cursor moves to monitor 2 on the left side instead of the right, you might need to place monitor 2 physically to the left of monitor 1, even if this was not your initial preference.
- After repositioning your monitors, test the mouse movement to see if it aligns more closely with your expectations. It might take a few attempts to find a setup that works well both practically and ergonomically.
Ensure that your final monitor setup does not compromise on comfort or ergonomics. The top of your monitors should be at or slightly below eye level, and you should be able to see all screens without excessive head turning or straining.
Related resource: 16:10 vs 16:9 Aspect Ratio for Gaming: Which is Better?
Some common mouse direction issues between multiple monitors
Occasionally, you may run into issues such as the mouse not moving correctly between monitors or the monitors not being detected.
Detecting monitors
If a monitor isn’t being detected, check your cables and ports to ensure they are securely connected. You can also click the “Detect” button in the Display settings to prompt Windows to look for any connected displays.
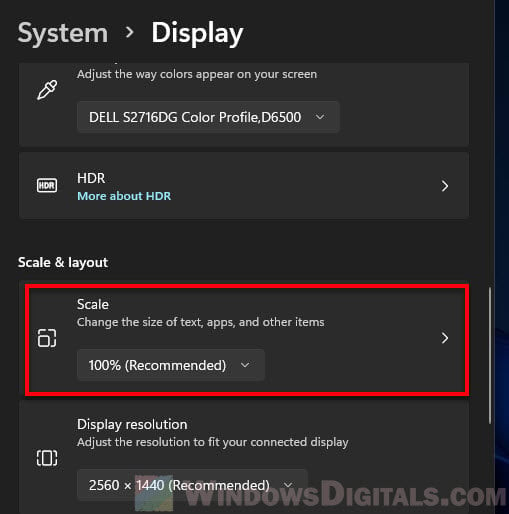
Adjusting scaling and resolution
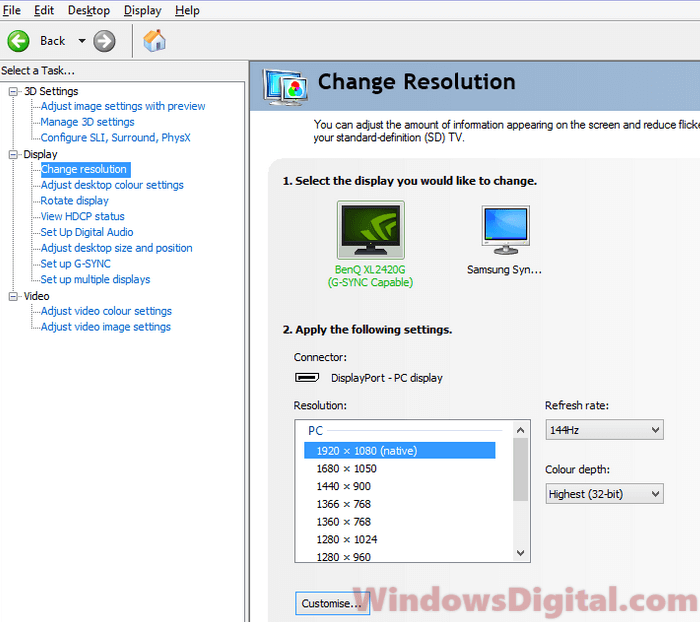
Inconsistent scaling and resolution between monitors can cause awkward mouse transitions. Adjust the scaling settings for each monitor in the Display settings by clicking on each monitor icon and customizing the scale and resolution to match as closely as possible.
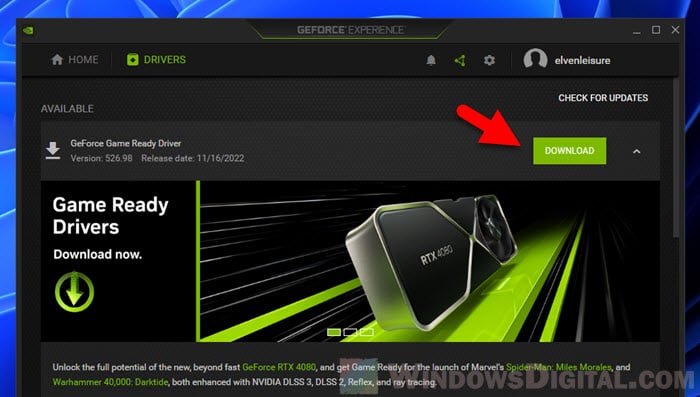
Updating drivers
If the mouse isn’t moving smoothly between monitors, ensure that the monitors are correctly aligned both virtually in the Display settings and physically on your desk. Check for any software updates for your graphics card or Windows itself that might resolve the problem. Outdated or corrupt drivers can cause issues with multi-monitor setups.
Check your monitors’ orientation
If you’re using monitors in mixed orientations (some vertical, some horizontal), ensure this is accurately reflected in your display settings.
Summing up
Most of the time, issues with mouse movement between monitors in Windows 11 come from the monitors not being arranged correctly in the computer’s settings. This is a common problem, especially when you first set up a second or third monitor or if you rearrange your physical workspace. The easiest and most effective way to fix this is by going into the Display settings of your Windows 11 system. Here, you can drag and rearrange the monitor icons to match the actual setup on your desk. This simple step usually solves the problem for most people, making it the go-to solution.
If adjusting the settings in Windows doesn’t do the trick, the next step many users take is to use the NVIDIA Control Panel or a similar tool provided by their graphics card. This can offer more detailed adjustments that Windows settings might not cover. Only in rare cases, where software adjustments don’t help, do users resort to physically moving their monitors. The objective is to have a setup that feels natural to use, so a bit of trial and error with these settings can go a long way in improving your computing experience.