
![]()
Želite li pokrenuti operativni sustav u virtualnom stroju koristeći VMware Workstation Player? Ovdje ću vam pokazati kako ga instalirati i koristiti u Ubuntu 24.04 i Ubuntu 22.04 LTS.
Osobno koristim OracleVirtualboxza isprobavanje različitih operativnih sustava kao virtualnih strojeva (VM). Neki ipak preferiraju VMware radnu stanicu, koja je dostupna besplatno za nekomercijalnu upotrebu.
1. Preuzmite i instalirajte VMware Workstation Player
VMware Workstation Player pruža podršku za Linux putem univerzalnog.bundlepaket koji je dostupan za preuzimanje na donjoj poveznici:
Preuzmite Workstation Player za Linux
U slučaju da gornja poveznica ne radi ispravno, možete i vi otićiova stranicaumjesto veze za preuzimanje.
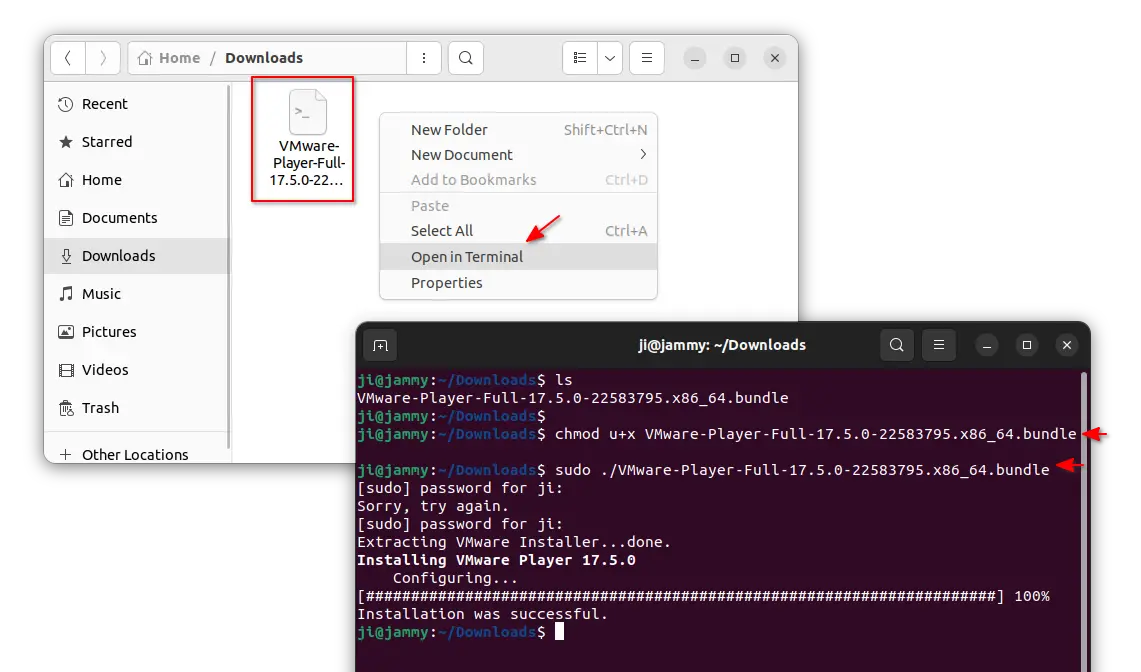
Nakon preuzimanja paketa otvorite mapu Preuzimanja. Zatim desnom tipkom miša kliknite prazno područje i kliknite opciju izbornika "Otvori u terminalu" da biste otvorili prozor terminala s tom mapom kao radnim direktorijem.
U skočnom prozoru terminala pokrenite naredbe ispod jednu po jednu (zamijeniVMware-Player-*.bundlena naziv vašeg paketa):
- Dodajte izvršnu dozvolu preuzetom paketu:
chmod u+x ./VMware-Player-*.bundle
- Zatim ga pokrenite uz sudo dopuštenje:
sudo ./VMware-Player-*.bundle
This command will ask you to type user password (no visual feedback) for authentication. Then automatically extract the package, install and configure VMware Player in your system.
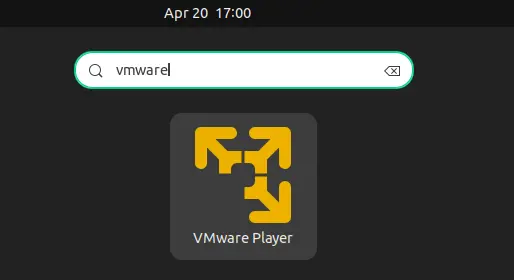
Once successfully installed the package, you can start the software from either start menu or GNOME ‘Show Apps’ (or overview) depends on your desktop environment.
2. Install an OS in VM using VMware Player
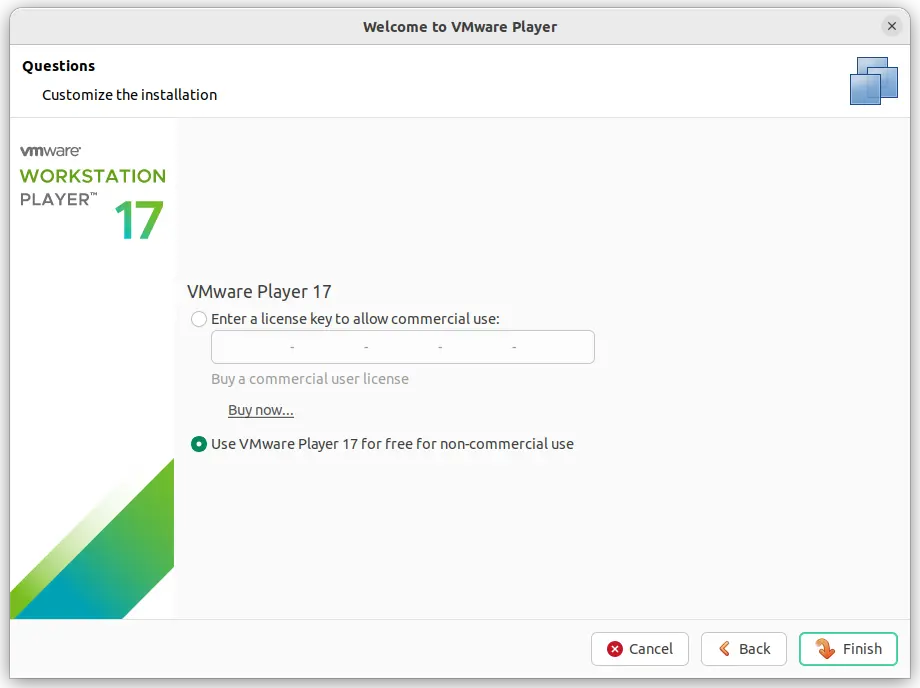
On first launch of the virtual machine software, you need to read and accept the license. Then, either enter a license key or select “Use VMware Player for free for non-commercial use”.
Then, it starts into a VirtualBox look like VM manager window. There you can either click “Open a Virtual Machine“, if you already have VMs exported as .vmx, .ovf, or .ova files. Or, click “Create a New Virtual Machine” to create new.

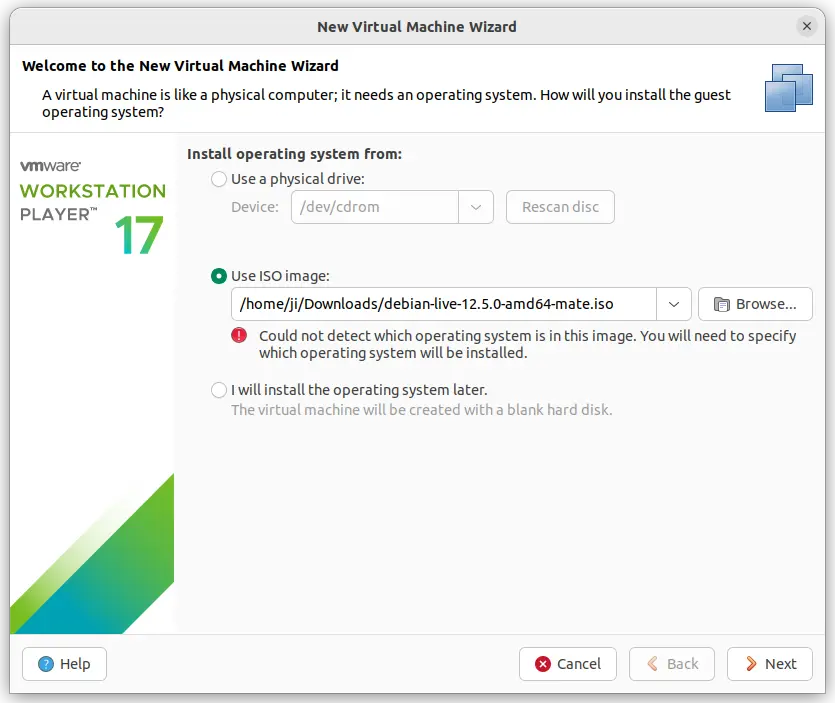
In the “New Virtual Machine Wizard”, you can choose to install a system from either CD-ROM (if your real-machine have one) or an .iso image. Of course, you can also choose to create a blank disk for later use.
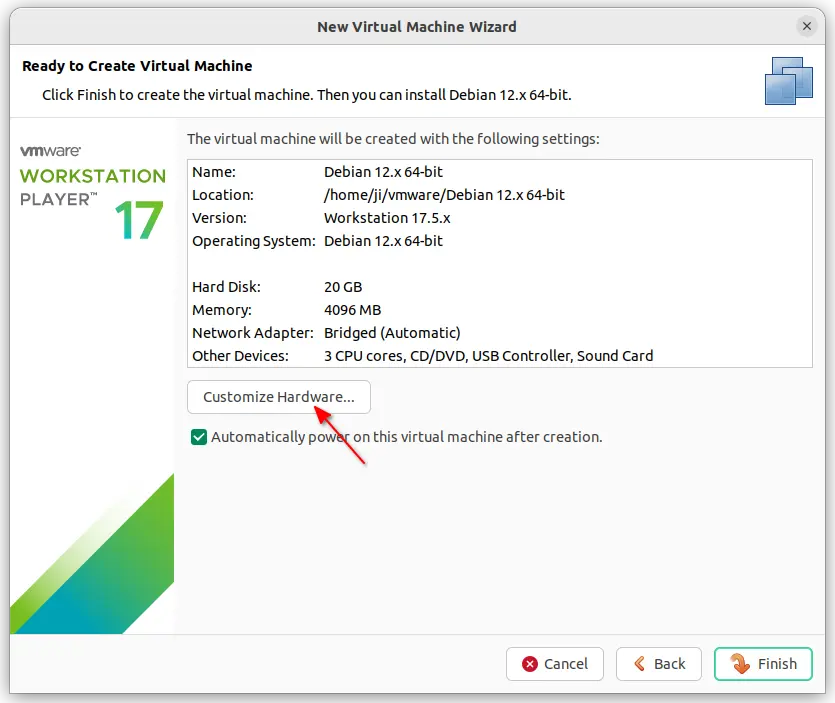
Then, just follow the wizard to select which operating system it is, set a VM name and where to store the VM files, allocate some disk space. Before your clicking “Finish” button, you can click the “Custom Hardware” button for more options, including:
- memory size for the VM.
- how many CPU cores to use.
- adjust hard disk size.
- configure network adapter, sound card, USB controller, etc.
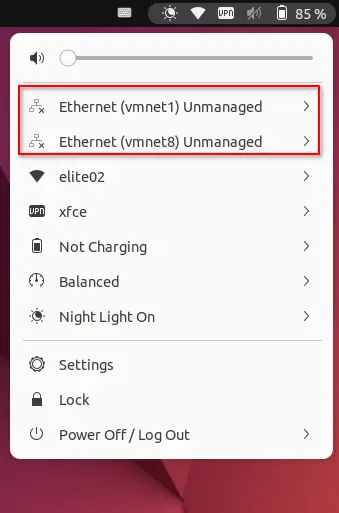
Tips: Here it’s better to choose “Bridged” option as network controller, or you’ll get a few “Ethernet (vmnet1) Unmanaged” options in top-right system status menu, which is quite annoying (See the screenshot below).
If you already have those options in system status menu, then run command vmware-netcfg to launch the config dialog, and remove the virtual networks. Finally, re-configure them to “bridged” in their own VM settings dialog.
Once done the “New Virtual Machine Wizard”, it automatically starts VM, just like you boot the real machine from USB or CD-Rom. Then, you can start the installer in the virtual OS and follow the wizard to install the system in the virtual machine.
When everything’s done, the VM will be listed in the main manager window of VMware Player, next time you launch it. And, you can go “Virtual Machine” menu to configure the VM preferences and install VMware tools for additional features.

Uninstall VMware Workstation Player
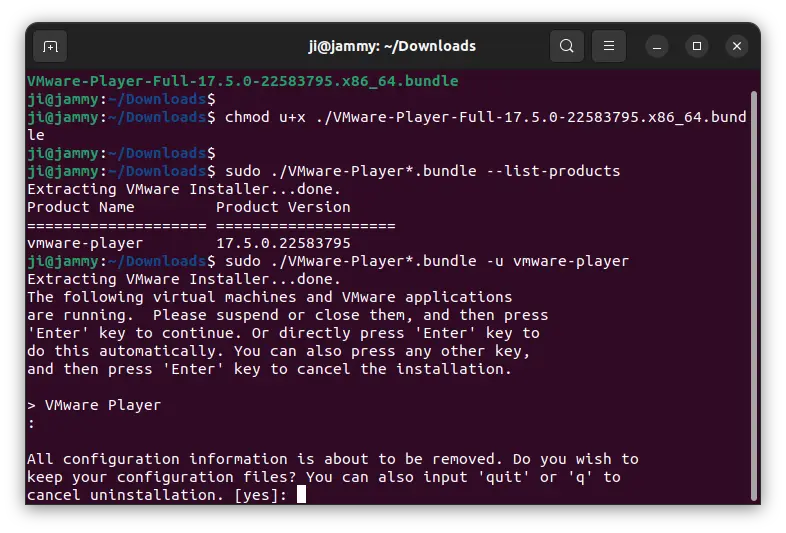
To uninstall the software, you still need the .bundle package you downloaded in the first step.
Also, right-click in blank area in the folder that stores the .bundle file, and click “Open in Terminal”. In the pop-up terminal window, run commands one by one:
- Add executable permission, in case you’ve deleted it and re-download again:
chmod u+x ./VMware-Player*.bundle
- List installed product. In the case, it should be
vmware-player:sudo ./VMware-Player*.bundle --list-products
- Uninstall vmware player (you need to quit the software if running):
sudo ./VMware-Player*.bundle -u vmware-player
Nakon deinstaliranja softvera, još uvijek ima nešto ostataka. Koliko ja znam, oni uključuju:
- datoteke svih instaliranih VM-ova (prema zadanim postavkama u mapi vmware vaše početne mape). Mogu se koristiti za vraćanje VM-ova (ili čak za korištenje u drugom softveru VM-a) sljedeći put kada instalirate VMware Player, no obrišite ih ako želite.
/etc/vmwaredirektorij za konfiguracijske datoteke, koristitesudo rm -R /etc/vmwareizbrisati.- VMware upravljački program zaslona (
xserver-xorg-video-vmware) paket instaliran kao ovisnost.